Wednesday, October 29, 2014

What I'm wearing on my nails TODAY

It's not often I share with you my manicures in live time, but I am so in love with this new color I got from Literary Lacquers, I couldn't resist showing you right away.

 photo 336099FF-C243-4BAB-BF85-376E9EC0AA9B_zpswm6irx6u.jpg

This is Literary Lacquers Je Reviens from Literary Lacquer's Rebecca collection, inspired by the novel by Daphe de Maurier. The polish is a darkened teal holographic polish, with a linear holo finish with larger holographic pieces scattered throughout!

 photo 036BDA98-45E8-4B70-AFD9-29828B4CB52E_zpsq76hw8qb.jpg

Here is what maker Amy wrote about this beautiful shade:

The buoy was just opposite, about thirty feet away. There was something written on it. I craned my neck sideways to read the lettering. “Je Reviens.” What a funny name. Not like a boat… “Je Reviens” – “I come back.” Yes, I suppose it was quite a good name for a boat. Only it had not been right for that particular boat which would never come back again.

Rebecca was assumed to have drowned in her little sailboat, Je Reviens, despite being known as an excellent sailor. Je Reviens means I come back or I return, is it ironic that the boat is named such? Has the boat disappeared beneath the water for good or does the name herald future events?

Rebecca by Daphne du Maurier is a suspenseful novel told in the form of a flashback. I struggled with these descriptions because I don’t want to give too much of the story away. This collection is dedicated to Rebecca, the book simply throbs with her presence, but yet we never meet her alive.


 photo 33EAD318-085D-4037-882E-49EFF54FE4D3_zpsgkabau97.jpg

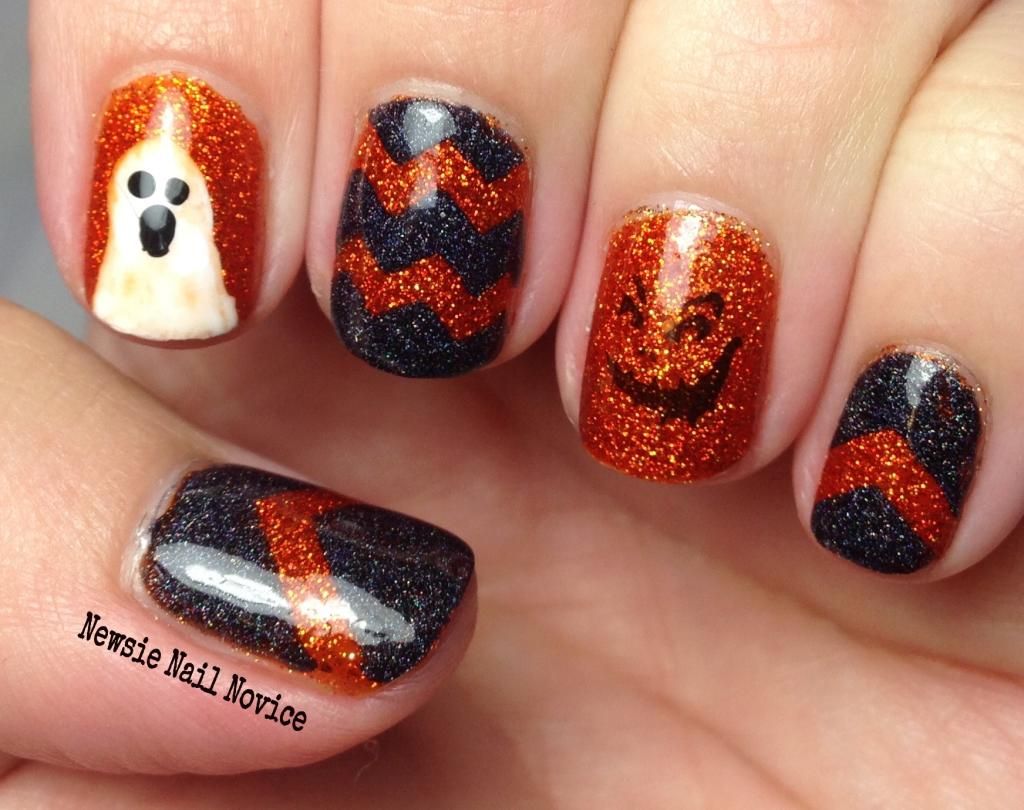
I think it's pretty appropriate that Je Revins means "I come back." Last night, I took off the above manicure (you'll notice the manicure above has wavy lines and the manicure I'm currently wearing has chevrons). After redoing my nails, I literally missed Je Reviens so much I put the manicure back on, this time with chevrons instead.

I know that is pretty silly sounding. Literally taking a manicure off, redoing my nails to something I didn't love as much, and then recreating the manicure I took off. I guess that is love though!

 photo C3C51039-0E32-4028-8834-6948C23D7F2E_zpsgghg61eh.jpg

The polish I paired Je Reviens with is Essie's The Perfect Cover Up, from their fall collection, which is a lovely muted teal that just pairs with Je Reviens perfectly!

Application: The application of Je Reviens was flawless, goes on completely smooth, but is a little sheer. I did three coats for this opacity, but you could probably get away with two coats just fine.

Where to purchase: You can purchase Je Reviens from the Literary Lacquer Etsy shop. I purchased this polish for $12.

Anyway, Amy's words above had me so intrigued I've decided I must read this book! So I'm off to go start that now!

I'll leave you with a photo of my cat Patty – I've named this shot "Patty the Polish Protector!"

 photo 9ACF326D-F5C1-4E24-AF7A-948570CF3769_zpssmrhl2c6.jpg

Friday, October 24, 2014

Black and white Halloween manicure

I drew a lot of inspiration for this manicure from a post I saw on Pintrest!

 photo F179AC2E-5669-4623-9454-0435EBA6790E_zpsfmciit88.jpg

Now I don't have the freehand skills that this lady does, so used Bundle Monster BM-H07 plate to stamp the web on my index finger. I freehanded that spider as best I could, but my employer said it looked like a scorpion to her. I think it's cute.

 photo 5A21D8C9-7860-4A8C-AB40-A11B016676BA_zpsv9i7zlyz.jpg

I didn't just want a black and white manicure though, so I added white and black dots on the thumb and pinkie to make it more Halloween-esque. The sparkle is courtesy of Painted Polish Drunk on Holo of course!

 photo 399715EC-73DF-4BFF-8C66-6652264B5640_zpsc4jiqdrx.jpg

I think this was a good manicure to round out my Halloween week here on Newsie Nail Novice. I really liked this look the best I think. I think the freehand gives it something special. Now my freehand skills are not the best, but I think practice makes perfect.

Have you guys tried freehand art before? Are you a pro? What tips do you have for me!?

Wednesday, October 22, 2014

Smitten Polish Halloween Duo nail art

So Smitten Polish, one of my most favorite indie brands just released a Halloween duo so I decided it would be a great pair to create a Halloween manicure.

 photo 3F0B5208-05C7-4124-8431-FD29A574A281_zpsbaut1h6l.jpg 
Smitten Polish Fire Burn is orange holographic microglitter suspended in an orange jelly base. I started this look with two coats of Fire Burn.

 photo F28D9E2B-8871-4D65-AE74-0B93A050BEA6_zpshr9monz3.jpg

Next I added Cauldron Bubble, an indigo leaning black microglitter with a scattered holo finish. Cauldron Bubble's microglitter is much finer than Fire Burn's, but they still look amazing together. I used single chevron (thumb and pinkie) and chevron nail vinyls.

 photo FD99ED44-61E9-4B35-BC9B-75E1C9928F95_zpsjprhitsl.jpg

To keep with the Halloween theme, I stamped a fun pumpkin face on my ring finger and free handed a fun ghost on my index finger.

 photo CA9D5A13-46BB-4ADB-9305-A22FBACAD1BB_zpsr0mkbrvp.jpg

Application: Fire Burn is a very hungry glitter and will require an additional layer of topcoat to smooth out. Cauldron Bubble did not have this issue. Both applied super smoothly and were a breeze to work with. The both had a matte finish, so for a glossy ultimate sparkly look, you'll want to top coat these. One note though, Fire Burn did stain my nails, but it wasn't super bad. Just probably want to double coat your base coat before wearing Fire Burn. The stain was gone after redoing my nails three times (I redid my nails an obscene amount of times the night I took these off, see previous post), so the stain would most likely be removed with some extra scrub.

Where to purchase: These both retail for $9 on the Smitten Polish website, but are sold out at the moment. I am pretty sure that Noelie, the genius behind Smitten Polish, is planning to restock this weekend. Follow Smitten Polish on Facebook for the most up to date information on her releases!

Tuesday, October 21, 2014

Feeling uninspired

You guys every have a day when you just don't know what in the world you want to do on your nails?!?

Last night I totally had one of those nights!

 photo AC00FDA7-6AFD-4819-BD90-98B387840074_zpsqwxdhuzt.jpg

I started by removing the look on the top left (more on that manicure tomorrow, it's my second Halloween post).

Then I moved on to what I thought would be a super cute harvest-like manicure, top right. That was just one big fail because the stamping ended up being almost invisble! So I took a few shots of that fail and moved on.

Then I thought, glow in the dark is fun, let's try this new polish I just got in the mail. It was super thick and difficult to apply. After applying it to all my nails, I quickly photographed it and then had to take it off.

And finally it was getting late, so I picked out Literary Lacquers Megatron, which is beautiful, but I would enjoy more with a design stamped on it or some sort of art added (it was just too late and I had spent FAR too much time on my nails at this point).

Basically, share with me your nail fail stories, so I don't feel like such an uninspired nail nut!!!


Monday, October 20, 2014

Halloween Nails featuring The Little LacquerBean Radioactive Slime

I thought I would share some Halloween nail art this week, being that it is the week before Halloween!

Recently, I purchased my very first glow in the dark nail polish, I thought Halloween was the perfect time to break down and purchase some!

 photo 0709B1B7-4A94-4D9D-B318-C99569BF7159_zps1x3skoff.jpg

Radioactive Slime is a jelly-like polish in consistency and is rather sheer but it's brightness and scattered holo make up for it. It is lime green, almost neon, with a gorgeous scattered holo with golden flashes. This is three coats.

 photo 25178FF7-812E-46B8-85BB-66B9E60F06BF_zps0il2ojmj.jpg

Since I had seen so many great stamping over glow in the dark polishes online, I thought I'd give it a shot. I took out my stamping plates and gathered the looks I could find that were Halloween related. For the thumb I used Bundle Monster BM-H07, for the index, middle and ring finger I used BM-H08 and for the pinky I used my Winstonia W116.

 photo 8C93E00B-1A5D-4C35-9110-6C5CD7683AA6_zpsjuosdlje.jpg

I was super exited to see how bright the polish glowed in the dark (after charging it under a light of course) and how well the stamps showed up in the dark!

Where to purchase: I was extremely impressed with this new-to-me indie polish, so I placed a second order! Her Halloween collection had me impressed so I had to get more (they were all glow in the dark). You can purchase Radioactive Slime on The Little LacquerBean website for $7.50. I believe the shop is closed at the moment because she is getting some new bottles in, but when it opens back up, I highly suggest checking out her polishes. I'll let you know what I think of my second order as soon as I get it!

Friday, October 17, 2014

Off topic post: My PKU journey

Hey guys, sorry I didn't do a regular nail post today. Thought it might be an appropriate time to share with you this journey I'm headed down health wise.

I wrote several portions of this post in a post last year, but that was before I met all you fun nail gals. Thought it was time to share some of this with you.

Well I was born with a metabolic called PKU. What is PKU? It is actually short for phenylketonuria (which to this day I still have to look up the spelling for) and in plain English it means I can't have a diet high in protein. I have had it since I was born and every newborn is tested for it when they get their heel prick (which tests for more than 240 metabolic disorders).

Basically the science behind it is that protein is made of 20 amino acids my body cannot break down the amino acid phenylalanine (PHE). What does that mean? If I eat a hamburger will I start seizing on the floor, no. The effects of PKU are a long-term pain in the butt.

Maintaining a strict diet was extremely important when I was growing up and my brain was developing. See, having high PHE levels in my blood levels affects my brain functioning. If I was not treated from birth, I'd be severely mentally retarded today. So thank you science, for figuring this out before I was born so I can function normally from day to day.

This graphic courtesy of PKU.com shows it in very simplistic terms.


Wait a second, you need protein to survive right?! Yes, you do. I get my protein the form of 60 pills a day. Pills that contain the other 19 amino acids my diet lacks. You think 60 pills is bad? When I was growing up I had to drink a formula that was so bad I had to drink it in a thermos with a straw through high school because I would gag at the smell of it.

This is what 20 pills looks like, I do this three times a day.
Eating while having PKU is an exercise in math, making sure you understand the quantities of PHE per item you are about to put in your mouth. Growing up everything was based on  a point system, very similar to Weight Watchers. When I was growing up I was allowed 22 points a day. A banana is 3 points. A large french fry from McDonalds is 13 points. So all real world food (except sugary candy) pretty much has some sort of points attached to it. You literally have to think about everything you put in your mouth and you have to keep track of what you eat.

Now mind you, I had my time off diet. From about college through about the last two years, I had my fun, eating whatever I wanted. Not taking my formula and just rebelling and enjoying food. 

So why am I sharing this? Well my husband and I have decided it's time to try and have children. Having children with PKU is a whole new journey in self discipline. My diet now is even stricter than it was when I was growing up. I was allowed 22 points then, now I'm allowed all of 10. 

In order to reach such a low food target, I have been eating a lot of low protein foods. Low protein foods are engineered without the amino acid I can't have, and try their best to be similar to the real world equivalent. I eat a lot of low protein pasta and rice. 

I also have to track what I am eating and measure every grain of food I eat. I use the measuring scale daily! I've had to replace normal foods I used to eat like potato chips, with their low protein equivalent like taro chips instead. I have to account daily for the amount of food I eat, the amount of PHE each item has and how many calories are in each item. Here is an idea of what that looks like:

10/15/2014AmountPHECalories
Rice Chex3/4 cup/ 20g6774
five sugar cubes (with tea)five cubes075
Cherry Dr. Pepper1 can0160
Taro chips37g30212
Applemedium1195
2 low pro cookies2 squares0216
Lo Profin Macaroni97g12352
Fresh Mushroom Prego81g3544
TOTALS1551,228

I have to take my blood level weekly, just in preparation of having a kid, to make sure I make my body baby-ready. I started this strict pre-conception diet as soon as I got back from Europe at the end of August. My blood levels have been steady where my doctors would like them, so hopefully we can get the green light from the doctor to start trying to have a child in January. 

Anyway, so when I say life is busy, I don't just mean with work. I mean with juggling with preparation for having a child, my diet, health and stuff in general. Basically I just wanted to bare a little of my soul with you all so you could all get to know me just a little better. If you made it this far, thanks for reading!!!


Wednesday, October 15, 2014

KBShimmer Mint-al Vacation with coral stamping

I've been trying to achieve this coral stamping look for awhile. I've literally been collecting coral stamps so I can perfect this look.

 photo 5A1F4984-18B2-4248-A297-A4B3FCE72201_zpsq4lfzxw8.jpg

To create this look, I used two coats of KBShimmer Mint-al Vacation as the base. Mint-al Vacation was a little on the thick side, but definitely not difficult to work with.

 photo 4029A5E8-A02A-4BA0-9669-D46A7FB0FE4B_zpsufyswkll.jpg

To stamp, I broke out my MoYou London Sailor 08 plate, which I may or may not have bought specifically for the coral. But it has a bunch of super cute fish on it too!


I need to make a fun skittle look with these sea creatures soon!

 photo F541D695-A9CD-469B-A901-5391BB4DDADC_zpss88lciyp.jpg

I used KBShimmer You're So Shellfish to stamp this look. To me, I think I needed something a little brighter. You're So Shellfish is actually a bright polish, but sometimes when you stamp, polishes show up a little sheerer than they look on the nail.

 photo 052D27FB-EAC7-4CF4-8E3A-22C3286AFE91_zpswbdcvdys.jpg

Where to purchase: You can purchase KBShimmer polishes at the KBShimmer website. Mint-al Vacation and other KBShimmer holos retail for $8.75 and You're So Shellfish and their cremes retail for $7.50. MoYou London plates retail for 4.99 pounds (sorry its late and I can't figure out the symbol for that). I consider MoYou London Plates among the best in quality, if you haven't purchased from them, you really shoul!

Monday, October 13, 2014

Smitten Ker-Bloom Nautical Nails

Before I left for vacation this summer, I created this manicure to get myself pumped for going on my cruise!

 photo 427289D2-58E1-4FAB-97B2-9C4CEC172A5E_zps4kqumb4g.jpg

To start the manicure off I used two thin coats of Smitten Ker-Bloom, a beautiful light lavender-leaning cerulean holo polish. I can't say enough good things about Smitten polishes, I have fallen in love with every single polish I have purchased from them!

 photo B71012F9-970B-4E19-A64C-534AC9BFBC32_zpsdyqny3lw.jpg

Then to get myself pumped for the cruise, I added this super cute stamp from the my MoYou Sailor 04 plate.

 photo 1AA1B0AA-0259-4533-B69B-79381D1C9B9A_zpsw01dyvom.jpg

 photo 0259F255-04DC-4E36-91EB-D80B2BACA416_zpsbsutprkw.jpg

This manicure was fun and even though the summer months have passed, for me, any time of the year is appropriate for a nautical manicure!

 photo 47807C6D-83A0-40A8-ADE2-4C0A4726D2E2_zpsgt3vbmle.jpg

Friday, October 10, 2014

Fall color dotticure nail art

To cap off this fun week I've had sharing nail art with you, I thought I'd try a dotticure with a neutral base!

I have a very hard time finding neutrals that work with my skin tone. I am actually a neutral skin tone, so warmer colors and cooler colors work well with my skin. But finding the appropriate nude polish has been a difficult journey.

 photo 37ACDDBD-12EC-4394-8033-41C20491BDEB_zpshlizedfb.jpg

So I picked up OPI Don't Bossa Nova Me Around recently and thought I'd give it a try. The formula is great, this is it above with two coats (no top coat). Not sure I totally like it with my skin tone, but I don't hate it, and for a nude that is actually a compliment for me. What do you think?

Anyway, wanting to make this a fall manicure, I thought I'd add a fun dotticure, after being inspired by some manicures I saw on Pintrest.

 photo C1038BD9-201E-44FE-9BD2-EFCBDE735671_zps8mdzazwm.jpg

For the dots I used Zoya Penny, a gorgeous darkened brick red creme, Kiko 356 - Melon (one of my Germany nail purchases), a mustard yellow creme, and Zoya Channing, a burnt orange foil polish.

 photo C24CB925-94E2-4A76-BDAC-2C62862BBE18_zpsvrpgwmoi.jpg

I placed the dots in a gradient like fashion, but I didn't want to cover the whole nail. I liked the look, but I wasn't totally in love with it. I think the nude I picked was a tad too pink, which made the look less fall like to me.

 photo EF5B181B-9AE4-4041-9D8F-B5FF46E8AE72_zps4fx4nj4p.jpg

But I really did like the combination of the dots and I thought it would be a neat idea to include Channing, a different finish, to mix up the dots. Neat?!? Who uses adjectives like that, I'm super lame. Hahaha, sorry for the random aside.

Anyway, I hope you liked fall week here at Newsie Nail Novice, I loved sharing it with you. And as of now, I have absolutely no idea what I'll share with you next week, but I have a lot in the vault!

Wednesday, October 8, 2014

Fall Leaves Nail Art

Now an ode to my favorite part of fall, the changing of the leaves.

  photo 0584BEE9-D33A-45A0-B788-5F89378A1074_zpsmqcrijsv.jpg

I work in Los Altos, where every fall the streets are lined with the most beautiful trees!

 photo 0bea8b582f2a11f6753278b54ad10314_zpsfe84b960.jpg

To start I picked my favorite fall leaf colored holos and created a beautiful skittle!!!

 photo 76969164-F62F-4166-B225-7A45022EA8D8_zps5a3xyxiw.jpg

From thumb to pinky, I am wearing KBShimmer Whole Lava Lovin', Smitten Polish The First Lobster, KBShimmer Rust No One, Joss Alternate Dimension and KBShimmer Run It's The Coppers.

 photo F213FA0A-01C8-4D64-A774-00D3F9D82448_zps21hbg9u3.jpg

I once again used my Bundle Monster BM-H11 plate for the leaf image, one of my most favorite fall stamps, an in my opinion, THE best fall plate.

 photo B55EFA37-86AC-42FF-AC9A-45E311412A42_zpspya7twxx.jpg

And in the sun it was the most spectacular! I just absolutely LOVED this manicure and I hope you did too!

I'd love to see your fall nail looks, share them with me on my Facebook page!

P.S. My nail polish giveaway is ongoing through this week, so check it out and enter if you haven't had the chance yet!

Monday, October 6, 2014

ILNP Atomic Sherbert

Welcome to all about fall week here at Newsie Nail Novice. This week I'm showing you my favorite fall looks that I have been working on.

To start, today I'll be sharing with you the wondrous polish that is ILNP Atomic Sherbert!

 photo 9894026D-8BF8-41EA-A02C-2C9E26C59B47_zpsbyyrizcx.jpg

Atomic Sherbert is a lovely pumpkin orange, perfect for Halloween and fall! And it is a linear holo to boot! After putting this shade on, it reminded me so much of pumpkins, I decided to add an appropriate fall stamp.

 photo 38BD4773-C6C5-4351-B28C-AAD1CA1D5AAA_zpskldwu2pk.jpg

Using Zoya Black Swan, I stamped this pumpkin and leaf design using Bundle Monster BM-H11 from the holiday stamp. If you are looking for a fall stamping plate to purchase, this is it.

You'll see a manicure in which I used that leaf design later in the week.

 photo 1C07F5C7-8632-46EE-BC7C-4760B7115E17_zps8i88zaya.jpg 

The thing I love most about fall is the leaves changing colors, the smell of a freshly carved pumpkin and the excitement in the air as it starts to cool and students go back to school. Fall evokes so many nostalgic memories, it truly is my favorite season. Which is why I'm so excited to show you all my fall looks this week! Fall is THE best!

 photo 78E7E4B8-2677-4B31-A09A-64EF68EE5E85_zps77t6nlrv.jpg 

Application: Atomic Sherbert was on the sheerer side so I needed three coats for this opacity. I used KBShimmer Clearly on Top to top coat the look.

Where to purchase: You can purchase Atomic Sherbert, and a whole bunch of other beautiful colors from the ILNP website. Atomic Sherbert retails for $10. You can purchase Bundle Monster plates from their website. I got this plate in their holiday set, but you can purchase it alone for $1.99.

So what is your favorite part of fall? Are you creating some festive fall nails? Share them with me on my Facebook page!

P.S. My nail polish giveaway is ongoing through this week, so check it out and enter if you haven't had the chance yet!

Friday, October 3, 2014

Nail stamping with holo polish

There are many different polishes to stamp with. There are polishes made specifically to be stamped with, like Konad, and there are some lucky tries you can get with regular polish you own (I find a lot of Zoya cremes are easy to stamp with). Color Club holographic polishes are also great polishes to stamp with, especially over a creme polish.

 photo 613F9D64-3FF8-4937-A63D-E240B8803170_zpsrjkddqn7.jpg

For this look I used Color Club Eternal Beauty, a gorgeous purple holographic polish, and stamped it over KBShimmer You're So Shellfish using my Lily Anna 06 plate.

 photo 110F4EED-05BD-41D4-90A4-A7BE84F149C2_zpse0k3kgbc.jpg

Holos stamped over a creme polish create such a gorgeous effect. Here the polish was a bit bright, so the holo is a little lighter than it could be, but the effect is still gorgeous.

 photo E0ABD422-9625-407C-9019-4AE5AE6542D1_zpsmkgddsi2.jpg

In the photo above, you can really see the purple.

 photo 85D98467-C325-4EE2-A24B-3D6F88A361B9_zpskc1cj2ek.jpg

And out in the sun, the stamping really comes out to play!

 photo 98025E34-3041-4B63-9965-D096FB8E1835_zpsvbsrersc.jpg

What are your favorite nail stamping polish combos?


Wednesday, October 1, 2014

Practicing my gradients

I have been trying to perfect the gradient method for awhile. I have attempted it a few times, each time I walk away amazed with how beautiful it looks, but so disappointed with all my errors in application.

If I could just do a smooth perfect gradient I would be happy.

 photo C416961E-29D0-4674-9C5E-8C0309C27FE2_zpsz0y1ztj7.jpg

I love love love this color combination. For this gradient I used Essie Go Overboard, Zoya Alexa and Essie The More the Merrier to create a teal to lime green gradient. And just because I was not happy with the final result, I put some China Glaze Fairy Dust to cover up the imperfections.

 photo F7410394-AF32-41FF-8937-AE6F3C81BEDE_zpsgtexkcew.jpg

I'll tell you my number one complaint about gradients, the white undercoat. White pigmented polish is from the devil. I have yet to find a white polish I am pleased with. Some gradients don't require a white undercoat, but I find in order for the colors to be bright and appear as they are in the bottle, the white undercoat is a must.

Unfortunately, white polish is never good in one coat. Usually takes at least two and then maybe a third depending on how chalky and streaky the formula is. And then when clean up is involved, you end up cleaning the edges and showing the white undercoat by accident.

 photo 501146D0-F260-49A9-B8A5-174582A1609D_zpsj7qdeltd.jpg

As you can tell I tried to cover that up with a smaller brush, note the darker teal edges, trying to cover up the accidental white undercoat. In an attempt to make the gradient look a little better, I added a stamp to it.

 photo DE9EBACA-9613-4CD7-98B7-E628FF199A61_zpsirhwxhqx.jpg

I used my Lily Anna Plate 10 to stamp a coral looking design. It looked ok, but I think I prefer the gradient on its own. I just wish I could apply the gradient perfectly.

 photo 2BFC0800-1D3D-4AAD-A58F-E70491C1D6BA_zpsvmas1cfx.jpg

So now I plead with you dear readers, what tutorials help you with the perfect gradient? I've watched a million online tutorials and they all show the same thing, and it is never helpful. So do you have tricks for the perfect gradient? Please share them with me!!!