I don't know about you but warmer weather always gets me longing for a good coral manicure. And being that coral is one of my absolute favorite nail polish colors, you better believe I have a bounty of it!
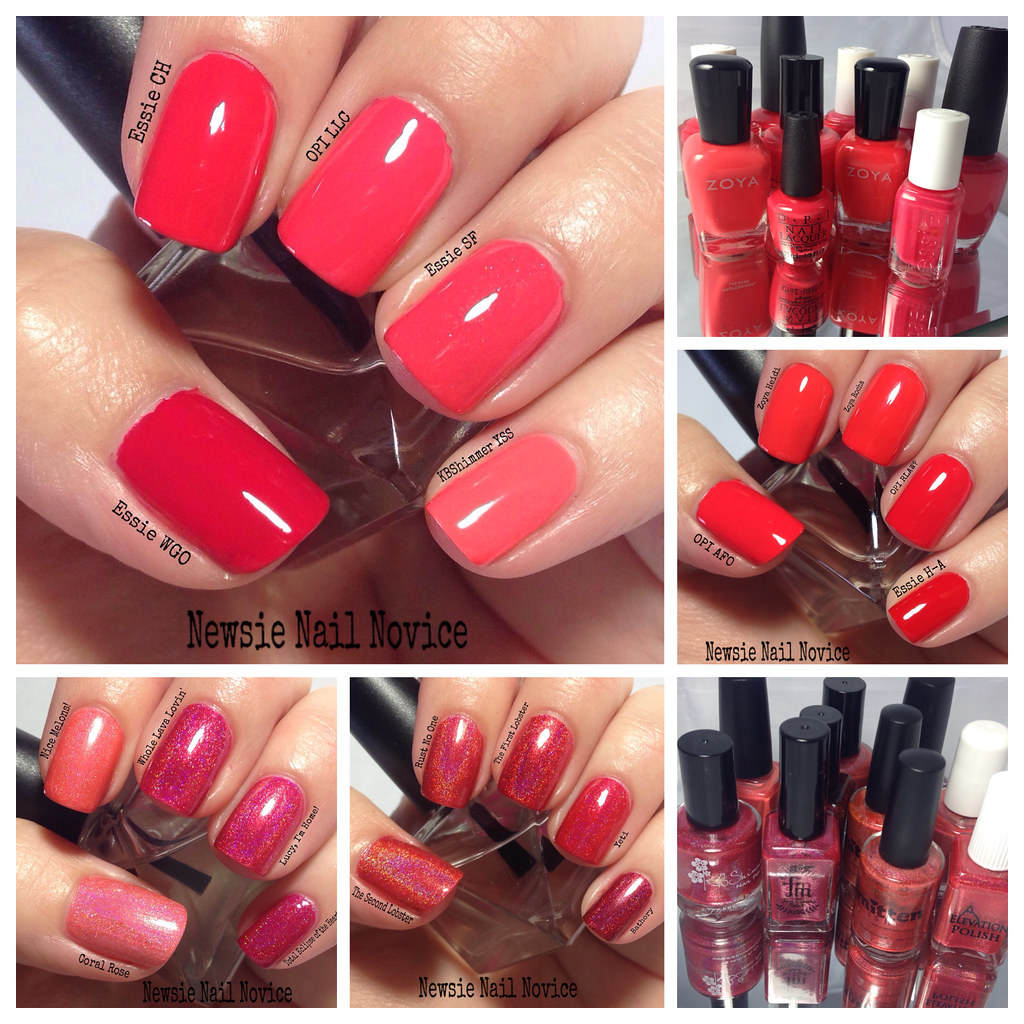
And boy do I have a ton of coral polishes! There are all different types of corals. Pink leaning, red leaning, orange leaning. For the purposes of this post, I decided to compare all my cremes and holos that were in the coral family.
Let's start with the creme's first. I'll start with the pinker leaning polishes to start off with!
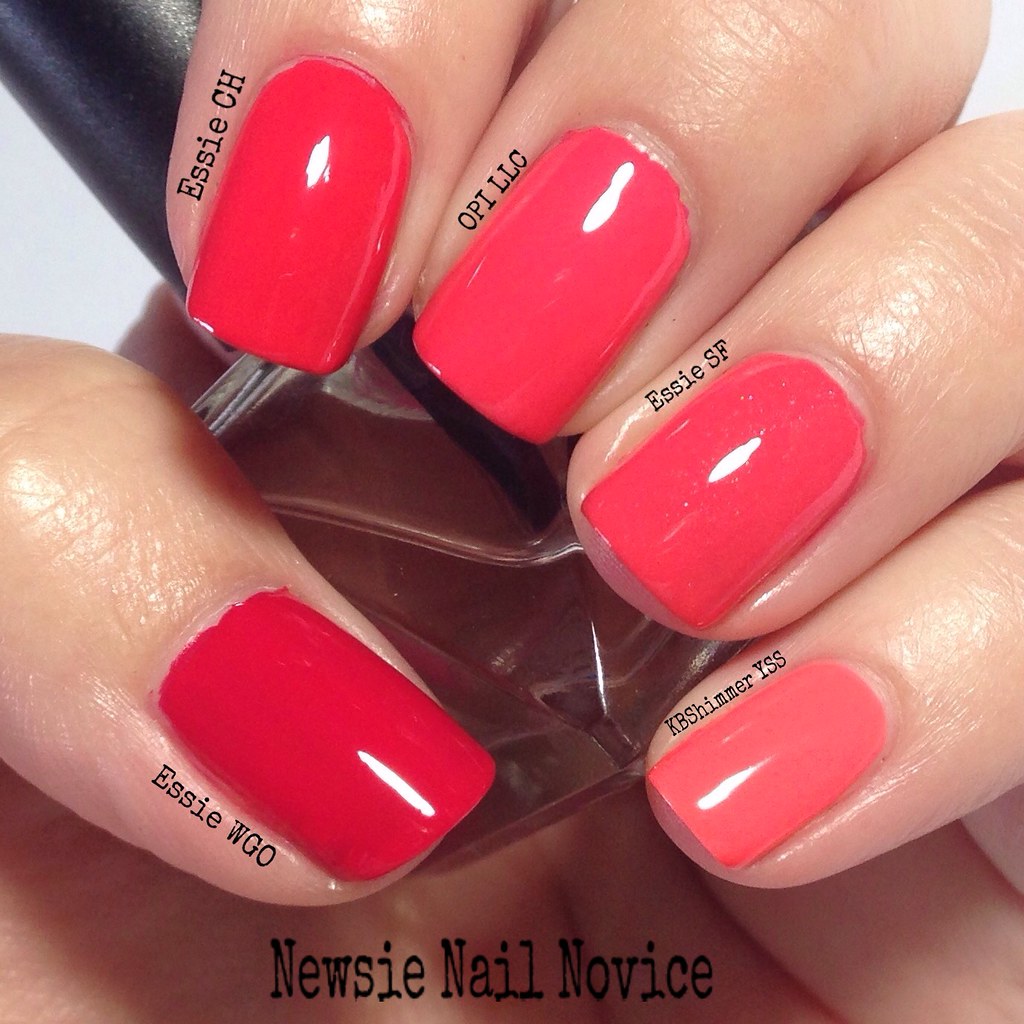

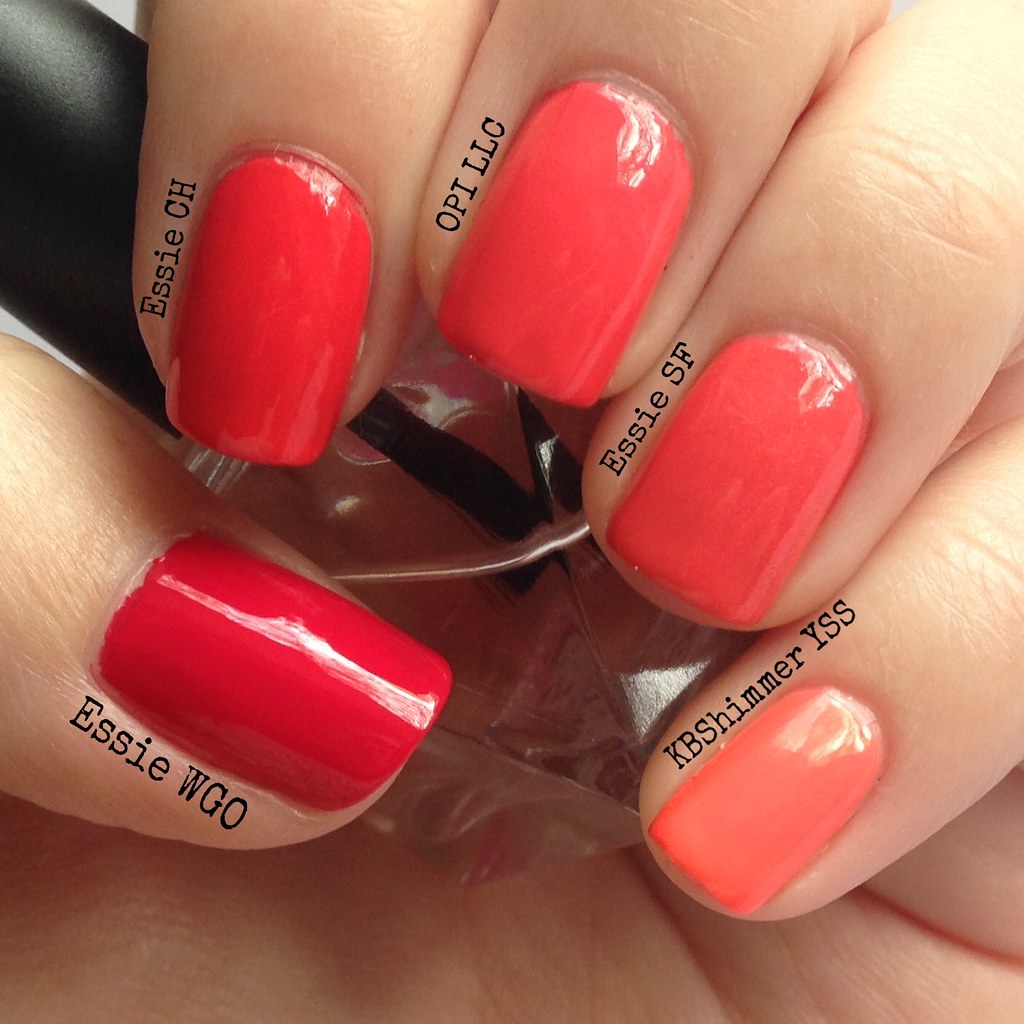
From thumb to pinkie we have:
Essie Wife Goes On: This is a gorgeous pink leaning coral, but truly more of a watermelon color. A great summer color! This is two coats.
Essie Come Here: This was my favorite of these five polishes. My favorite type of coral is a more red orange leaning coral that is still bright. This is two coats.
OPI Live.Love.Carnival: This is a lighter, pinker coral than Come Here. This is a great bright color, but a bit to pink for my liking. This is two coats.
Essie Sunday Funday: This polish is almost practically a dupe for Live.Love.Carnival if it didn't have these fine silver flakies, which doesn't really make it a true creme I know. This was three coats the formula was pretty watery.
KBShimmer You're So Coral: Honestly, this polish shouldn't even be in the comparison. This polish is a lovely orange/peach leaning coral, but it's more neon than anything, and unfortunately I just couldn't capture it's beauty in this post! This is two coats.
Now on to the darker cremes.
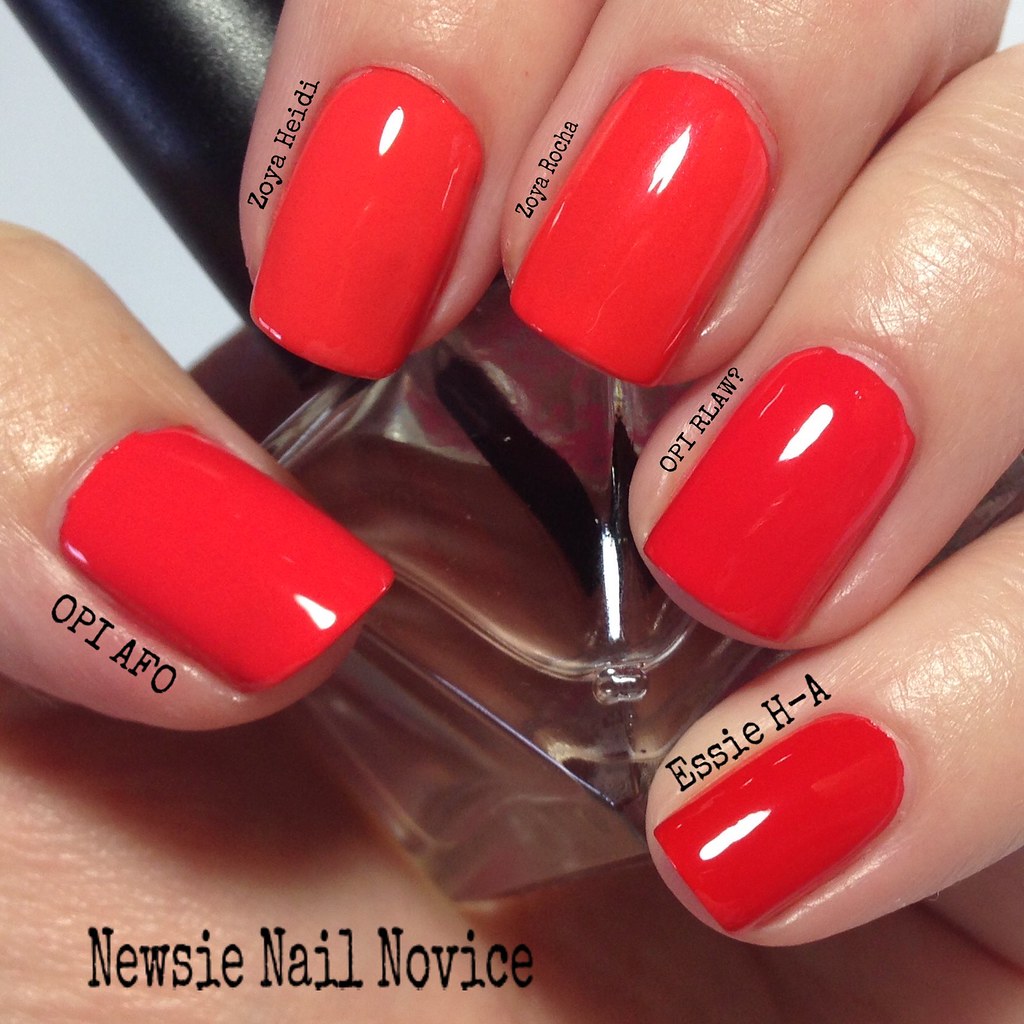
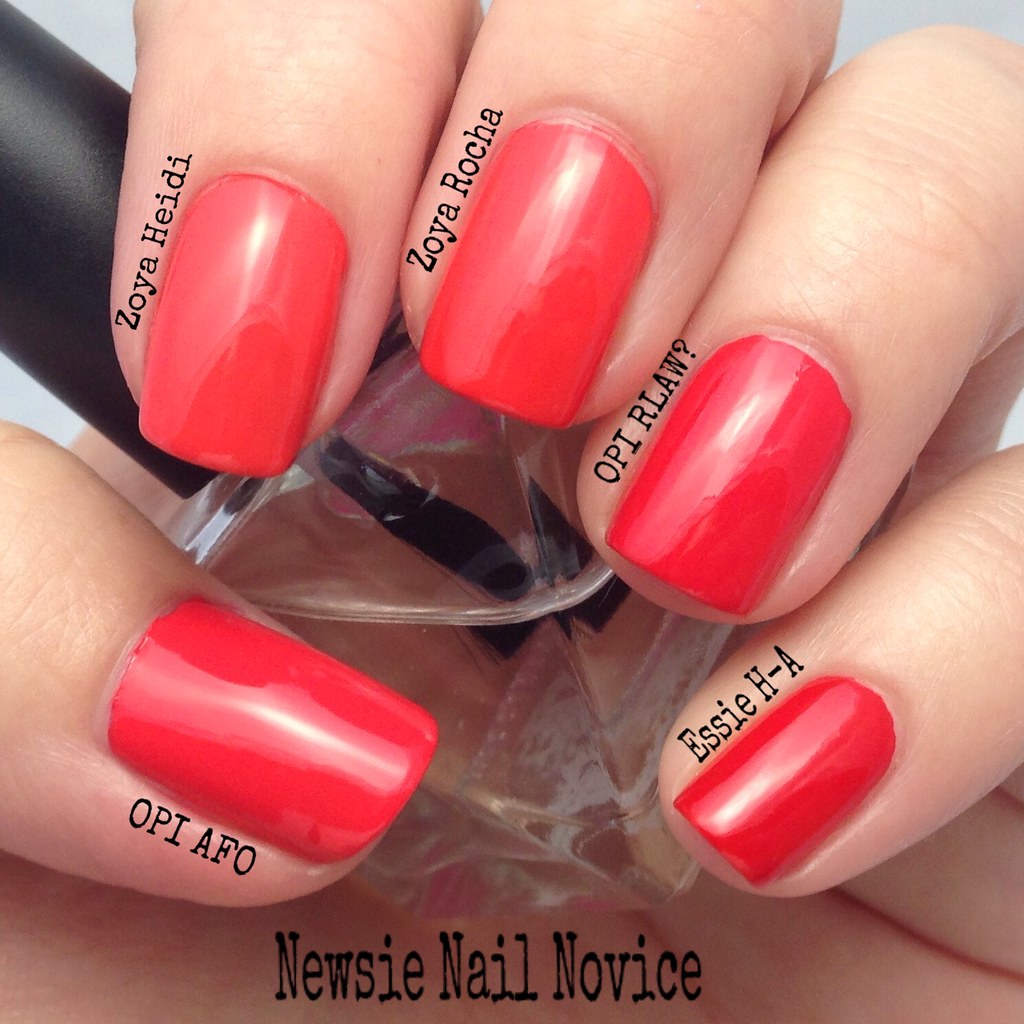
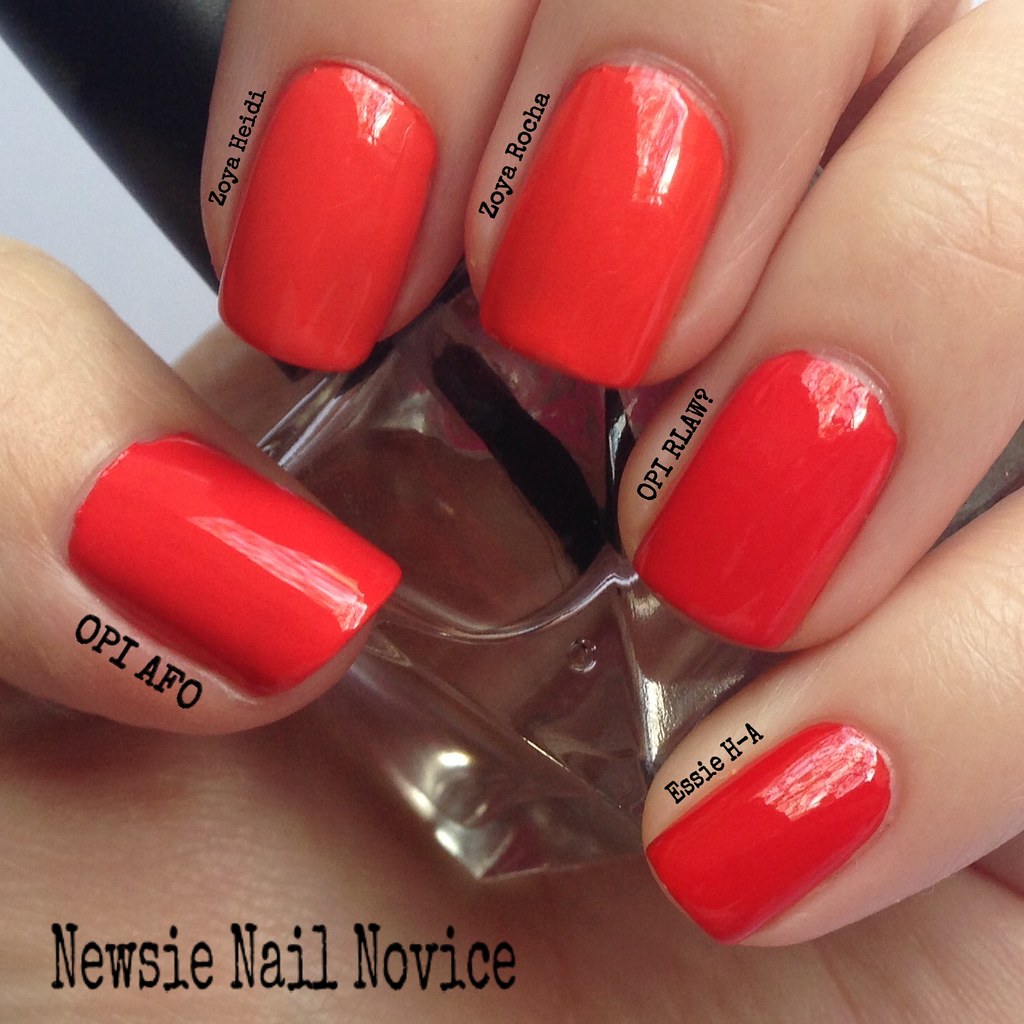
From thumb to pinkie:
OPI Aloha from OPI: This was my newest addition to my coral collection, and the real reason this post came to life. I had to see how my new polish compared to my collection. While I love the color of this one, a bright perfect darker coral, the formula was not great, it took three coats for this opacity.
Zoya Heidi: This polish is an oranger leaning coral, but still a big favorite of mine. This is two coats.
Zoya Rocha: Almost a dupe with Heidi, except it has a very hidden shimmer and is a smidge darker, that you can only detect in certain lighting. This is two coats.
OPI Red Lights Ahead, Where?: My all time favorite coral, and it still holds true. More of a red orange coral, bright and pigmented. I just love this polish and it has yet to be dethroned as my favorite coral creme. This is two coats.
Essie Hip-Anema: This polish is less of a coral and more of a tomato red-orange. Still bright and well pigmented, and very good for stamping! This is two coats.
Now on to the indie holos! Some of these are a stretch for coral, but I picked all my polishes in the pink/orange/reddish coral family. We'll start with the lighter/pinker colors.
From thumb to pinkie:
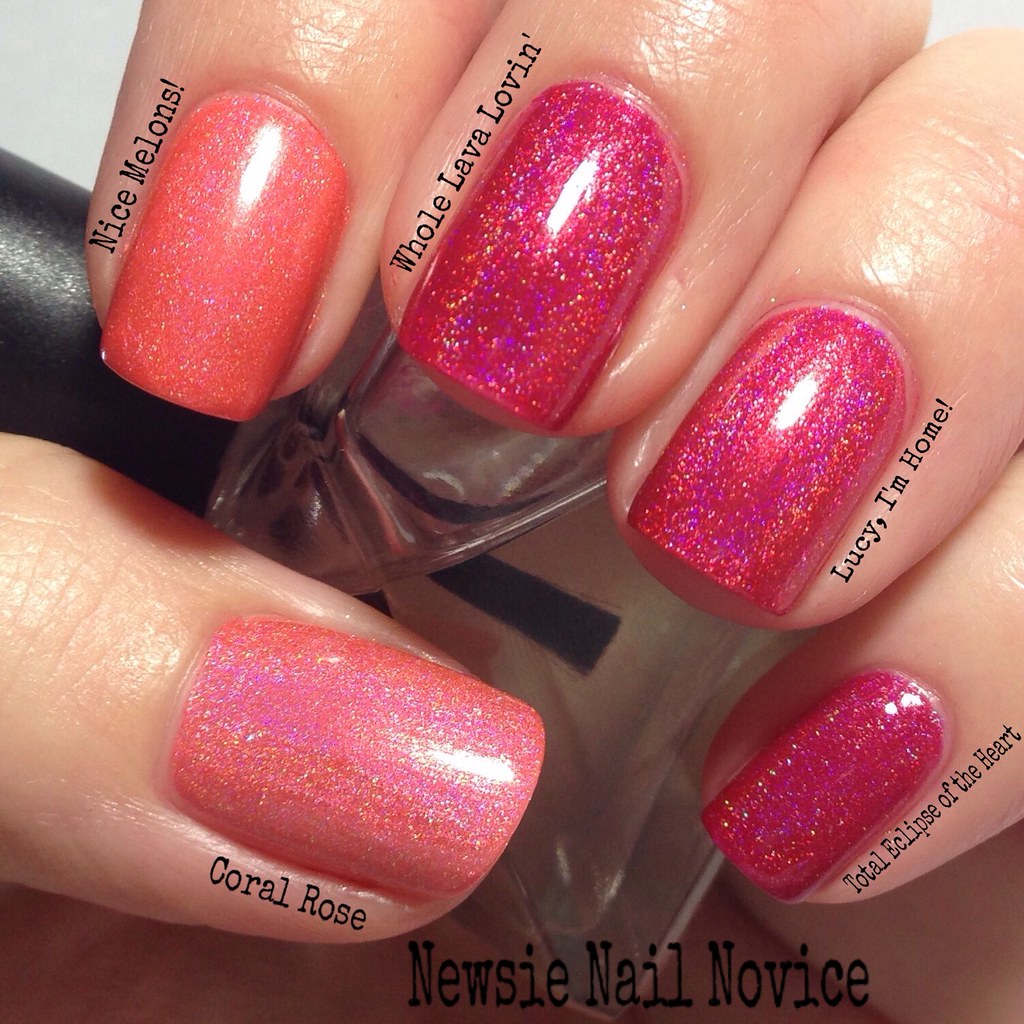
Different Dimension Coral Rose: This is truly in the lighter pink coral category and was my first coral holo polish. I do like it, but I favor a more bright and vibrant, less pink holo! This polish took three coats for this opacity.
Colors by Llarowe Nice Melons!: This is less of a coral and more of an orange peach holo. This polish was very bright, but had the weakest holo glow of the lot of holos I feature in this post. This was opaque in two coats.
KBShimmer Whole Lava Lovin': This polish is a bright pink holo that leans more cherry to me. Though it looks very similar to the next two polishes, it is a tad lighter, just didn't really photograph that way. It is happy and bright and fun, this is two coats.
Colors by Llarowe Lucy, I'm Home!:This is a bright pink coral holo that is just lovely. When I originally purchased this, I thought my search for the perfect coral holo was over, that was until I discovered the world of orange-red holos (my more preferred coral family color). This is two coats.
Fair Maiden Polish Total Eclipse of the Heart: This polish is a tad darker than the previous two, but is the brightest polish of the group, but leans a darker more raspberry pink holo polish with stronger violet undertones. This is two coats.
Now on to the orange/red holos!
 Smitten Polish The Second Lobster
: This polish was an oops mini batch from Smitten, and I just had to get it since I love The First Lobster so much. It basically is a lighter less bright version of The First Lobster (middle finger). This also had a thinner formula and required three coats for opacity.
KBShimmer Rust No One: This polish leans just a tad more orange and darker than The Second Lobster, but is a really gorgeous orange leaning coral in my eyes. I just love this polish. This is two coats.
Smitten Polish The First Lobster: I think this polish still holds the title of my favorite coral polish, though some wouldn't classify it as such. But this is one of my absolute all time favorites, it is bright and the perfect amount of red-orange holo. This is two coats.
Elevation Polish Yeti Hides in the Mini Apple: This polish popped up this year and quickly stole my heart. I thought it was a real contender to maybe dethrone The First Lobster in my heart at my top coral holo, but this is a more cherry holo. Still gorgeous and amazing in its own right. The formula was perfection, almost a one coater. This polish also had a golden shimmer and flakies inside, setting it apart from the other classic holo finishes featured here.
Bear Pawlish Bathory: Bear Pawlish is a newer to me brand that I haven't had a ton of time to play with. I threw it into this post, because I orignally purchased this polish because I thought it might be in this family of color. It's not, instead is a gorgeous smoky raspberry, a perfect fall holo in my opinion. I have nothing in my collection like it. This is two coats.
So which polishes win here? Well everyone's taste here differs. For me, I would have to say my two favorite cremes are Essie Come Here and OPI Red Lights Ahead Where? And for the holo category I would have to say Smitten Polish The First Lobster and Elevation Polish Yeti Hides in the Mini Apple.
But there is a shade of coral here for everyone to love. How do you like your corals, more light than dark? More orange leaning or pink leaning?
Have any coral recommendations for me to check out?! None of these are actual dupes of each other, they are just close, which is why I feel justified in owning them all! :-) Hope you enjoyed this post, it was a lot of work to put together!!!