Showing posts with label OPI. Show all posts

Friday, December 4, 2015

12 Days of Christmas Nail Art: Christmas Trees

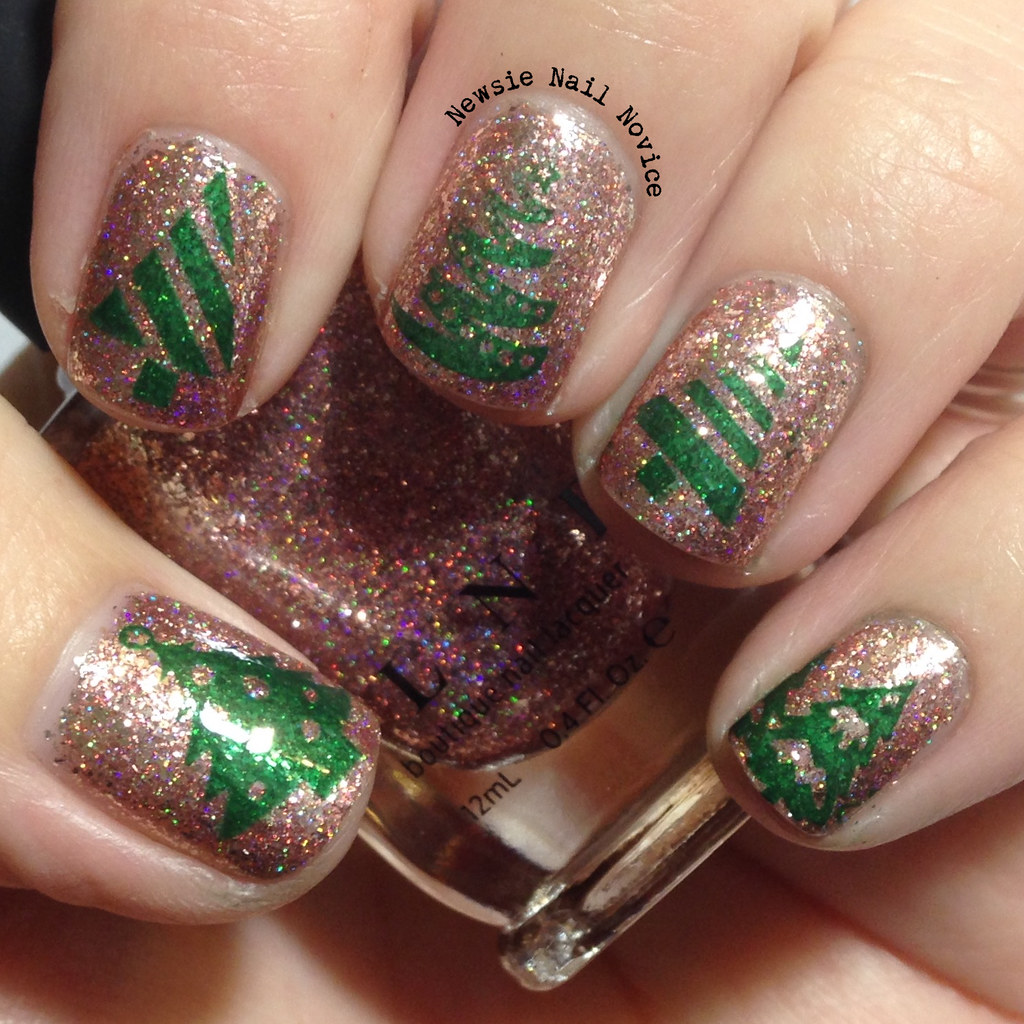
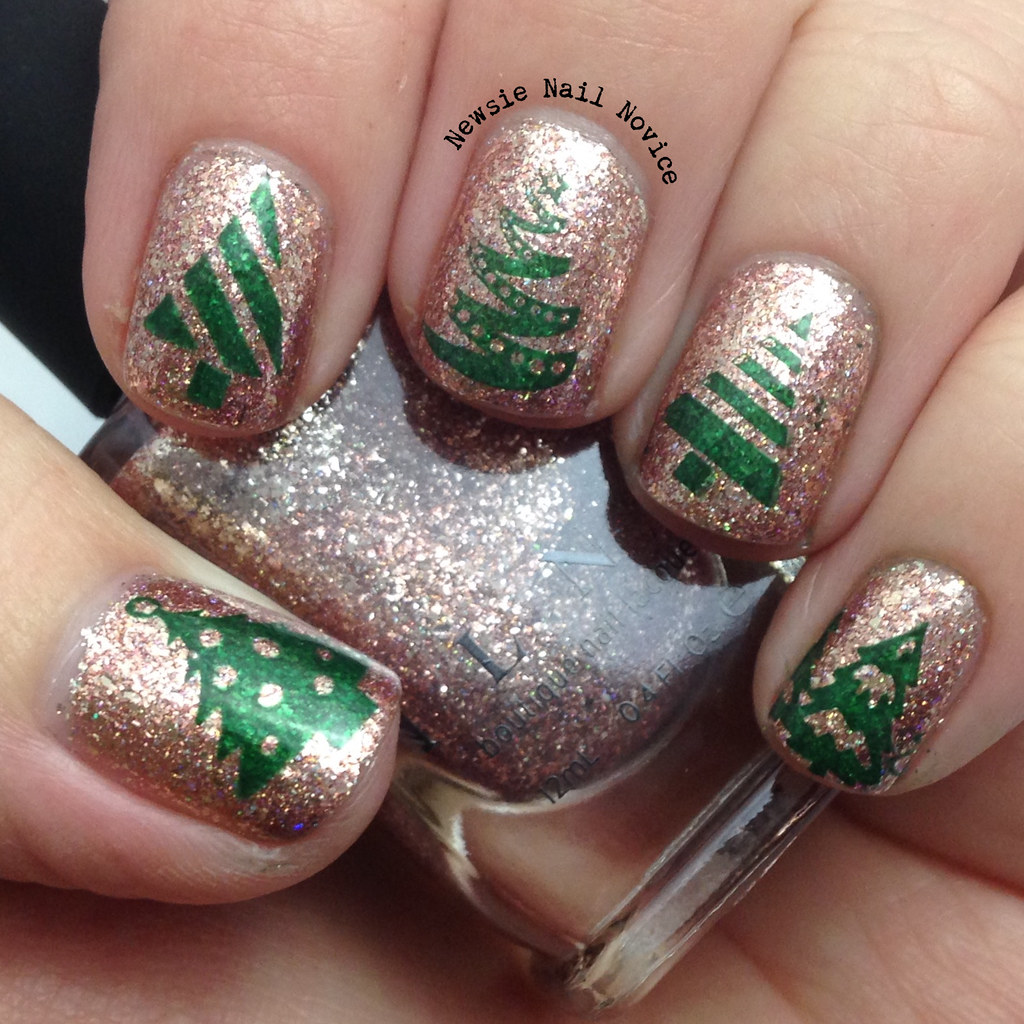
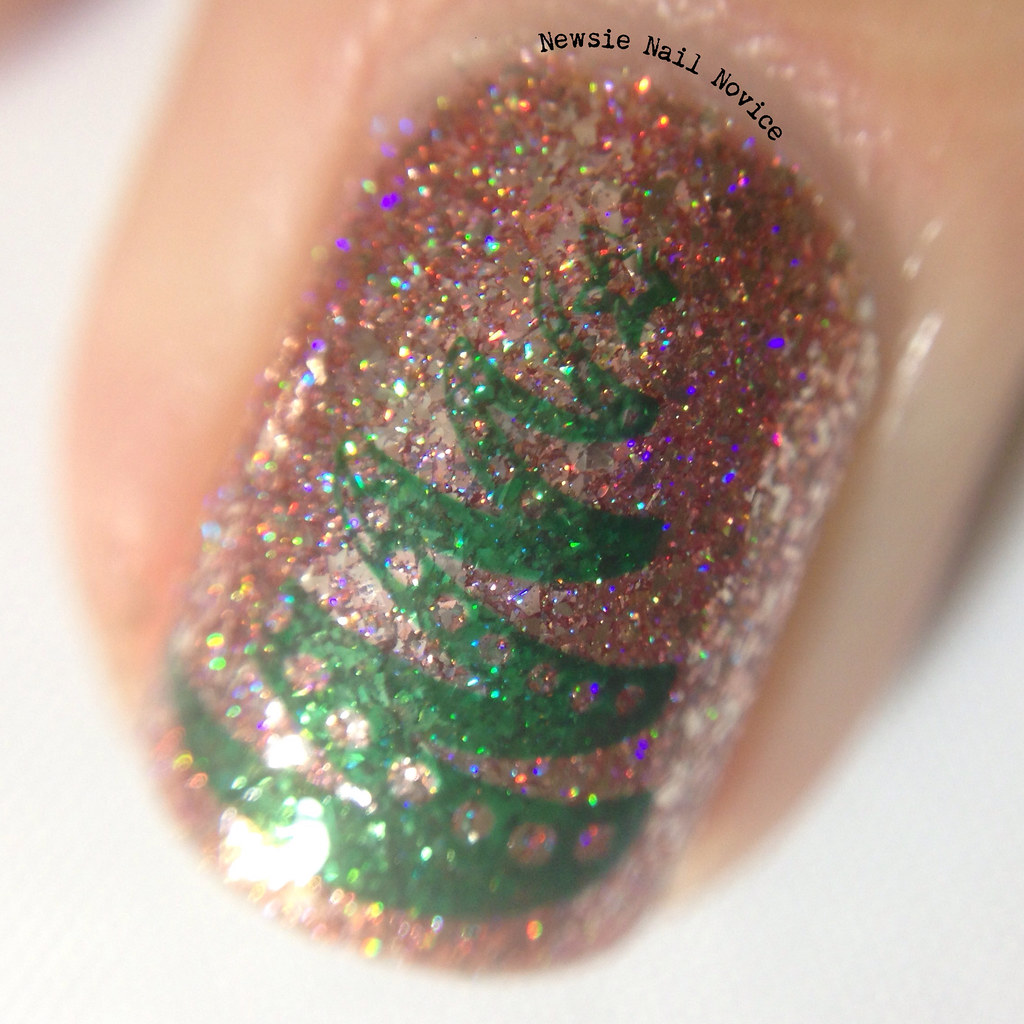
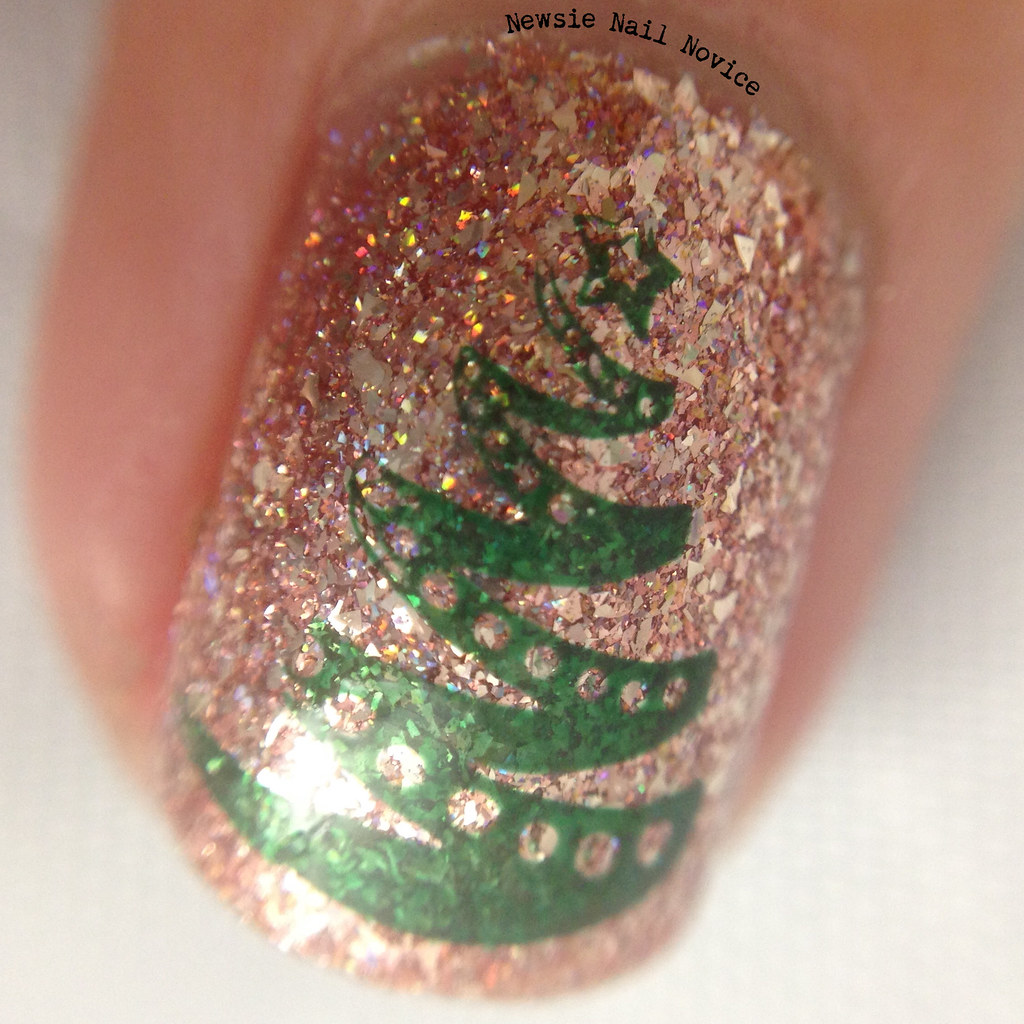
Today I have a medley of Christmas Trees over a new blinging polish by ILNP for the 12 Days of Christmas Challenge Your Nail Art Christmas Trees prompt!

Untitled

The base of this is amazing of course, stay tuned, I'm going to be blogging my recent INLP winter picks soon! This is INLP Juliette and it is rose gold perfection! So beautiful and bling-y inside and out.

But of course I had to fufill the Christmas tree prompt so I broke out my stamping supplies!!!

Untitled

For this look I used my new Bundle Monster Holiday Set, more specifically the BM-S218 plate, and stamped various Christmas Tree designs on the nail, not always getting the perfect placement.

Untitled

Untitled

The polish I used for stamping is OPI Christmas Gone Plaid, which worked okay, but was a bit watery and a little difficult to stamp with.

Untitled

Feel free to join us in the Challenge Your Nail Art 12 Days of Christmas Challenge, just join our Facebook group and follow along. You don't have to do every one, I know I probably won't this year, but we're casual. The more the merrier!!! :)

As always, check out the other lovely ladies participating in this challenge below!


    An InLinkz Link-up


Friday, March 27, 2015

Abstract Nail Art Quickie

I can't believe I am up this late typing up this post for today (it's almost 1 a.m. here on the West Coast, but I'm pre-typing this for later this morning!). I'm a little nuts so I'll make this one super fast okay?

Untitled

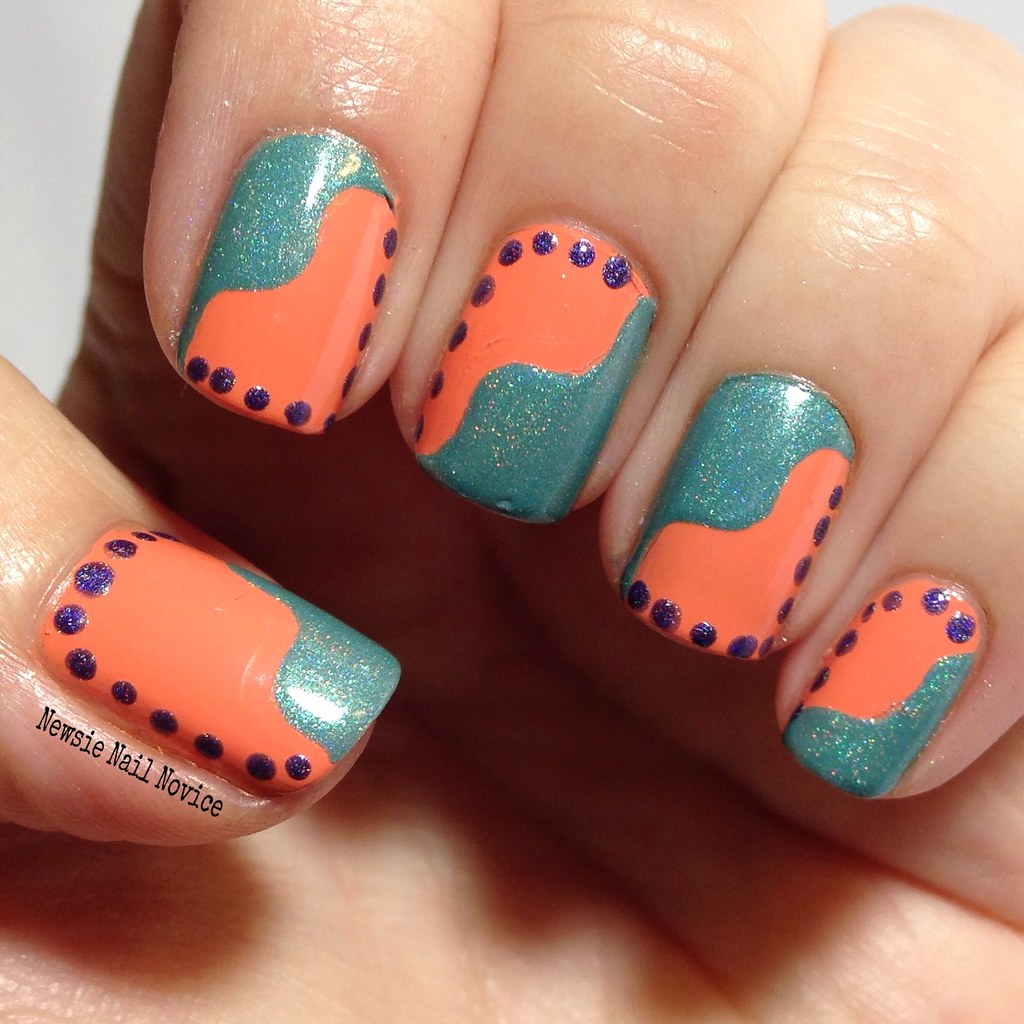
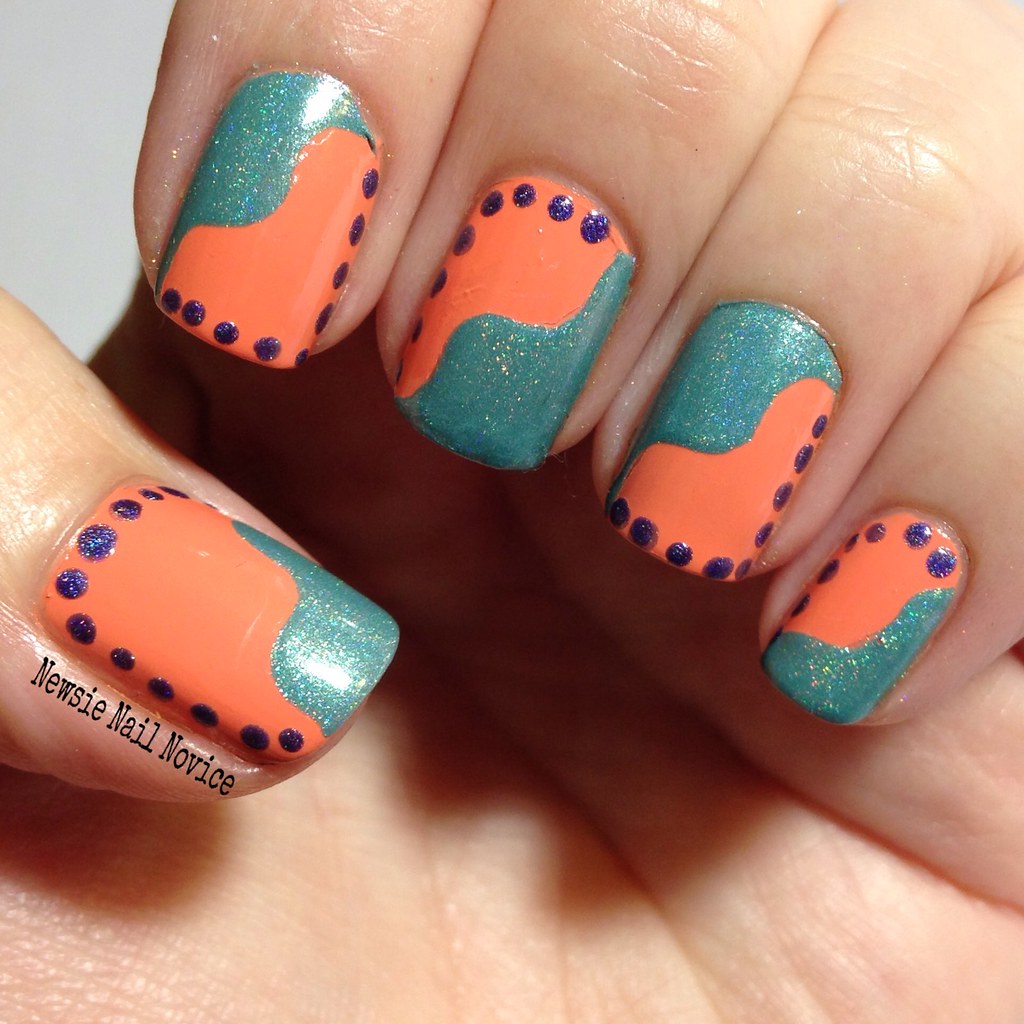
I don't know where my imagination was going when I created this look, but I think I actually kind of like it in an abstract, I-don't-think-I've-seen-something-like-this-before type of look.

To start this look off I had just purchased the base OPI Is Mai Tai Crooked? (careful though, this one is a stainer!!!) and I went in search of some polishes that would contrast/pair well with that beautiful bright pastel orange.

So first I grabbed ILNP Music Box, which is this amazing aqua holographic polish with tiny irridescent flakies of the same color hidden in the polish's creamy holo finish! I used a wavy nail vinyl on each nail in a random design and created the wavy look.

After I finished that step, the look was too boring to me so I wanted to take it up a notch. I went in search for another polish to offset the look, and I don't know what led me to add the dots, but that's what I went with! And for the color I chose Literary Lacquers Mysterious Irrevocable Sacred, which is this amazing blurple linear holo with scattered flakies. I thought the dark blue purple contrasted well with the aqua/orange look.

Untitled

In the end, I think the final creation looked rather abstract, like a painting or something. Part of me wondered after making this though, if the dots wouldn't have been better placed along the wavy line instead of the exterior of the nail? Who knows though.

Have you ever created a look that just baffles you because it came out of no where? That is this look for me! Hope you liked it! It is waaaaaaay too late now and I need to be getting some sleep ASAP! Hope you all have wonderful weekends ahead!

Wednesday, March 25, 2015

Coral Polish Comparison Showdown

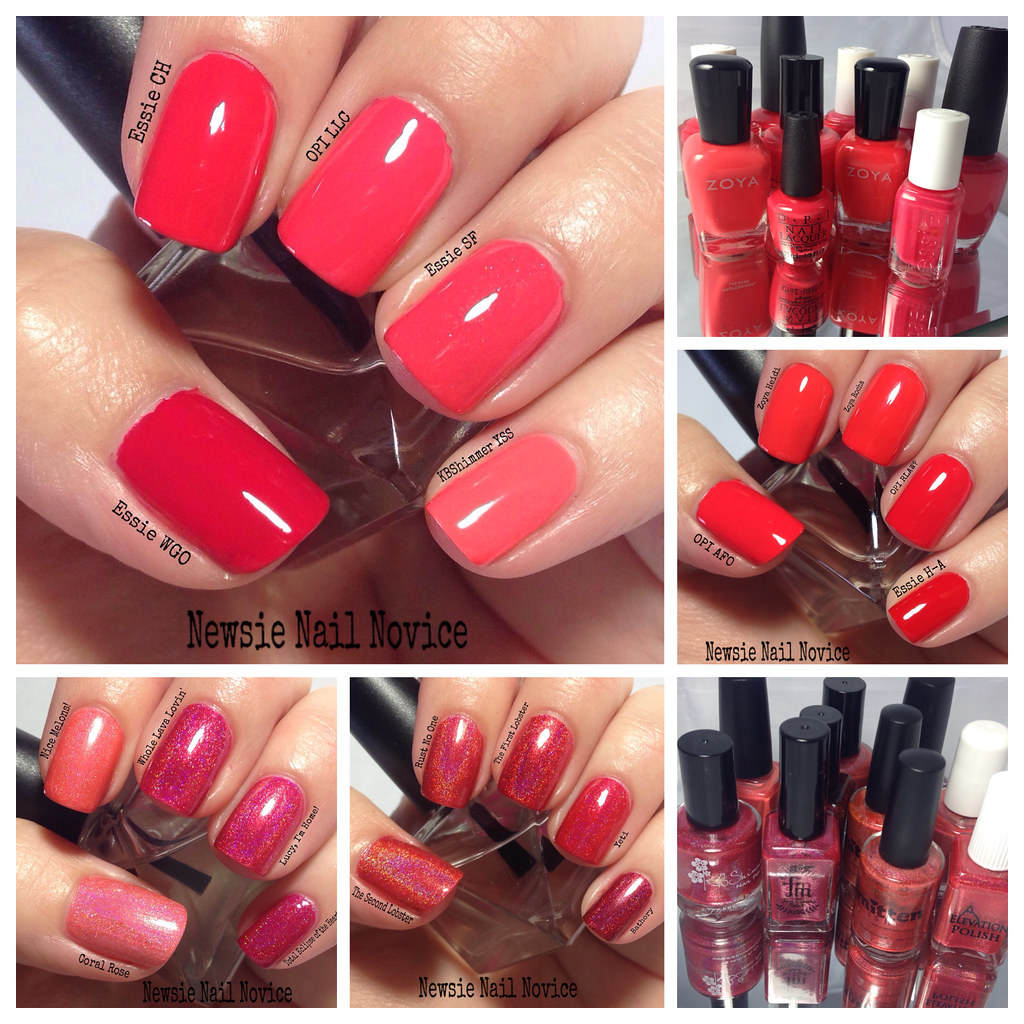
I don't know about you but warmer weather always gets me longing for a good coral manicure. And being that coral is one of my absolute favorite nail polish colors, you better believe I have a bounty of it!
Untitled

And boy do I have a ton of coral polishes! There are all different types of corals. Pink leaning, red leaning, orange leaning. For the purposes of this post, I decided to compare all my cremes and holos that were in the coral family.

Let's start with the creme's first. I'll start with the pinker leaning polishes to start off with!
Untitled

Untitled


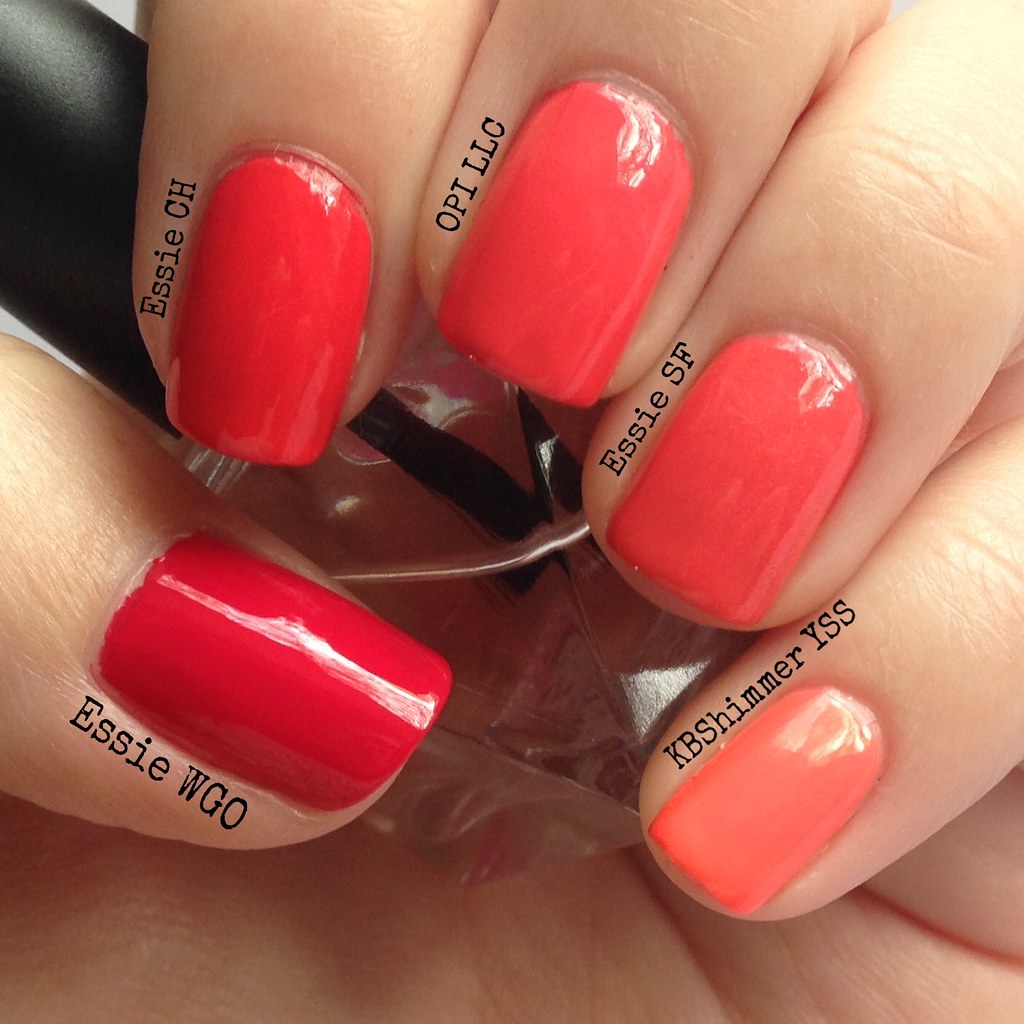
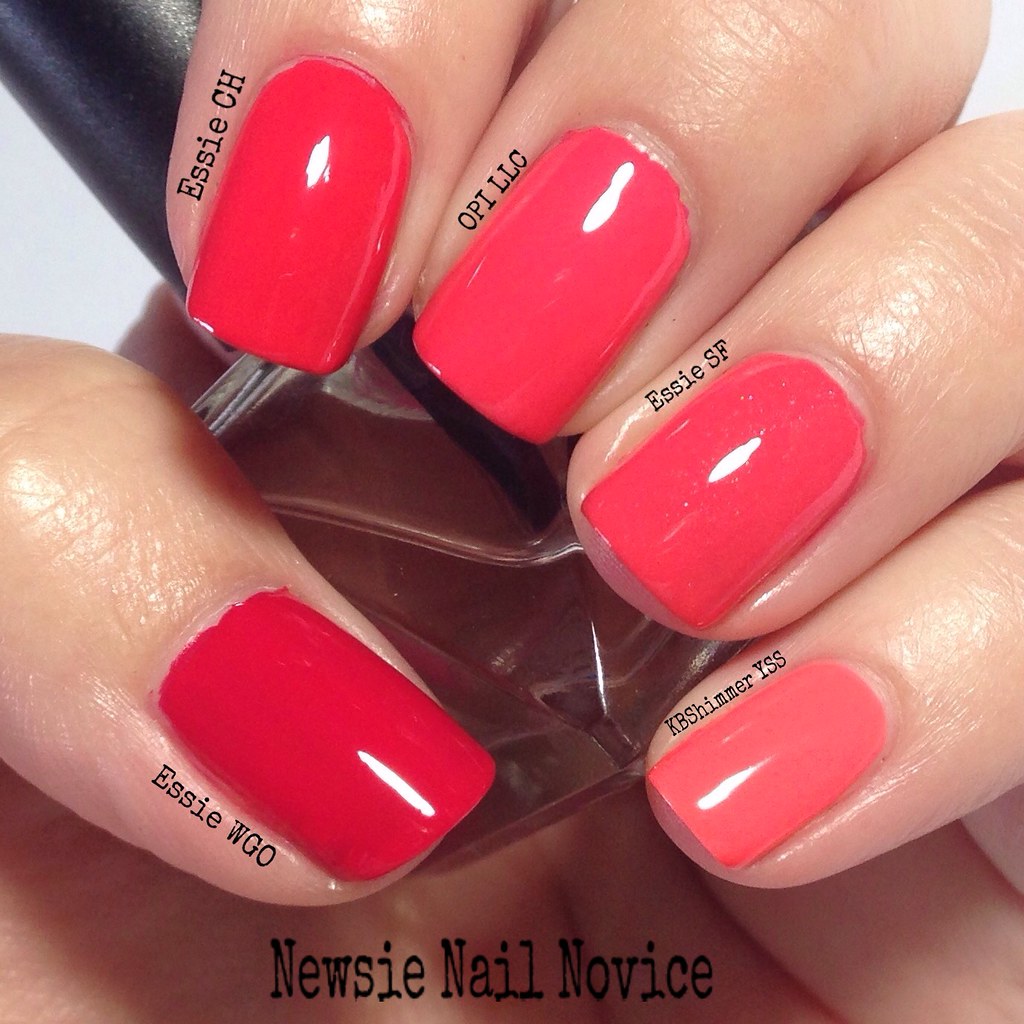
From thumb to pinkie we have:

Essie Wife Goes On: This is a gorgeous pink leaning coral, but truly more of a watermelon color. A great summer color! This is two coats.

Essie Come Here: This was my favorite of these five polishes. My favorite type of coral is a more red orange leaning coral that is still bright. This is two coats.

OPI Live.Love.Carnival: This is a lighter, pinker coral than Come Here. This is a great bright color, but a bit to pink for my liking. This is two coats.

Essie Sunday Funday: This polish is almost practically a dupe for Live.Love.Carnival if it didn't have these fine silver flakies, which doesn't really make it a true creme I know. This was three coats the formula was pretty watery.

KBShimmer You're So Coral: Honestly, this polish shouldn't even be in the comparison. This polish is a lovely orange/peach leaning coral, but it's more neon than anything, and unfortunately I just couldn't capture it's beauty in this post!  This is two coats.

Now on to the darker cremes.
Untitled

Untitled

Untitled

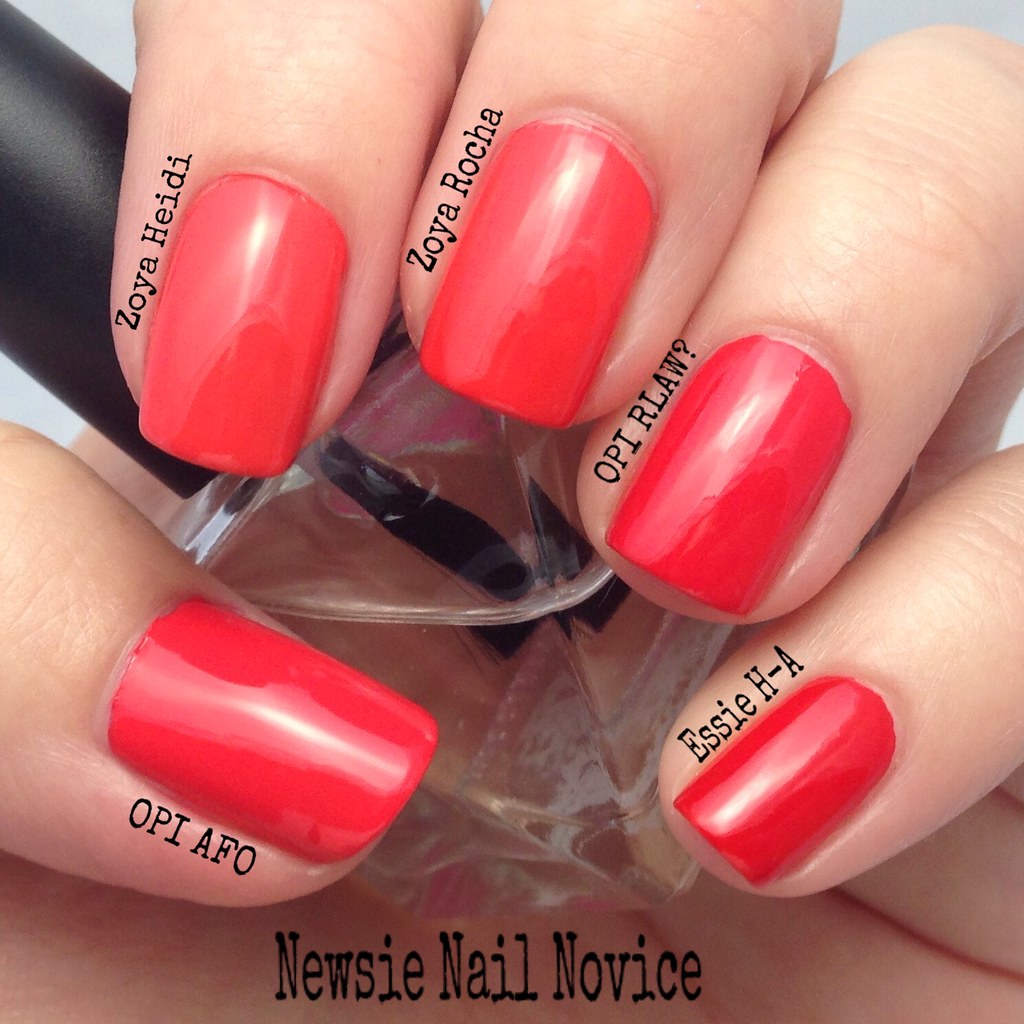
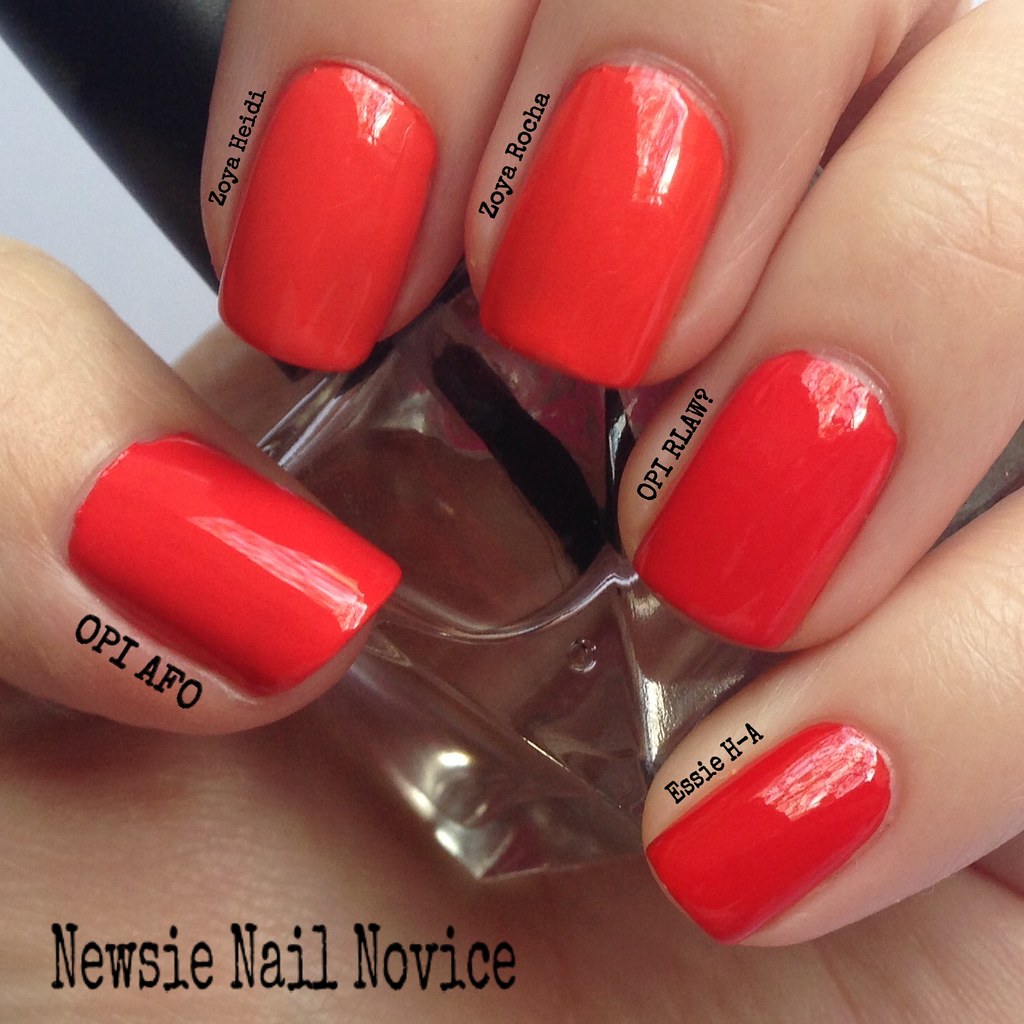
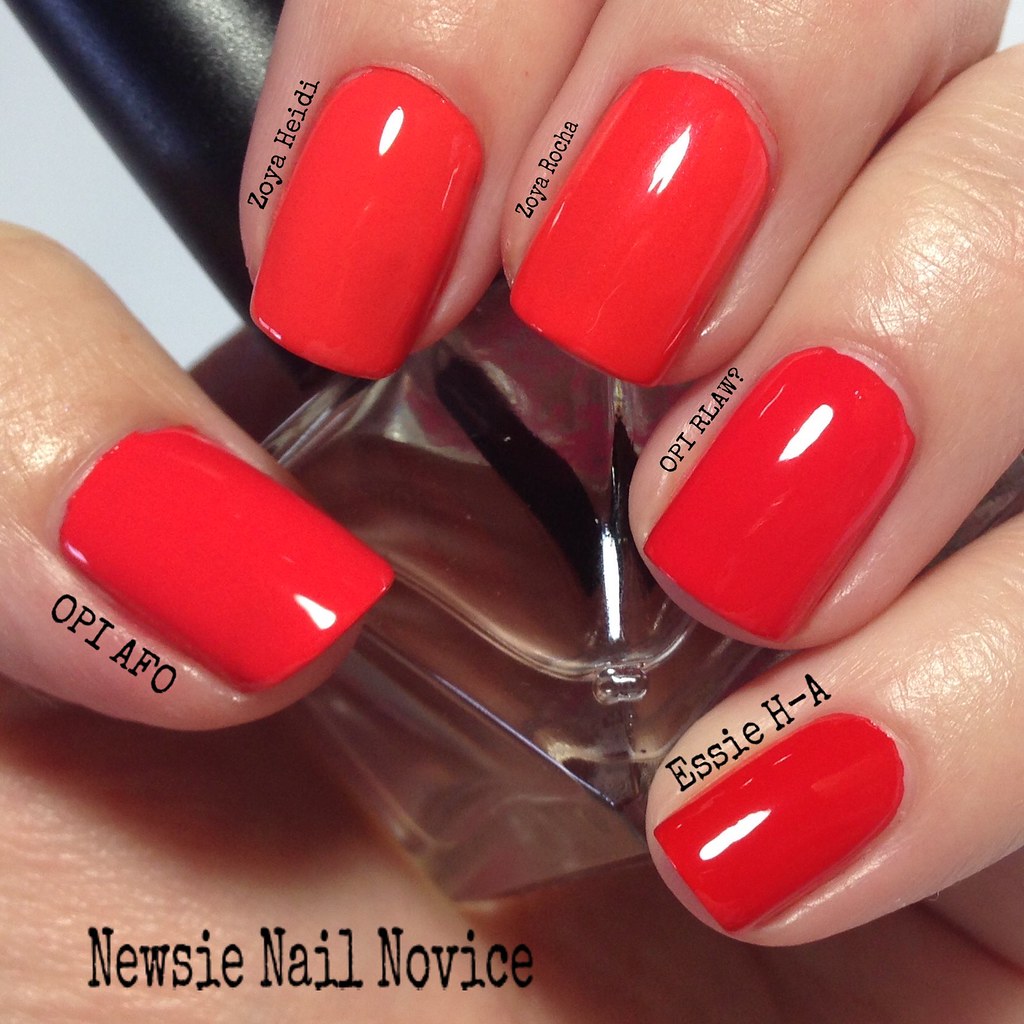
From thumb to pinkie:

OPI Aloha from OPI: This was my newest addition to my coral collection, and the real reason this post came to life. I had to see how my new polish compared to my collection. While I love the color of this one, a bright perfect darker coral, the formula was not great, it took three coats for this opacity.

Zoya Heidi: This polish is an oranger leaning coral, but still a big favorite of mine. This is two coats.

Zoya Rocha: Almost a dupe with Heidi, except it has a very hidden shimmer and is a smidge darker, that you can only detect in certain lighting. This is two coats.

OPI Red Lights Ahead, Where?: My all time favorite coral, and it still holds true. More of a red orange coral, bright and pigmented. I just love this polish and it has yet to be dethroned as my favorite coral creme. This is two coats.

Essie Hip-Anema: This polish is less of a coral and more of a tomato red-orange. Still bright and well pigmented, and very good for stamping! This is two coats.

Now on to the indie holos! Some of these are a stretch for coral, but I picked all my polishes in the pink/orange/reddish coral family. We'll start with the lighter/pinker colors.
Untitled

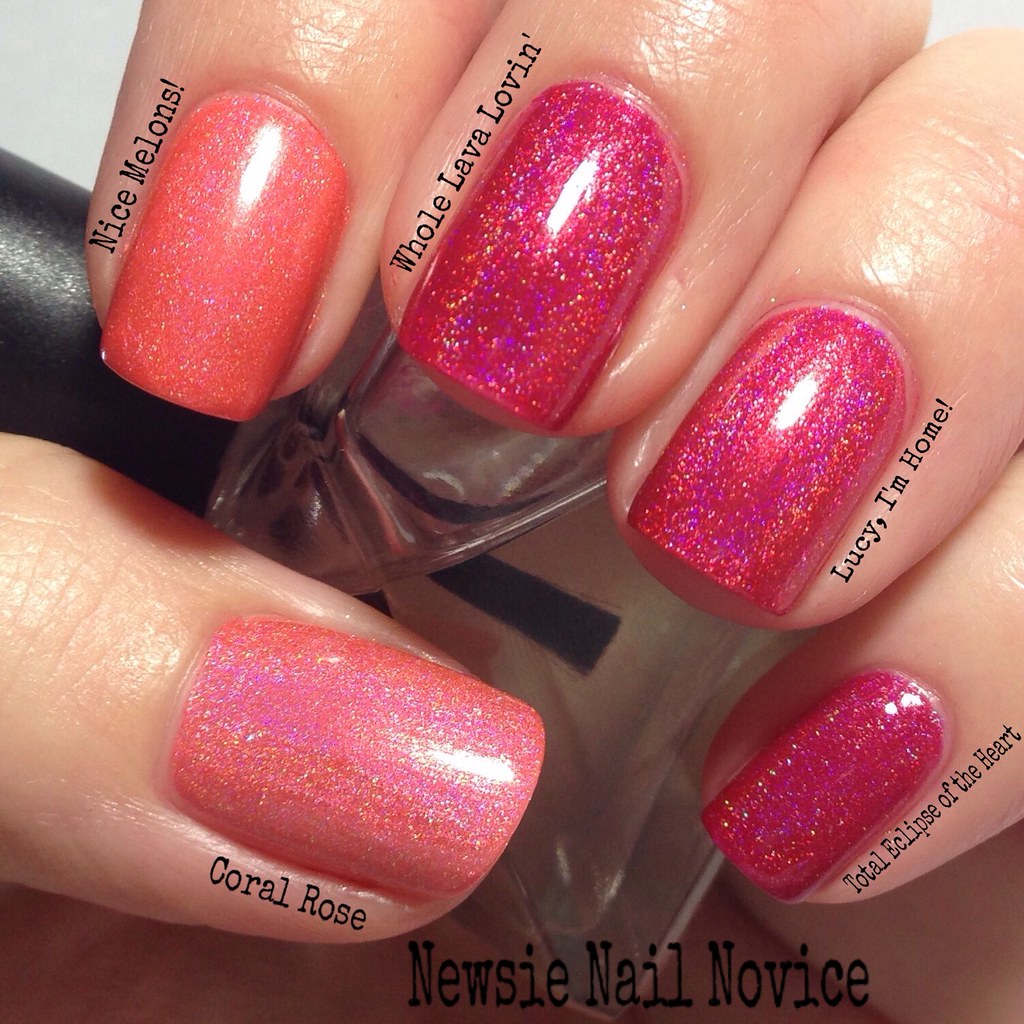
From thumb to pinkie:

Different Dimension Coral Rose: This is truly in the lighter pink coral category and was my first coral holo polish. I do like it, but I favor a more bright and vibrant, less pink holo! This polish took three coats for this opacity.

Colors by Llarowe Nice Melons!: This is less of a coral and more of an orange peach holo. This polish was very bright, but had the weakest holo glow of the lot of holos I feature in this post. This was opaque in two coats. 

KBShimmer Whole Lava Lovin': This polish is a bright pink holo that leans more cherry to me. Though it looks very similar to the next two polishes, it is a tad lighter, just didn't really photograph that way. It is happy and bright and fun, this is two coats. 

Colors by Llarowe Lucy, I'm Home!:This is a bright pink coral holo that is just lovely. When I originally purchased this, I thought my search for the perfect coral holo was over, that was until I discovered the world of orange-red holos (my more preferred coral family color). This is two coats.

Fair Maiden Polish Total Eclipse of the Heart: This polish is a tad darker than the previous two, but is the brightest polish of the group, but leans a darker more raspberry pink holo polish with stronger violet undertones. This is two coats.

Now on to the orange/red holos!

Untitled

Smitten Polish The Second Lobster: This polish was an oops mini batch from Smitten, and I just had to get it since I love The First Lobster so much. It basically is a lighter less bright version of The First Lobster (middle finger). This also had a thinner formula and required three coats for opacity.

KBShimmer Rust No One: This polish leans just a tad more orange and darker than The Second Lobster, but is a really gorgeous orange leaning coral in my eyes. I just love this polish. This is two coats.

Smitten Polish The First Lobster: I think this polish still holds the title of my favorite coral polish, though some wouldn't classify it as such. But this is one of my absolute all time favorites, it is bright and the perfect amount of red-orange holo. This is two coats.

Elevation Polish Yeti Hides in the Mini Apple: This polish popped up this year and quickly stole my heart. I thought it was a real contender to maybe dethrone The First Lobster in my heart at my top coral holo, but this is a more cherry holo. Still gorgeous and amazing in its own right. The formula was perfection, almost a one coater. This polish also had a golden shimmer and flakies inside, setting it apart from the other classic holo finishes featured here.

Bear Pawlish Bathory: Bear Pawlish is a newer to me brand that I haven't had a ton of time to play with. I threw it into this post, because I orignally purchased this polish because I thought it might be in this family of color. It's not, instead is a gorgeous smoky raspberry, a perfect fall holo in my opinion. I have nothing in my collection like it. This is two coats.

So which polishes win here? Well everyone's taste here differs. For me, I would have to say my two favorite cremes are Essie Come Here and OPI Red Lights Ahead Where? And for the holo category I would have to say Smitten Polish The First Lobster and Elevation Polish Yeti Hides in the Mini Apple.

But there is a shade of coral here for everyone to love. How do you like your corals, more light than dark? More orange leaning or pink leaning?

Have any coral recommendations for me to check out?! None of these are actual dupes of each other, they are just close, which is why I feel justified in owning them all! :-) Hope you enjoyed this post, it was a lot of work to put together!!!

Monday, March 23, 2015

ILNP Fame, Timeless Vow and Peri Me

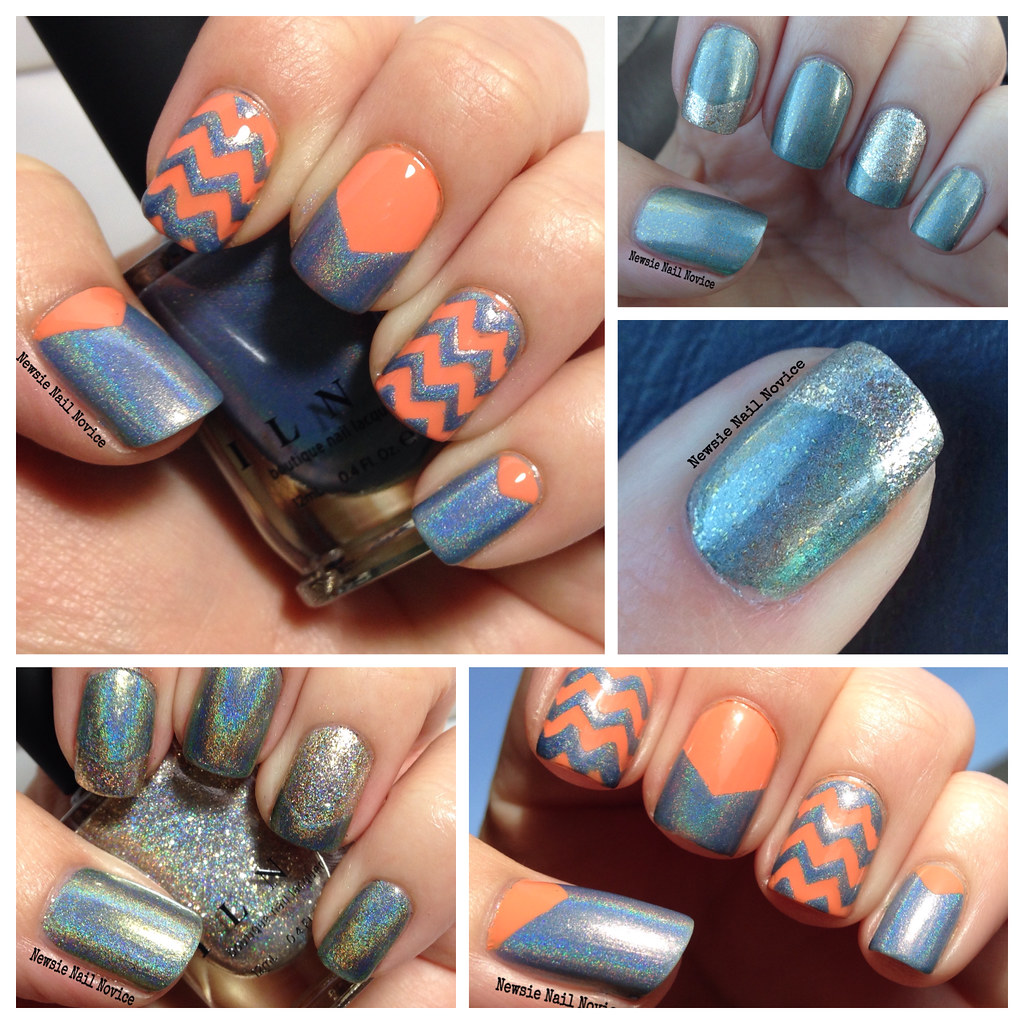
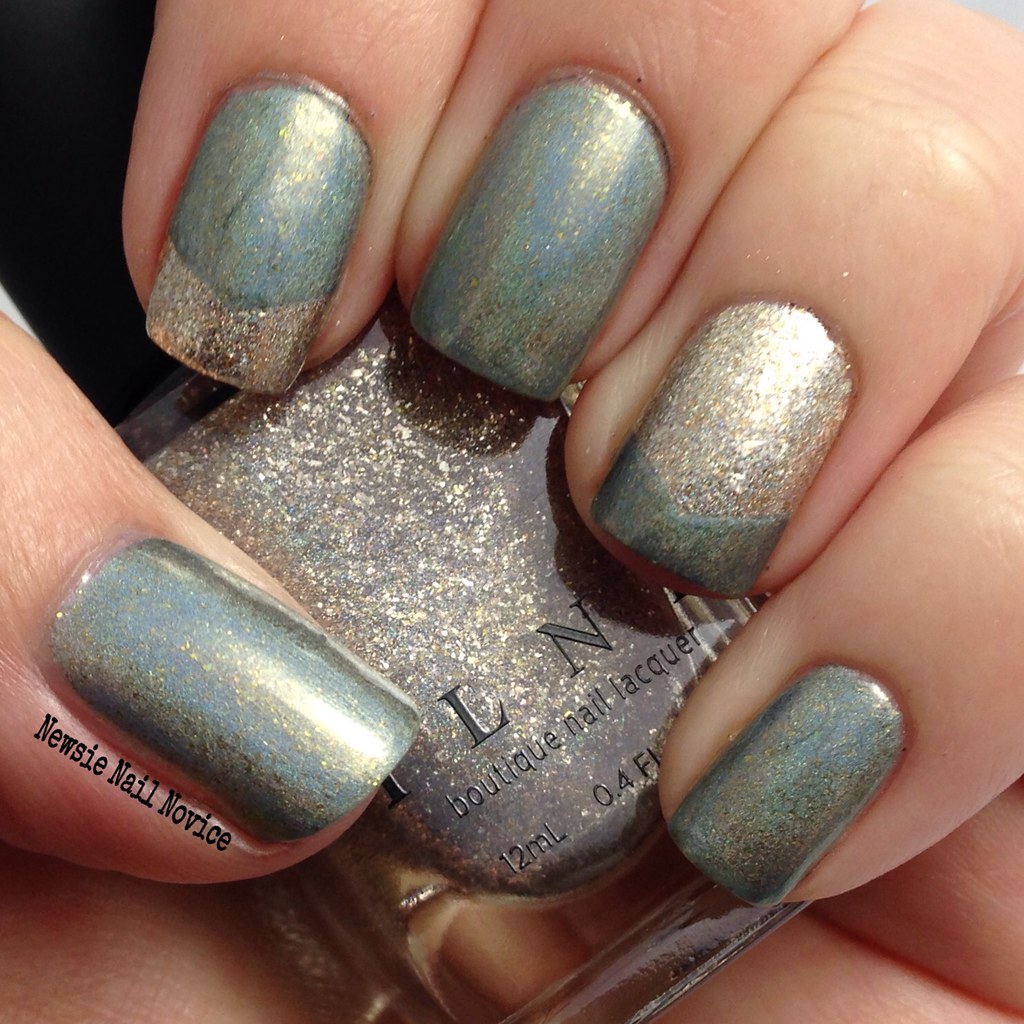
So last week I received a super hefty order from ILNP Spring Collection, which I happened to purchase during the preorder phase. These polishes, along with a ton of other amazing polishes, will be available in early April. I just loved these looks so much that I wanted to share them now!

Untitled

I just used nail vinyls to create these looks. I used KBShimmers Chevron guides and Nail Vinyls Single Chevrons.

Untitled

Untitled

Untitled

Untitled

Untitled

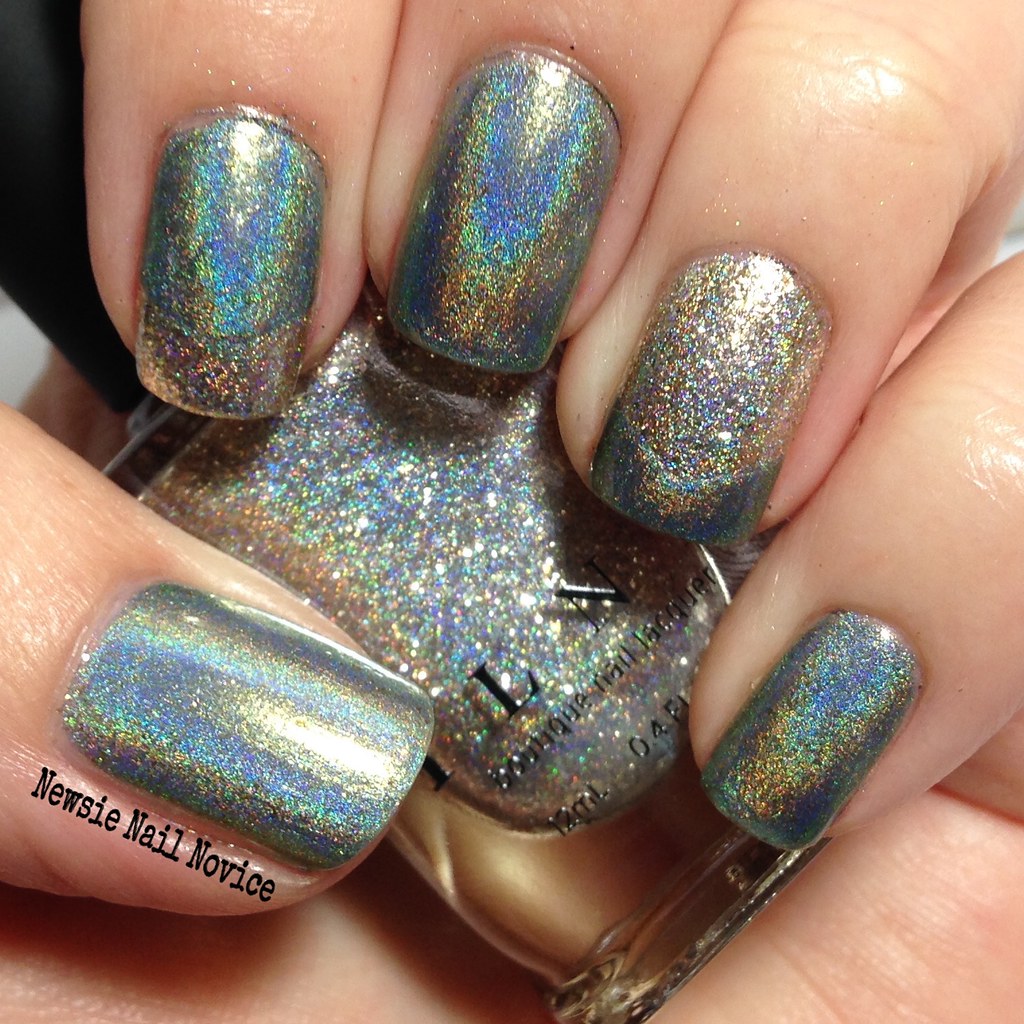
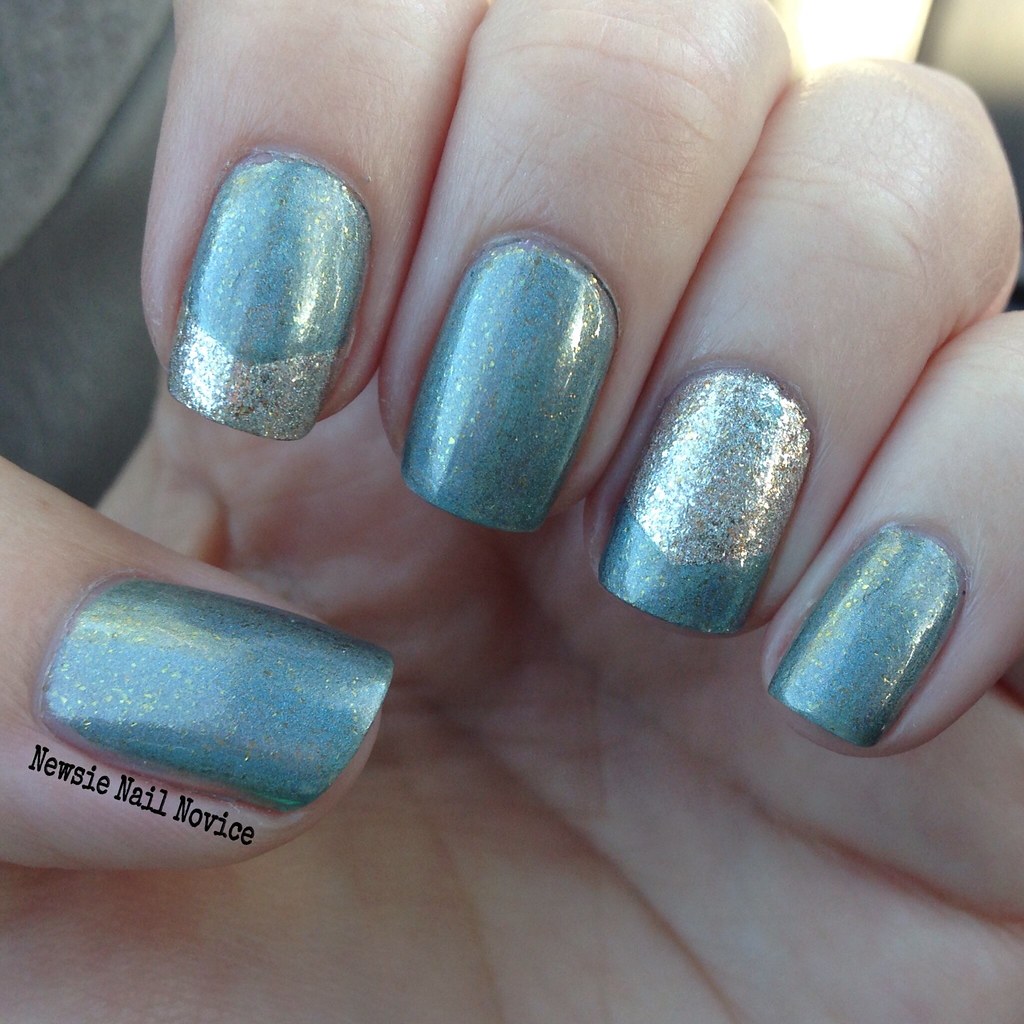
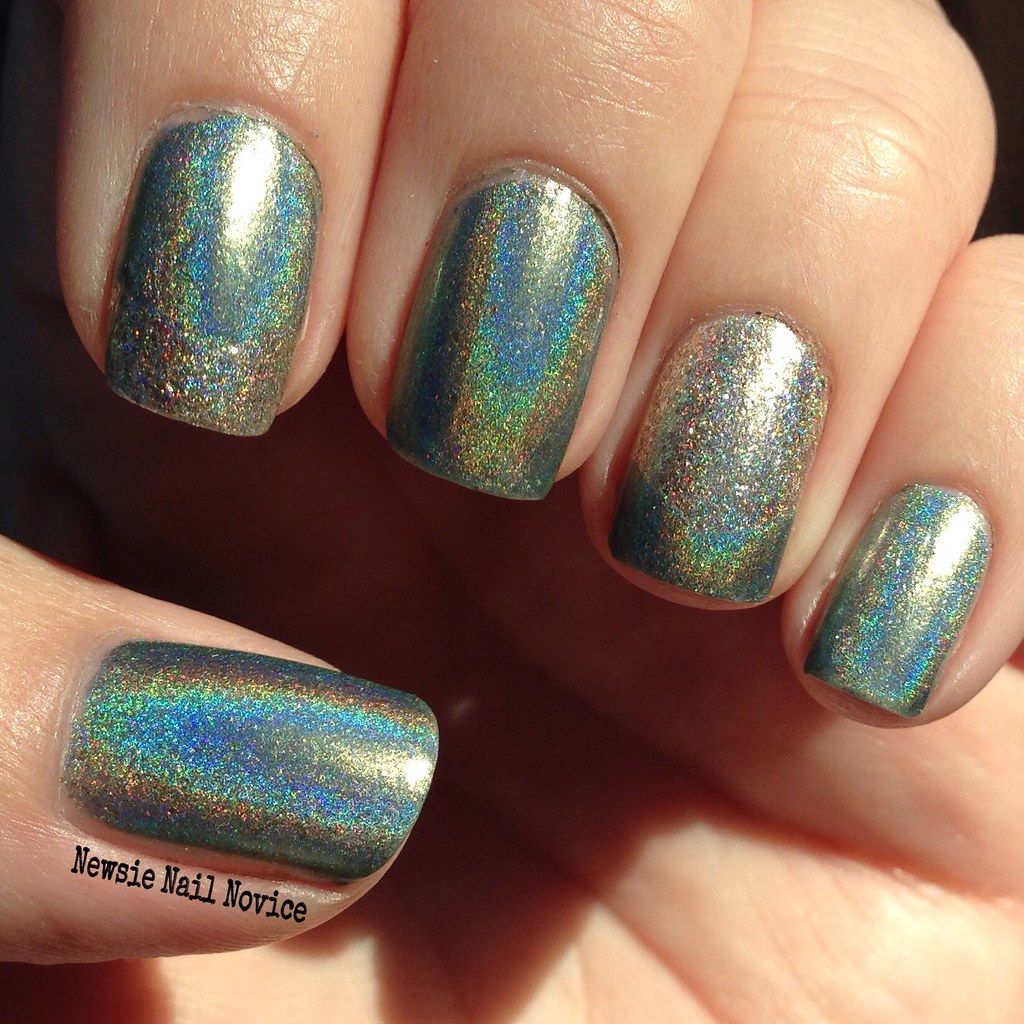
The first look I created I chose two polishes I got that I thought were complimentary to each other! Timeless Vow is a sage green holographic polish with bronze gold flakies scattered throughout. The holo in this is very strong in the sun, and in the shade the bronze flakies come out to play! The formula was on the thicker side, but not impossible to work with. Beware of brushstrokes, it's not as bad in that regard as other polishes, but they do still occur (see pointer finger). This application was opaque in 2 coats.

Fame is a super reflective silver flakie holo with the same bronze flakies interspersed throughout. The bronze flakies are what tie these two polishes together. This polish was super bright and holo in the sun and the in the shade it is super blingy and that is when the bronze flakies appear! This was also opaque in two coats, those flakies are really packed in there!

Untitled

Untitled

Untitled

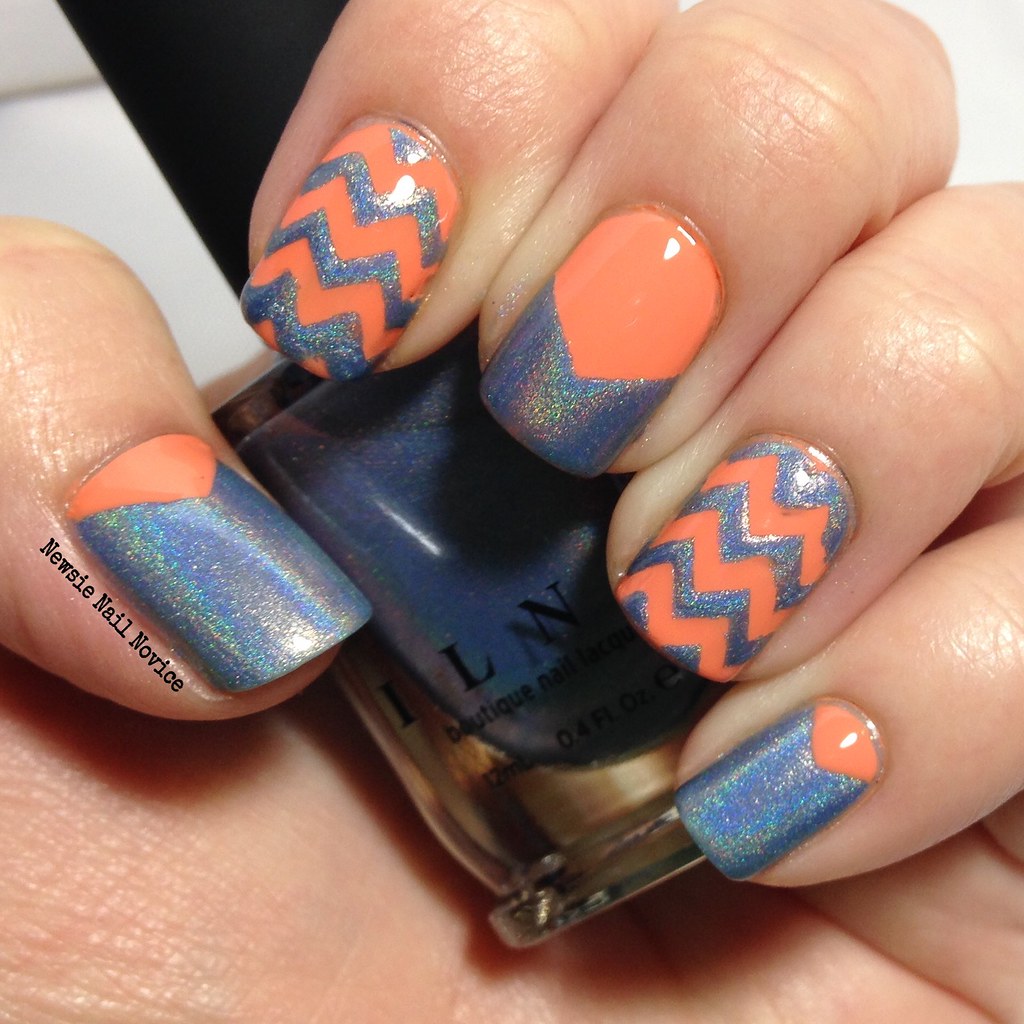
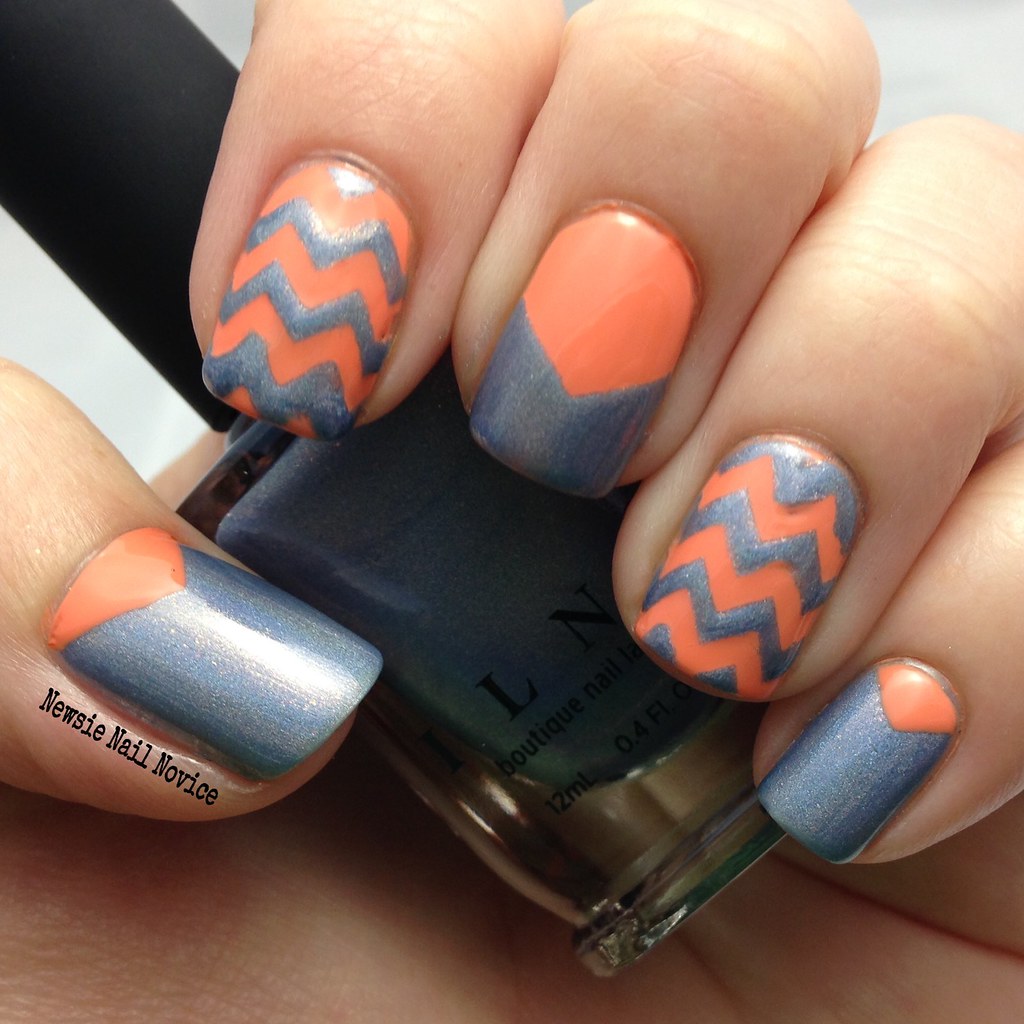
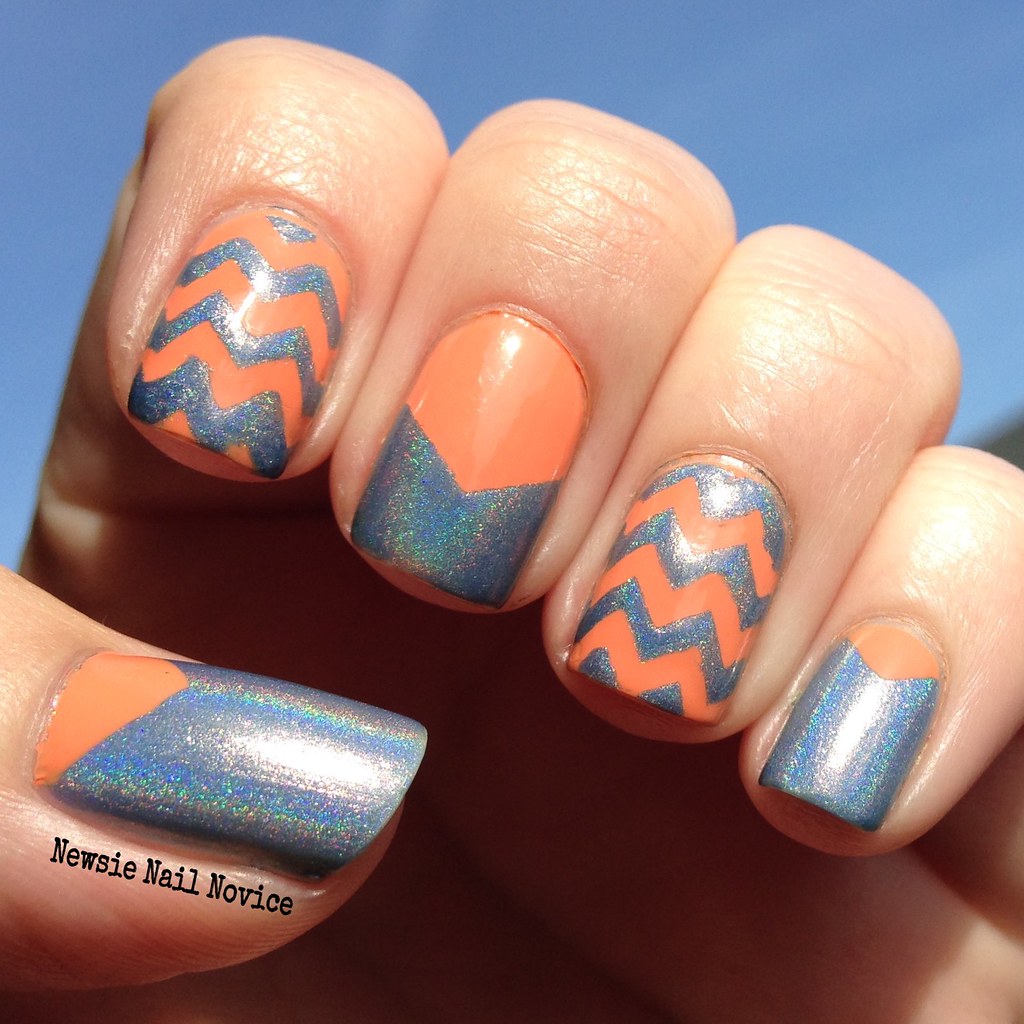
For this second look, I paired ILNP Peri Me with OPI Is Mai Tai Crooked? When I pulled Peri Me outside of the box, I noticed it has this amazing orange glow to is, along with some matching flakies. So that is when I went to my stash to try and pair it with a complimentary polish that would bring that special glow out.

Peri Me is very similar to Timeless Vow in application and appearance, though I didn't have the brush stroke issue. This was opaque in two coats, but I added a third for ultimate holo shine. I really liked Peri Me and I'll definitely be breaking it out again for many manicures. The perfect periwinkle polish – super holo in the sun and subtle flakies and glow in the shade.

A word of warning though, if you want to recreate this look, make sure to use Peri Me as the base polish, then layer the orange on top. I didn't do that for the pointer, middle and ring fingers and I have some nasty stains from OPI Is Mai Tai Crooked? Which is a bummer, but whatever, tis the life of a frequent nail polish wearer.

So did you pick up any ILNP poishes during the presale? Which are your favorites? Looking to pick something up with they are officially released? I still have some holo flakies to share and some more holos from this giant ILNP order I had (thanks to an awesome birthday gift certificate I received), so expect to see those soon!

Tuesday, December 23, 2014

A Christmas Skittle

To end this epic challenge, I decided to have a little bit of this and that! A combination of things I hadn't tried yet but were oh-so-holiday-esque!

 photo 5B73EC3C-38F1-4DBD-8A11-7514701ECC20_zpsavs3ptbj.jpg

I used a host of polishes for this challenge. For the Candy Cane nails I used a base of Painted Polish Ho-ho Holo and painted the stripes with Sally Hansen OMGhost.

 photo F5194AC1-AE70-451F-8822-9E7A325E0DAB_zpsq9g1wzm8.jpg

For the base of the middle three fingers I used Literary Lacquers I Heard the Bells (a polish I got for free for shopping on Black Friday and purchasing a certain amount).

 photo 25FFD40D-AD1E-4B04-9267-895D524283BF_zpsu8q9rr0a.jpg

Then I used KBShimmer's holiday nail vinyls, the one of ornaments and trees, and painted a coat of ORLY Candy Cane Lane and OPI Christmas Gone Plaid (which I just won off a giveaway from Danele at Low Country Lacquer), leaving I Heard the Bells in the center making up the trees and ornaments.

 photo 33849EFF-1E6F-47B1-B6D7-3EF61B317711_zpsdx7woyrk.jpg

For the final nail, I wanted to do a Christmas tree a-la what I have seen some other people do online with the striping tape. And to top the tree I used a glitter piece for KBShimmer Pine-ing for Yule.

 photo 1A2853DE-7C17-4B17-B5B5-9B629E99411A_zpsvnravpqv.jpg

Overall I really LOVED this challenge and I am so excited that I participated. I had such a fun time seeing what everyone else did with the prompts, I am truly grateful too because I feel this challenge made me grow in my nail art skills.

I'll do a wrap up of all my art tomorrow, and I'll give a sneak to what I did last year (which REALLY shows how much I've grown, in photography and nail art).

But once more, please don't forget to hop around to the other lovely ladies participating in this challenge!


    An InLinkz Link-up


Wednesday, December 3, 2014

Christmas Tree Nail Art

Now we are on to the second nail art prompt for the 12 Days of Christmas Nail Art Challenge. Today's prompt is Christmas trees.

I decided to take a little less traditional route. Typically when I think about Christmas trees I think about green and red with twinkling lights and all that jazz. For this manicure, I decided to go the route of Christmas trees in their natural habitat before they end up on the tree lot (which incidentally I will be working at all month as a volunteer raising money for scholarships and grants).

  photo A8698481-2752-485E-921D-AC050D18C368_zpsjssphhlb.jpg

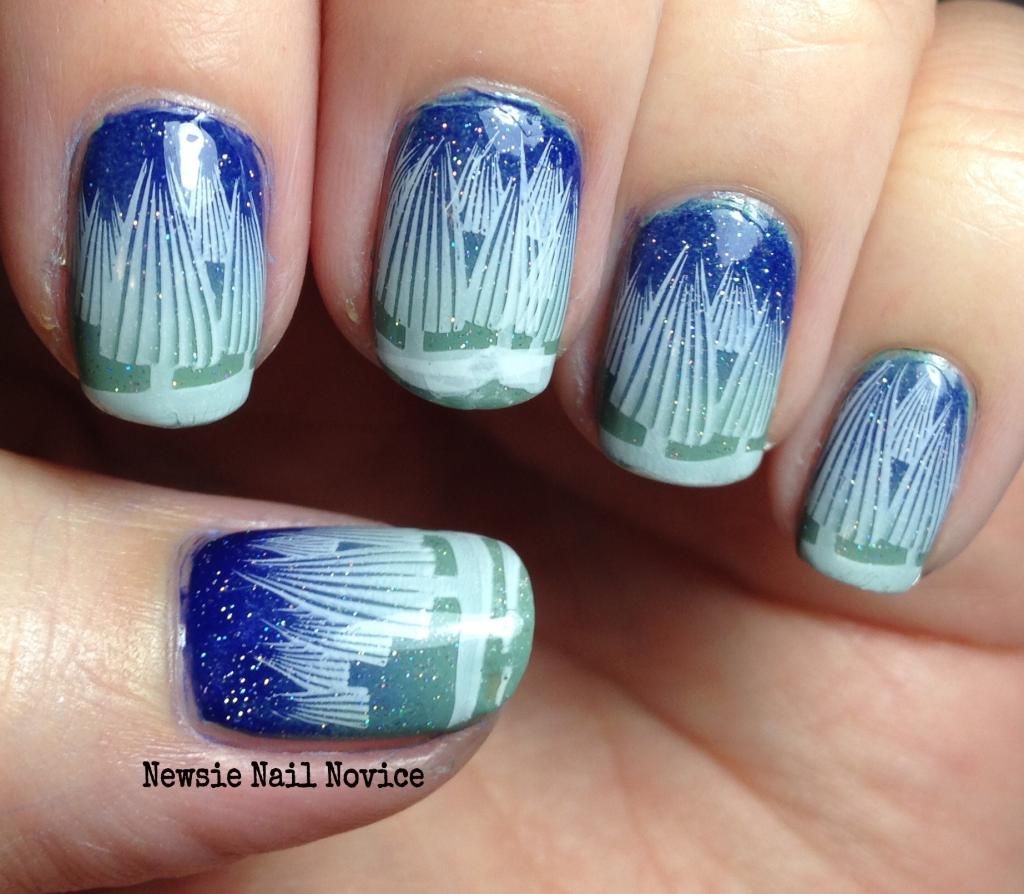
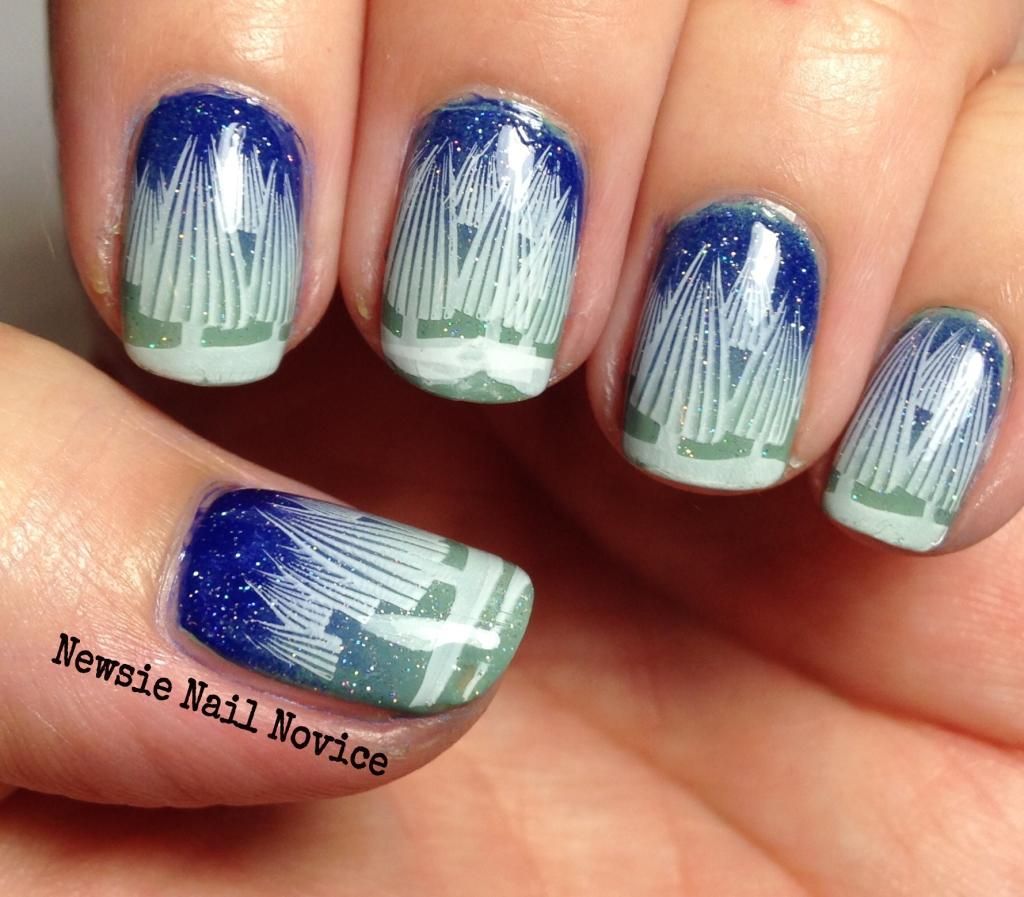
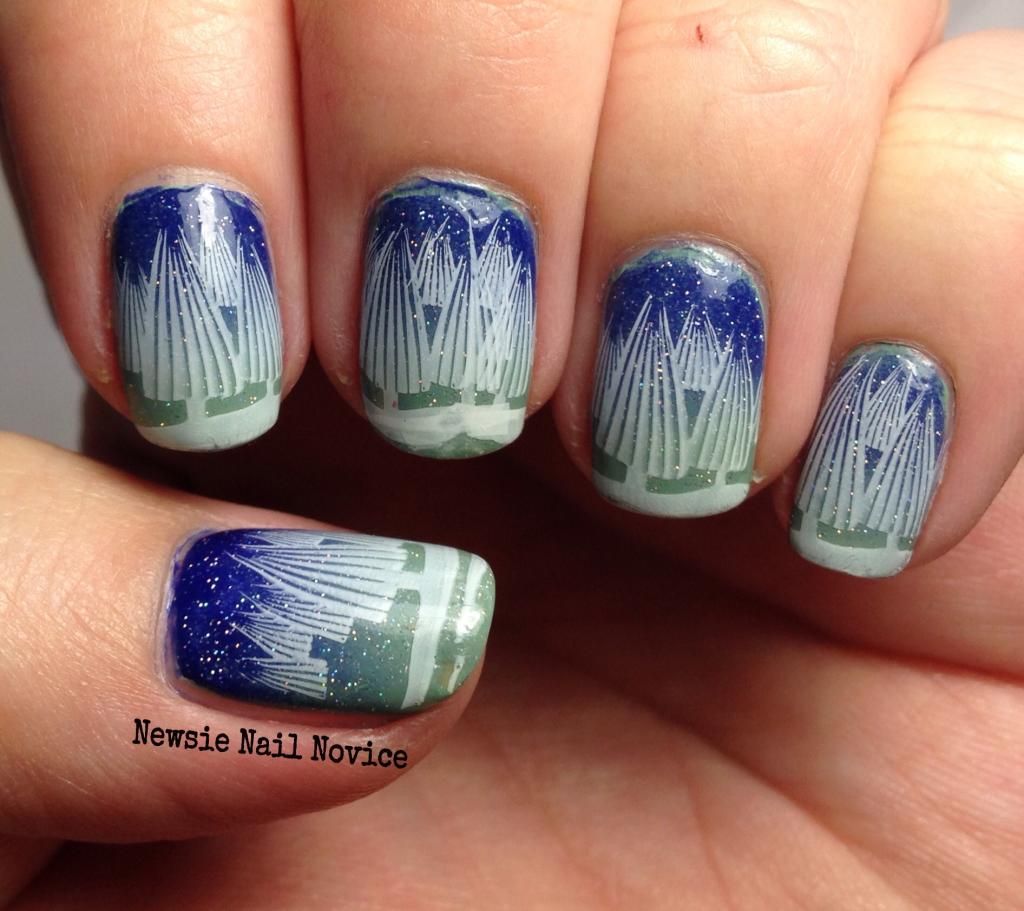
To start this manicure, I began with two thin coats of OPI Thanks a Windmillion, which is the green color here. Then I sponged on a gradient of OPI Eurso Euro to create a Nordic twilight atmosphere. Then to totally complete it, I added a coat of China Glaze Fairy Dust to represent the stars.

 photo 45B15BF6-E419-49DD-AC4E-BC9A1FC90E03_zpsaaohn6mw.jpg

After the gradient, I found the perfect stamp to complete the look. I broke out the Bundle Monster BM-H02 plate again and stamped the trees. I used Sally Hansen OMGhost to stamp with, which I find is a great white to stamp with. Perfect for a drugstore brand!

 photo D616E8C7-FCE8-4C68-B1D0-0B3FD09AA3D5_zps85yy4cnm.jpg

Now I feel like the trees get a little lost in the green, but I sort of like it. It is a really delicate and a not so typical take on the whole Christmas tree nail art.

  photo 3F60AAD9-08BE-4163-9F15-F5ABC7581FEB_zpsemlqobqv.jpg

And I had these nails on when I got my Christmas tree, so I just had to take a photo with it. I just love it! Looks great! What do you think about this look? Like it? Or do you prefer the more green and red look?

Don't forget to visit all the other ladies taking part in this challenge below!

Tuesday, November 11, 2014

The Ultimate Fall Leaves Gradient Nail Art

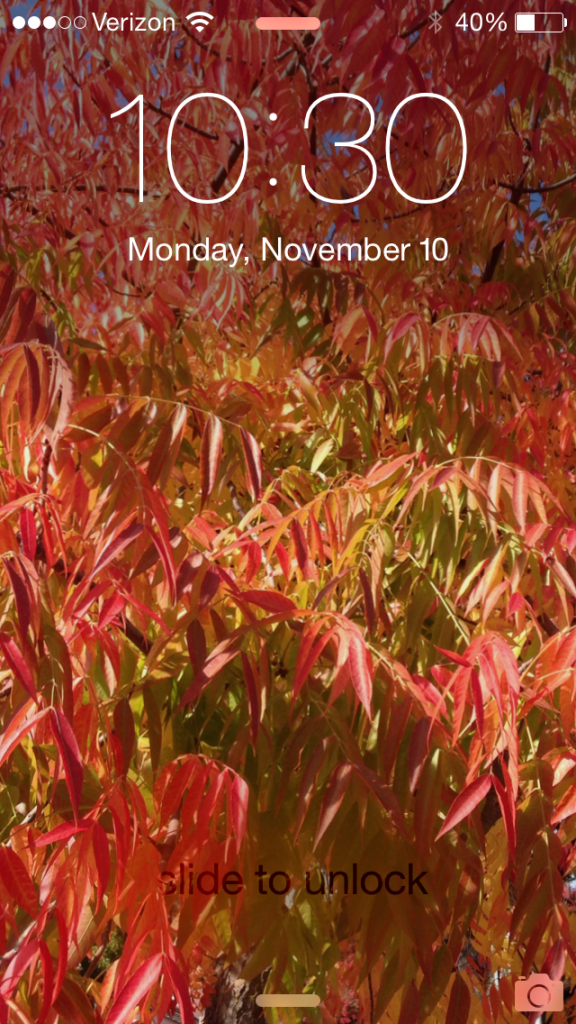
You guys, I love fall. And I love the fact that I get to work in a town with the most beautiful trees. I mean take a look at my background on my iPhone, I truly love these trees.

 photo 61C0C834-8724-4BB0-810C-51CA7F04042F_zps5qloaqng.png

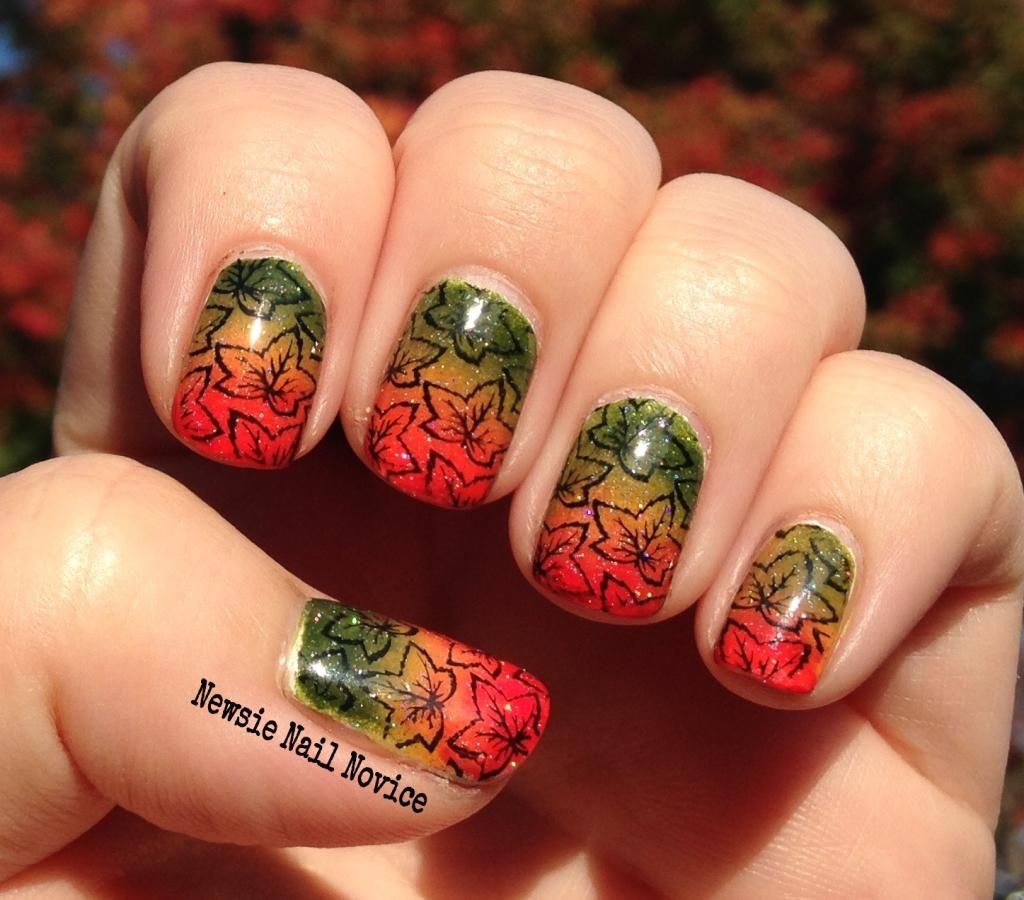
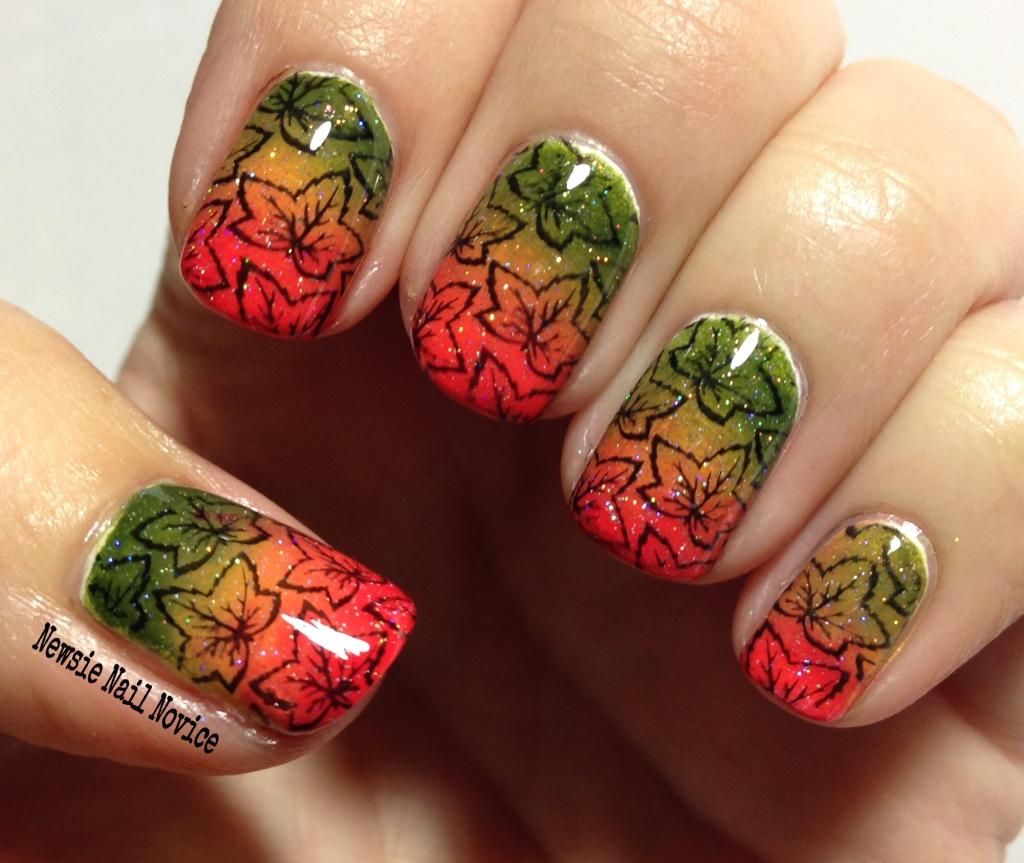
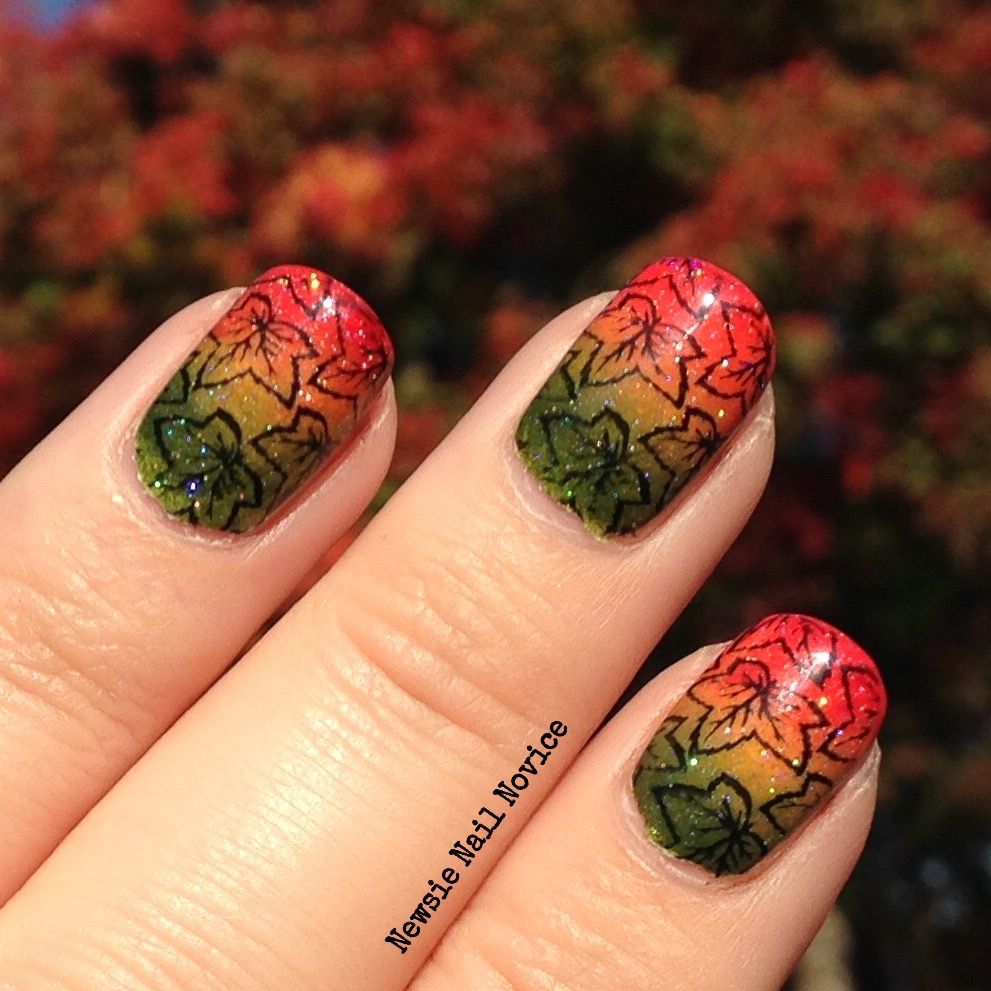
These trees are the Chinese Pistache, and Los Altos is full of them. They are green most of the year, and then every year in November, the leaves turn from green to yellow to the most magnificent neon orange-red. So in honor of these trees, I created a matching manicure.

 photo B2932019-E49A-4553-88A1-10761B53F717_zpsbzav3bqj.jpg

I mean I love this manicure so much, not only am I currently wearing it, I was originally going to wait to show you all this until Wednesday (to stick to my normal posting schedule). But I literally could not wait to share with you the amazingness that is this manicure. I think this might be my most favorite nail art ever!!!
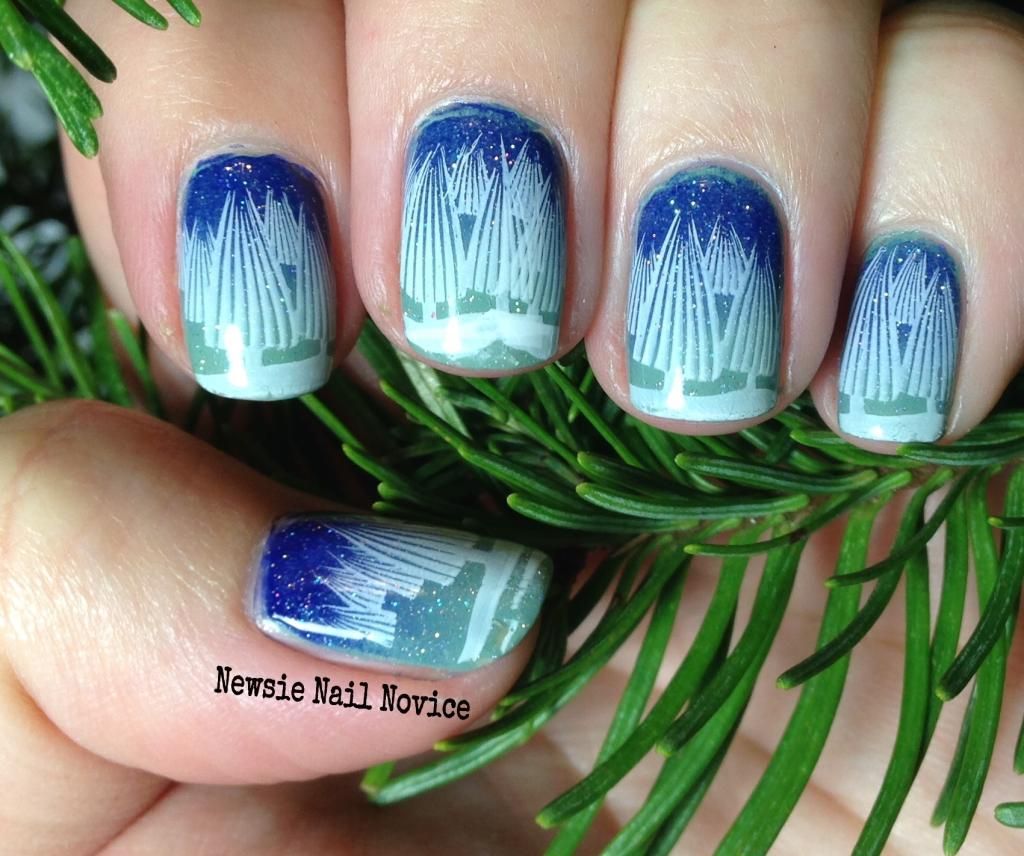
 photo 9BC36F21-0D8D-45E9-B6E7-6A9A07FB5BDB_zps4fa4zkro.jpg

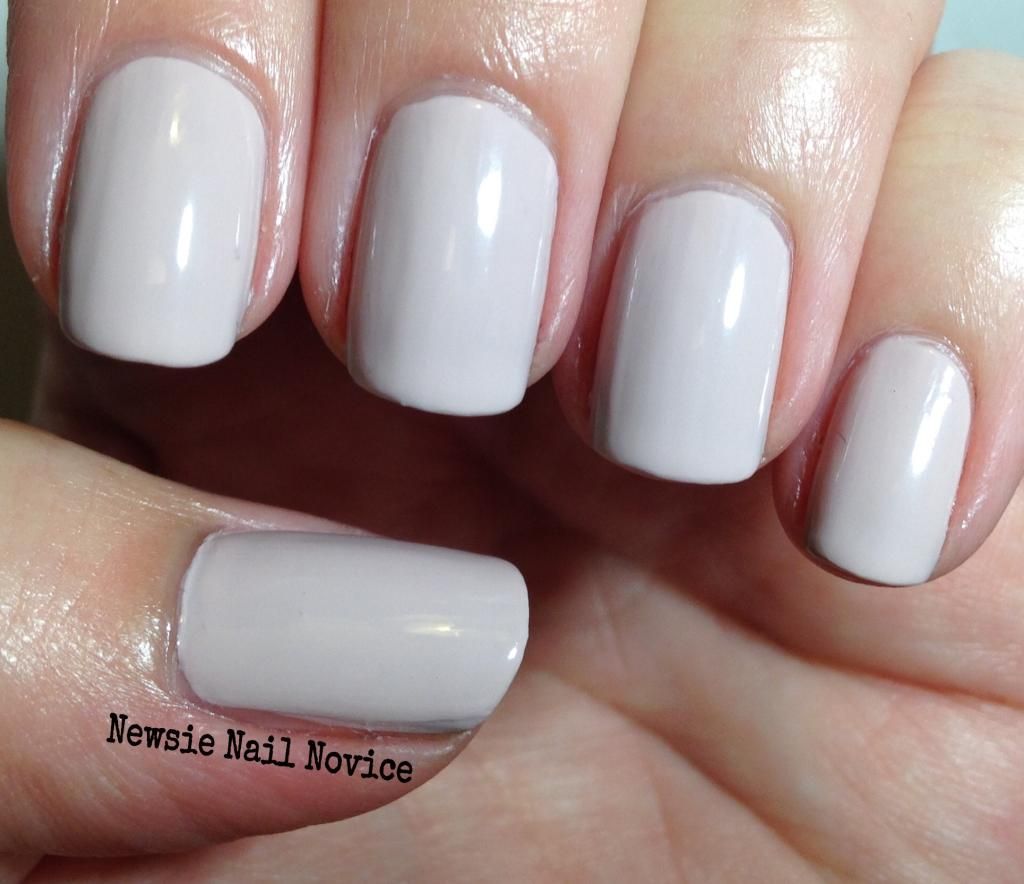
To start this manicure I did two coats of Sally Hansen OMGhost (which has a great formula, except for some minor bubbling, and is especially great for stamping). After that I sponged on a gradient of Zoya Shawn, Kiko Melon 356 and OPI Red Lights Ahead Where (which is I think my most favorite coral creme of all time, see my blog header).

 photo 10E0AAB6-E231-4E4F-BA26-08DDF4076FC9_zpszuxtgcxc.jpg

And then, because I still am super critical of my gradient, I added a layer of China Glaze Fairy Dust, because Fairy Dust covers a multitude of mistakes. To finish it all off, I stamped my favorite fall stamp ever, Bundle Monster BM H-11. I still feel like my gradient skills need some work, but practice makes perfect and I just truly love this manicure to death!
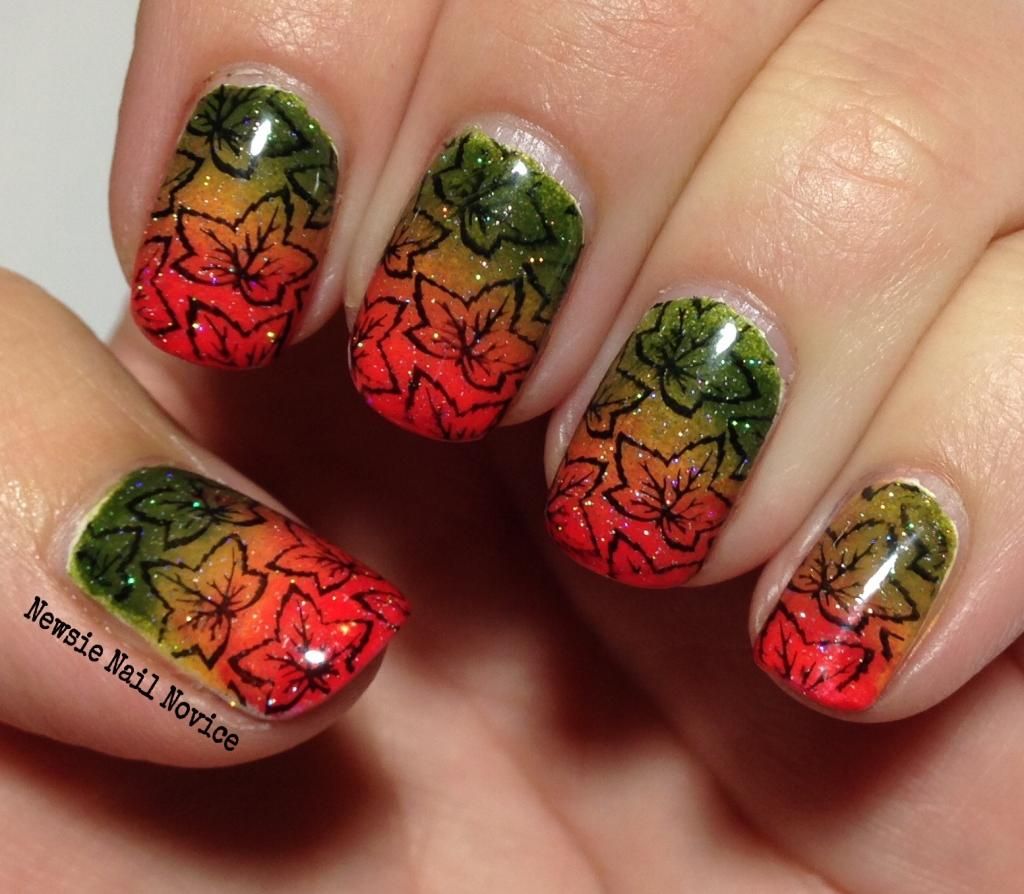
 photo EAC7A7BD-993C-458F-B7CC-7F9DA4049F63_zpsfuwaaud4.jpg

I never want to take this off, I am so in love with it! What do you guys think? I know a lot of us are all working on holiday nails in preparation for the fun holiday season, but I just can't get over fall. I haven't quite accepted winter is coming, because really in California, does winter ever really arrive?


Friday, October 10, 2014

Fall color dotticure nail art

To cap off this fun week I've had sharing nail art with you, I thought I'd try a dotticure with a neutral base!

I have a very hard time finding neutrals that work with my skin tone. I am actually a neutral skin tone, so warmer colors and cooler colors work well with my skin. But finding the appropriate nude polish has been a difficult journey.

 photo 37ACDDBD-12EC-4394-8033-41C20491BDEB_zpshlizedfb.jpg

So I picked up OPI Don't Bossa Nova Me Around recently and thought I'd give it a try. The formula is great, this is it above with two coats (no top coat). Not sure I totally like it with my skin tone, but I don't hate it, and for a nude that is actually a compliment for me. What do you think?

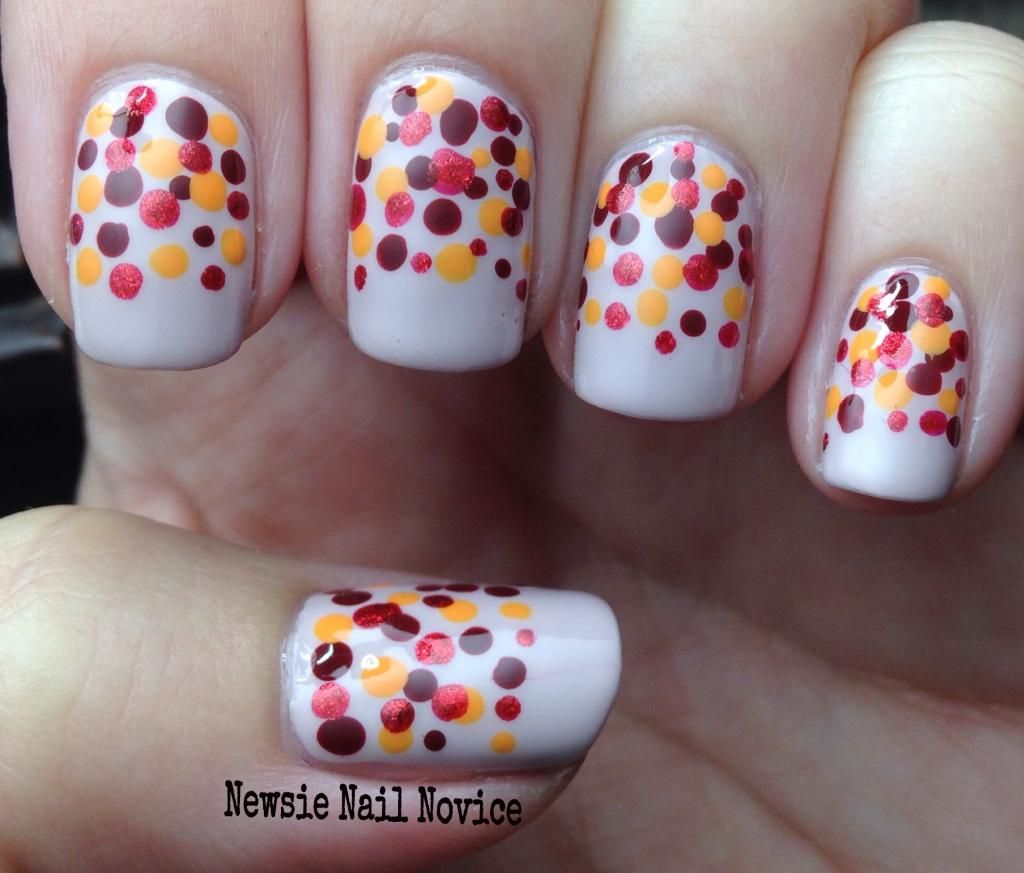
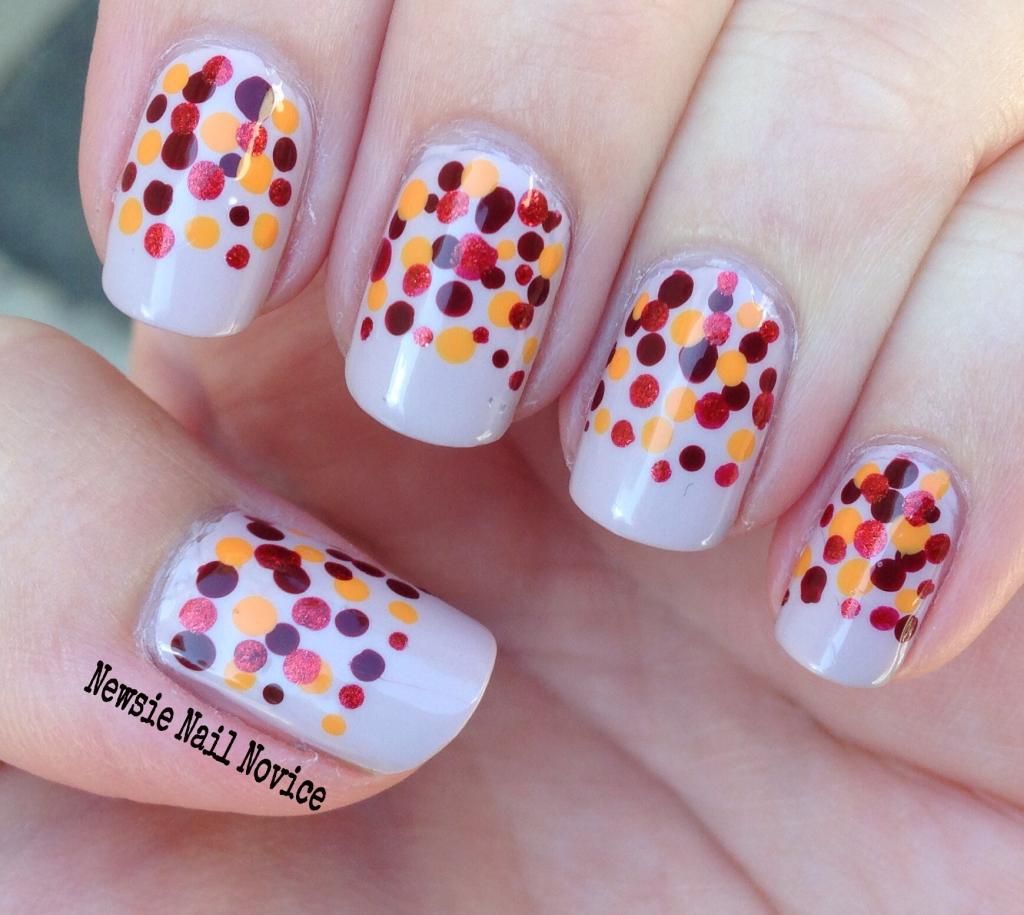
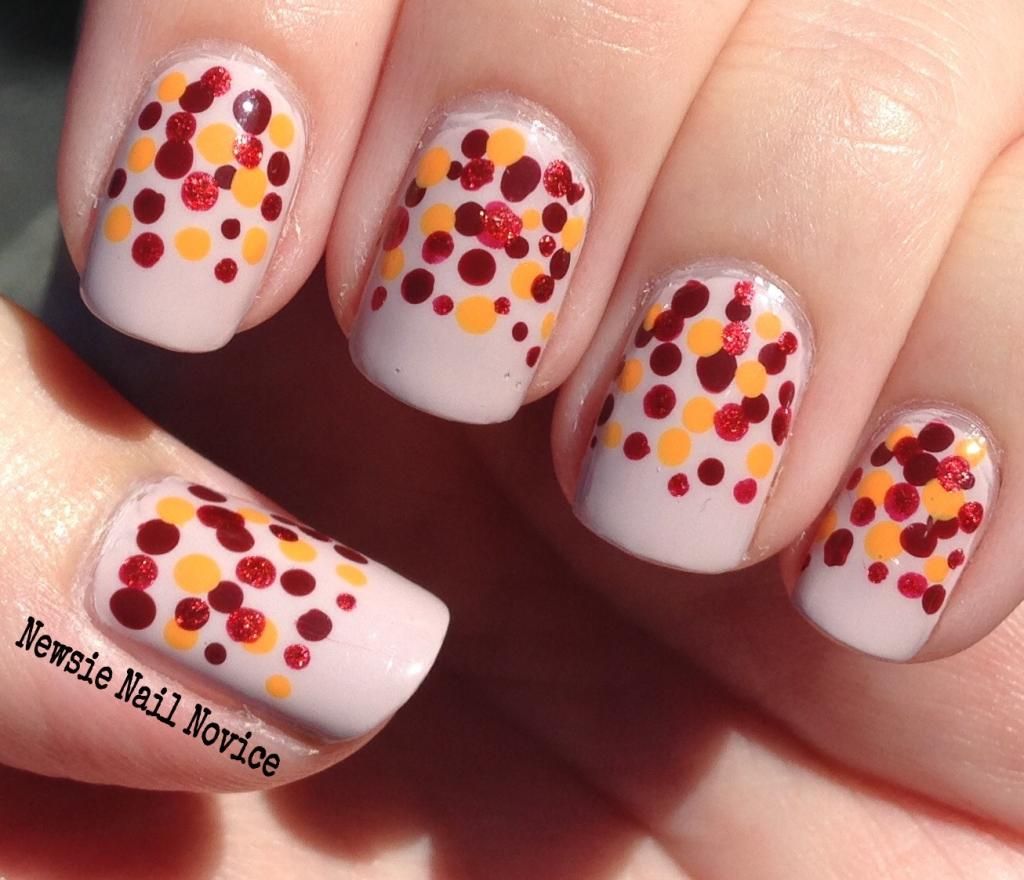
Anyway, wanting to make this a fall manicure, I thought I'd add a fun dotticure, after being inspired by some manicures I saw on Pintrest.

 photo C1038BD9-201E-44FE-9BD2-EFCBDE735671_zps8mdzazwm.jpg

For the dots I used Zoya Penny, a gorgeous darkened brick red creme, Kiko 356 - Melon (one of my Germany nail purchases), a mustard yellow creme, and Zoya Channing, a burnt orange foil polish.

 photo C24CB925-94E2-4A76-BDAC-2C62862BBE18_zpsvrpgwmoi.jpg

I placed the dots in a gradient like fashion, but I didn't want to cover the whole nail. I liked the look, but I wasn't totally in love with it. I think the nude I picked was a tad too pink, which made the look less fall like to me.

 photo EF5B181B-9AE4-4041-9D8F-B5FF46E8AE72_zps4fx4nj4p.jpg

But I really did like the combination of the dots and I thought it would be a neat idea to include Channing, a different finish, to mix up the dots. Neat?!? Who uses adjectives like that, I'm super lame. Hahaha, sorry for the random aside.

Anyway, I hope you liked fall week here at Newsie Nail Novice, I loved sharing it with you. And as of now, I have absolutely no idea what I'll share with you next week, but I have a lot in the vault!

Friday, September 26, 2014

Painted Polish Drunk on Holo

So we all know I am a fan of holo polishes, a real big fan. I just really love rainbows, they show the beauty of all colors at one time. Anyway, so browsing various nail blogs I kept seeing these AMAZING swatches of Painted Polish's Drunk on Holo. After seeing Sarah Lynn's nail art featuring it, I was done for. I knew I needed to have it!

 photo 393CC37F-1076-4E3B-8558-927C11E8A196_zpsn4rml7fp.jpg

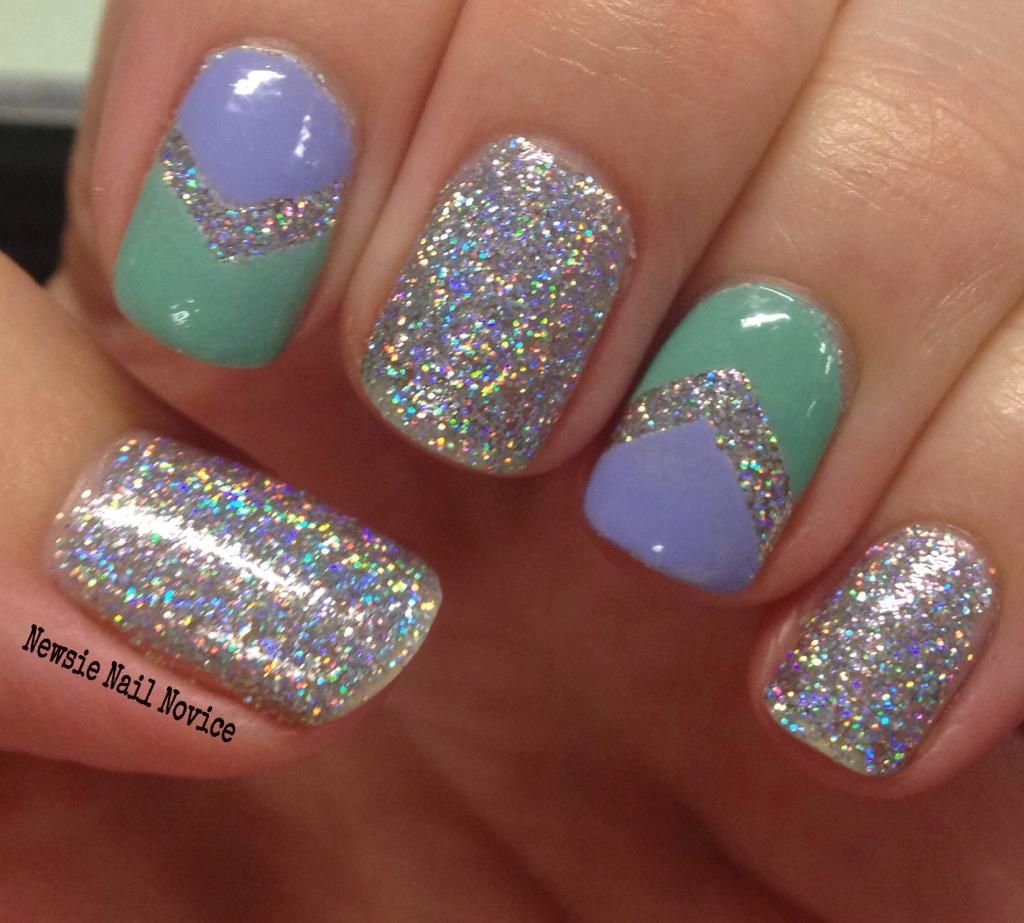
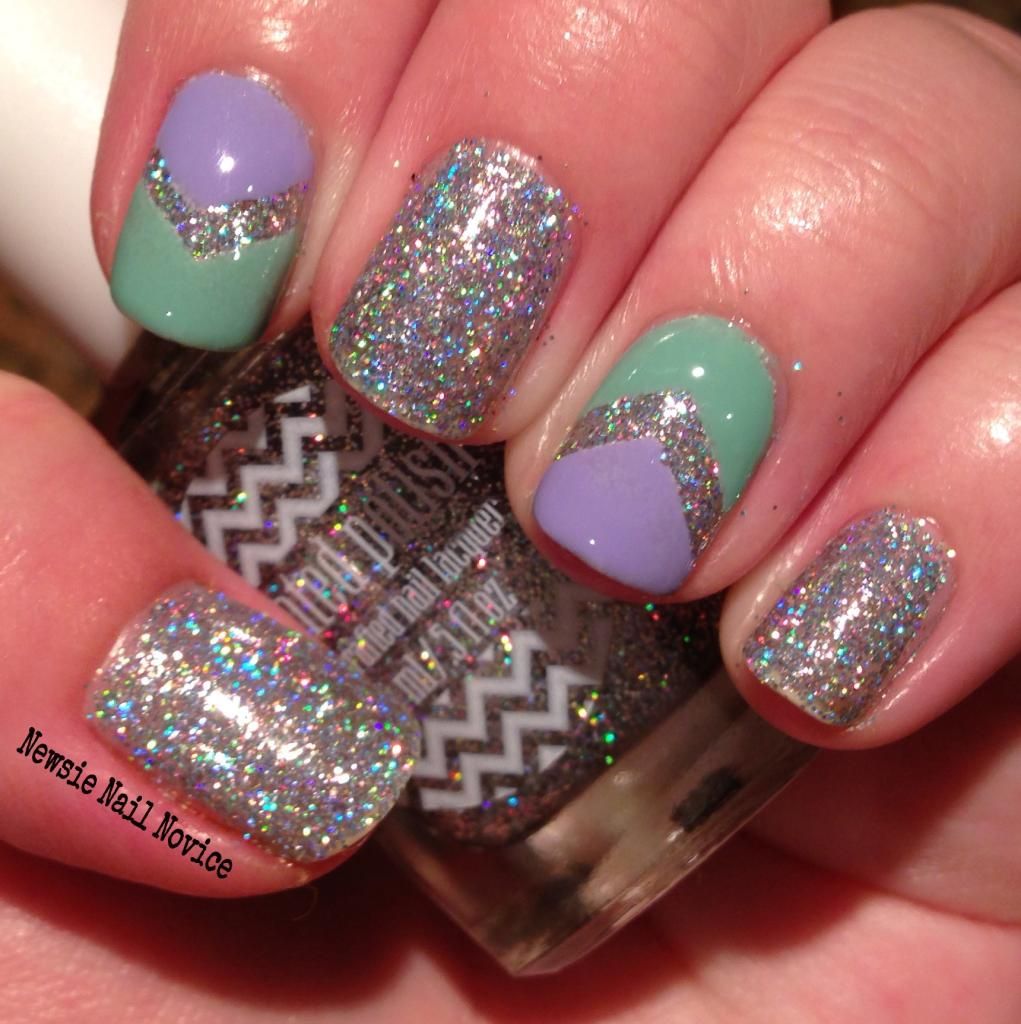
Drunk on Holo is a silver holographic polish with so much bling. I can't even describe to you how much bling this polish has. It is packed full of small holographic glitter in a clear base. For this manicure I think I used three coats for ultimate bling, but two coats would be fine I think.

 photo E4EF362A-0F06-4B9C-AF2F-9E9B862FA06C_zpshexs5p53.jpg

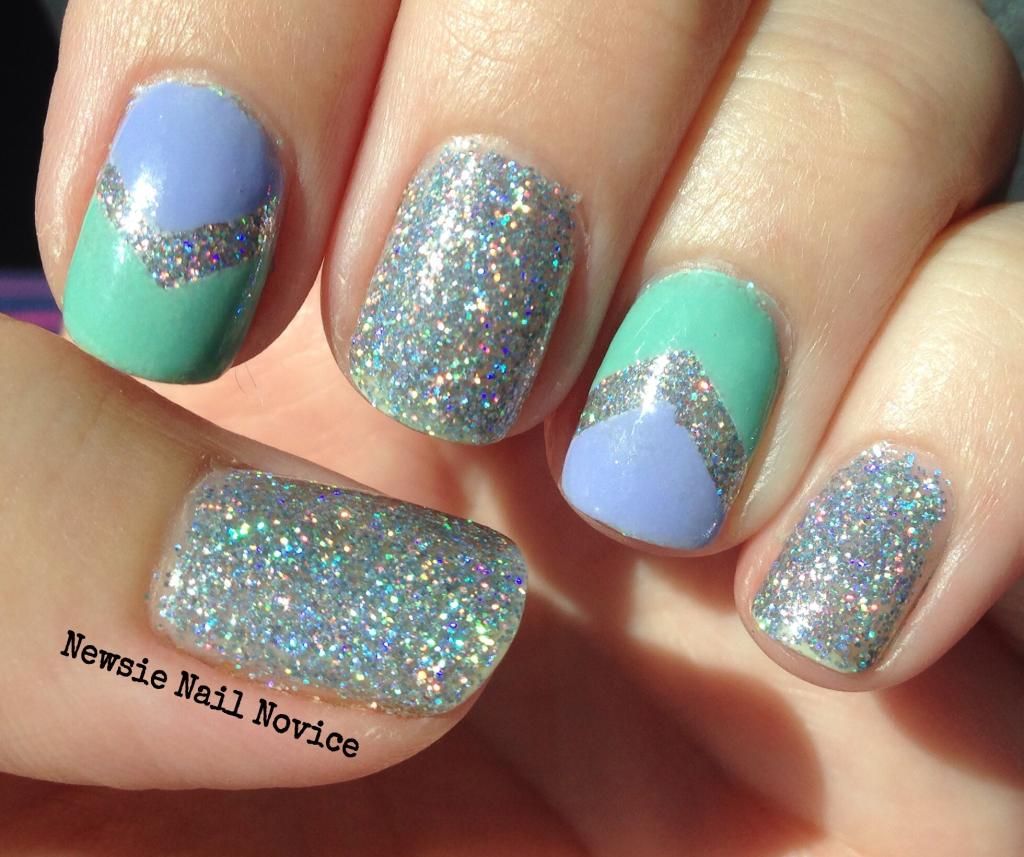
Because the rainbow showed some fun pastel colors, I decided to add some pastel colors to the manicure!

 photo 23991AEB-1BD0-4247-A7C5-A7C9D2B75745_zpsrjcrt6r8.jpg

I used single chevrons from NailVinyls.com, and then added OPI You're Such a Budapest and Essie Mint Candy Apple. I think the colors matched the holo beautifully.

 photo D7024D21-A090-4DC9-8EE5-1A7DA8586FC2_zpscuhggiqe.jpg 

But seriously, there is so much you can do with Drunk on Holo, I haven't even explored all the possibilities yet. Painted Polish restocks about once a month, but you'll have to stalk her via her Instagram or Facebook to find out when the next restock is. I promise you it will be worth it!

What do you think of my pastels paired with holo? What are your favorite polishes to pair with silver holographic polishes?!

Thursday, August 14, 2014

Guest Post from Cait at Polish Hound

While I am away I have some very gracious fellow bloggers filling in for me! Cait at Polish Hound was kind enough to share this look with me! I hope you enjoy! Make sure to follow her at the link below, you won't be sorry I promise! Her swatches and photography are top notch!


Hey guys! I'm Cait from Polish Hound, and today I'm mega-thrilled to be guest posting on Newsie Nail Novice!

I've got some simple and colorful dotted nail art to share.  I feel that if I can do this design, anyone can! This is only my second time attempting to make floral prints using dotting tools, and I think it went a little better than my first. Although, whether you prefer this style, in which the petals are more separated, or the first is really subjective.  There are so many ways to make flowers with dots, and it's going to be fun to experiment more in the future!


Polishes used:

The base color is Misa- Forbidden Lust. I used LVX- Cliquot for the stamping & center dots, and OPI- You Are So Outta Lime! for the green outer dotted petals. I love the color of the green petals, but You Are So Outta Lime! is a little sheer for dotting, and I had to go over some of the same dots twice, as you can probably tell. 

The stamped design is from MoYou London- Pro XL 11.


I'm just finally getting into dotted florals, (actually floral in general), and I don't know if the world is sick of them yet. What do you guys think?

Thank you, Traci, for having me! Hope everyone has an awesome day!