Showing posts with label Essie. Show all posts

Thursday, December 22, 2016

Snowflake Nails

Hey everyone! I've got another quick holiday look to share with you today!

Untitled

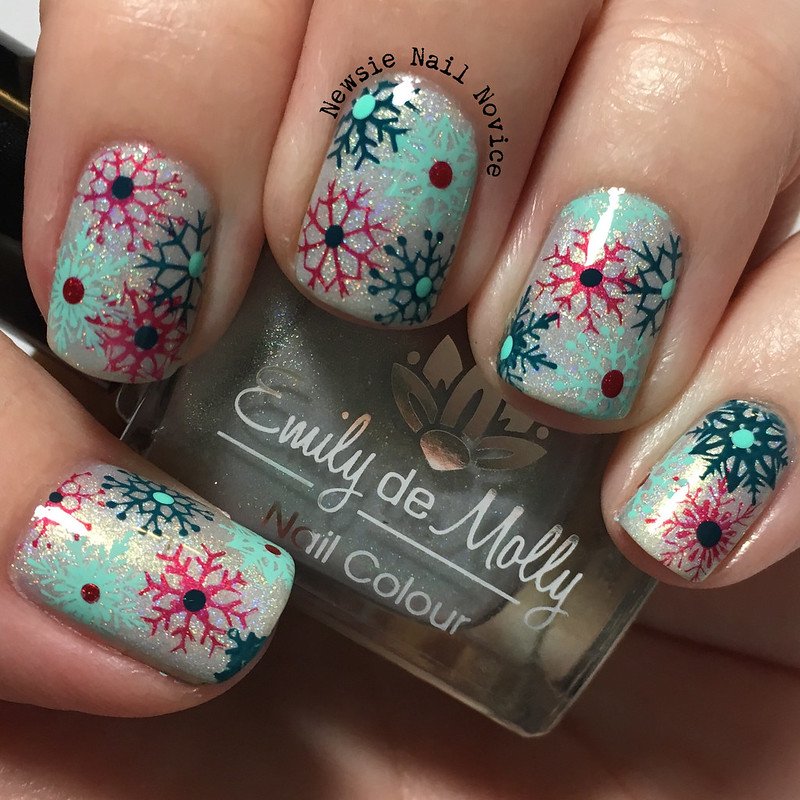
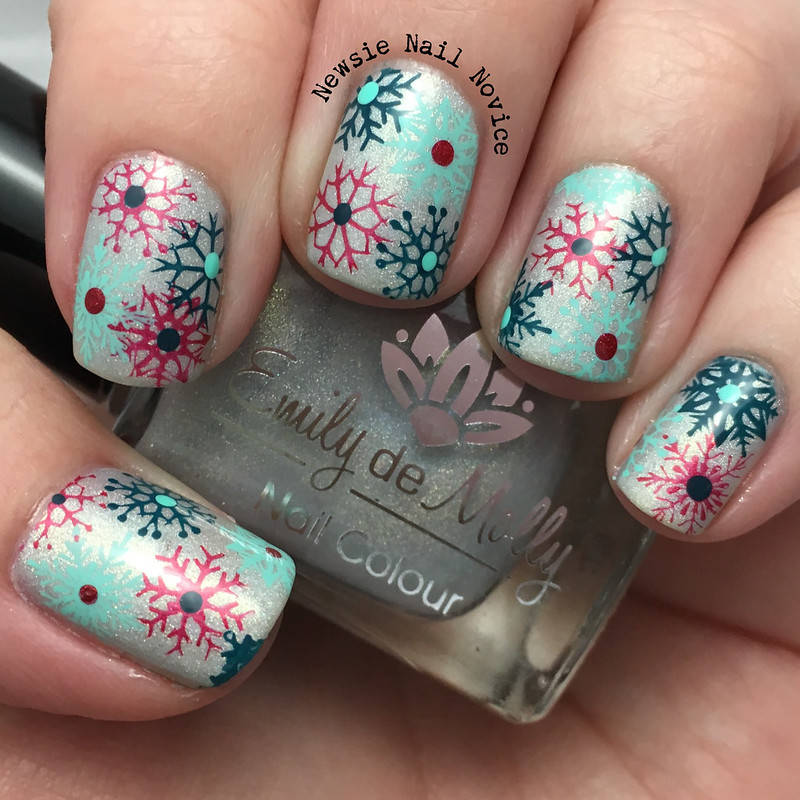
Tis the season for me gravitating toward not the most traditional holiday colors. I really like how this turned out!!!

Untitled

The base is Emily de Molly Crystal Crown – a gorgeous white holo with a golden glow.

Untitled

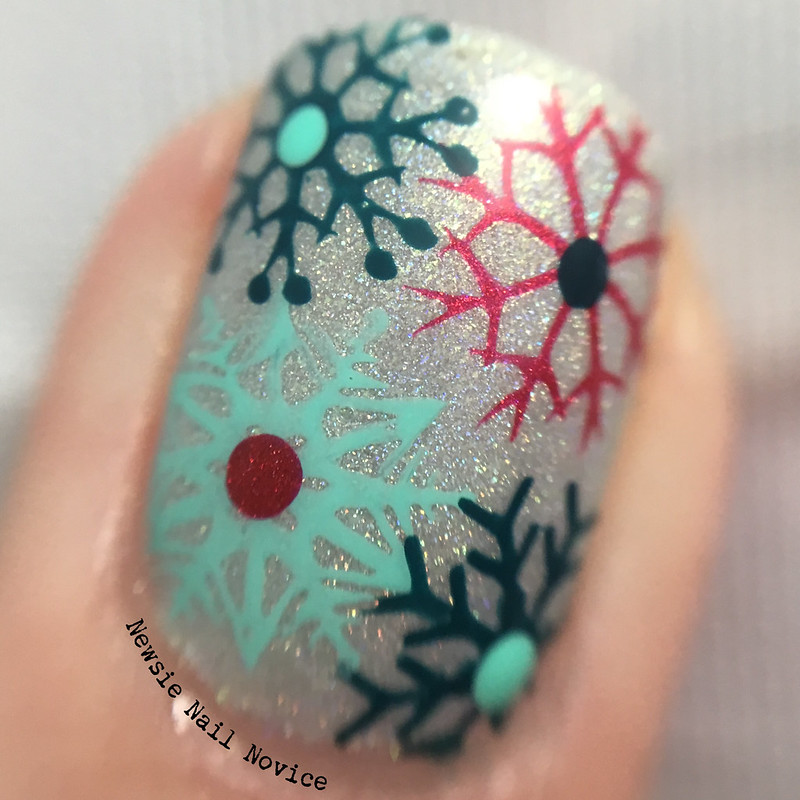
For the snowflakes I broke out Color Club Blue-ming (the aqua), Essie Go Overboard (the teal) and B Polished Red-y for the Holodays (one of my favorite classic Christmas reds). I used Bundle Monster BM-S216 for all the snowflake images. I then took a dotting tool to add to the snowflakes and tie the colors together!

Untitled

Anyway, things are winding down here at work, and I'm in twidling thumbs mode. I have one more holiday look I hope to get on the blog before Christmas and I should probably do my actual Christmas nails tonight. Or just pray the look I'm currently rocking lasts through the holiday!

Saturday, March 5, 2016

40 Great Nail Art Ideas – Pastels

Hey everyone! Happy Saturday! I'm out and about with my in-laws this weekend but I had time to write up this post ahead of time so that I could make my weekly challenge.

Untitled

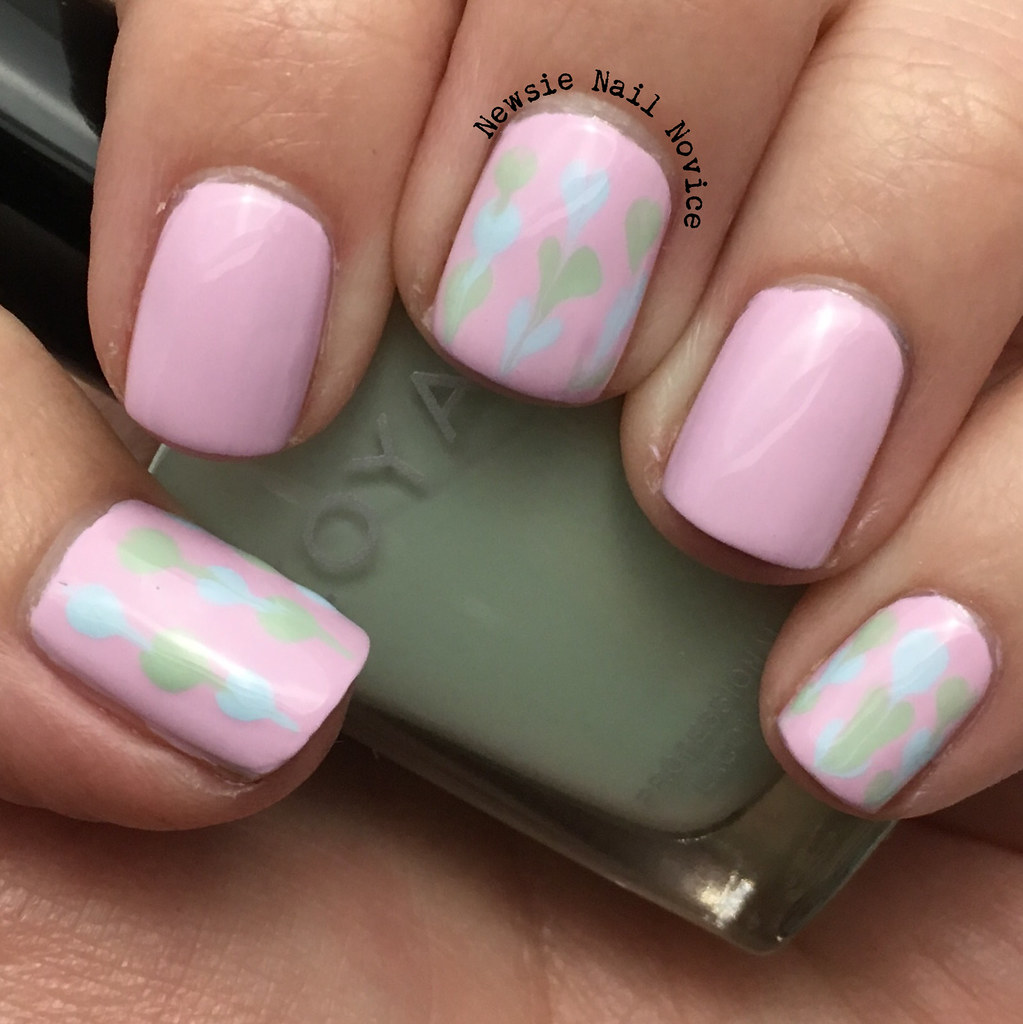
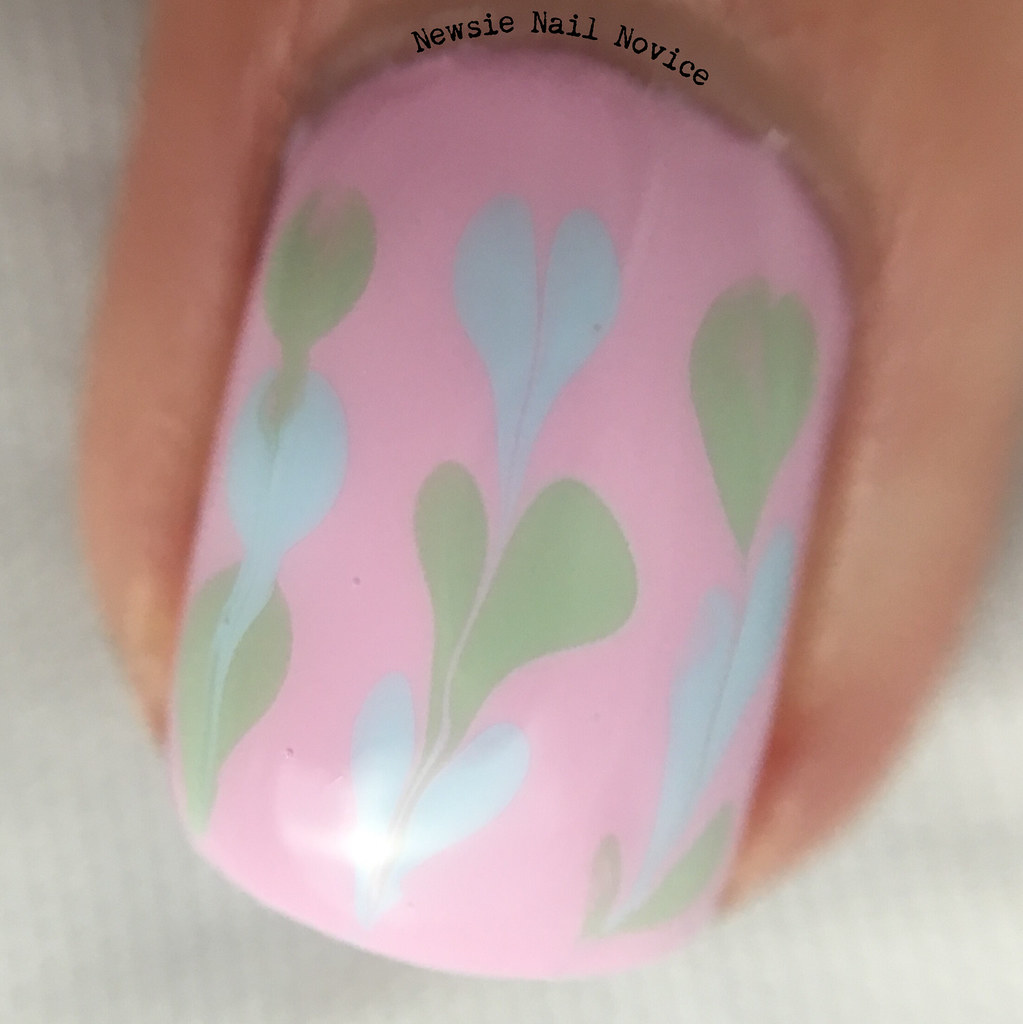
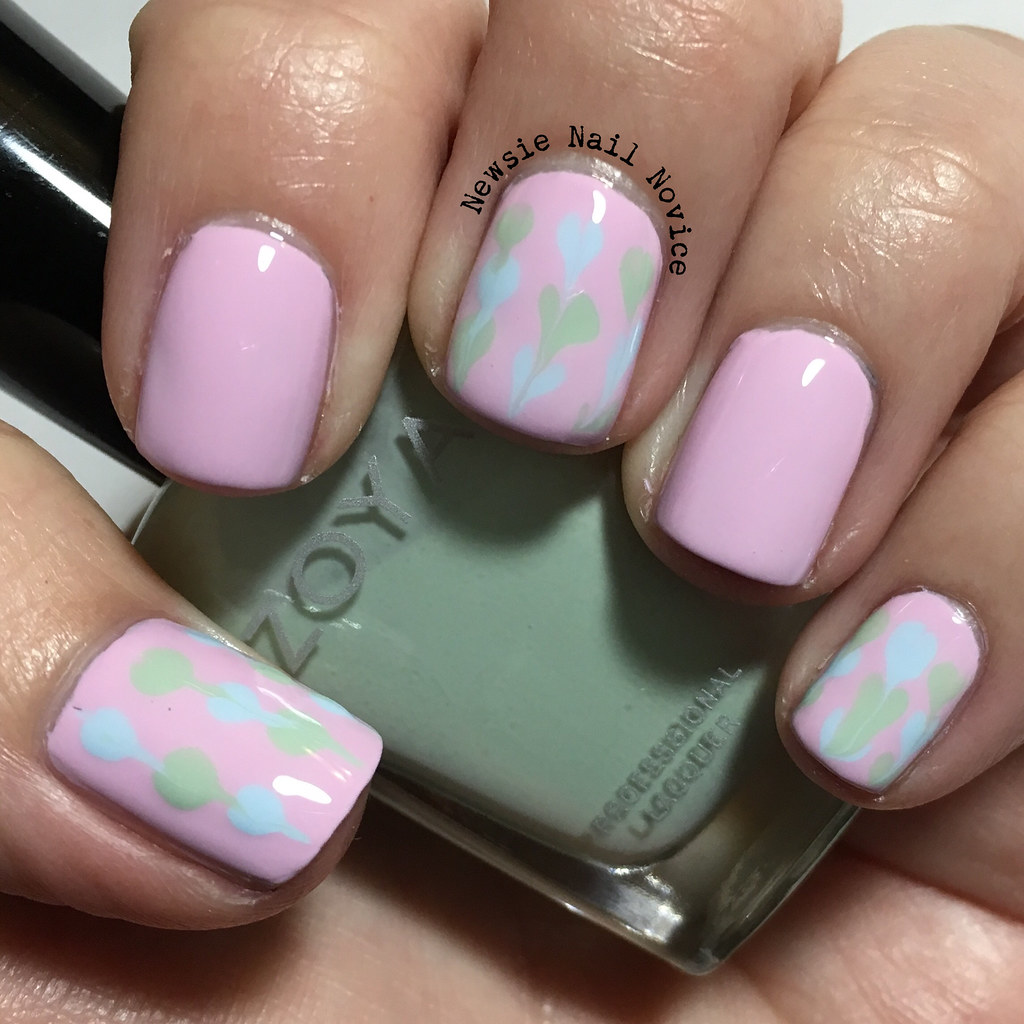
The prompt for Crumpet's Nail Tarts this week was Pastels and my added twist to the challenge is needle drag. Now I've never really done this before, so I wanted a few YouTube tutorials to try and teach me how. I was successful only once (as you can see on my nails)

Untitled

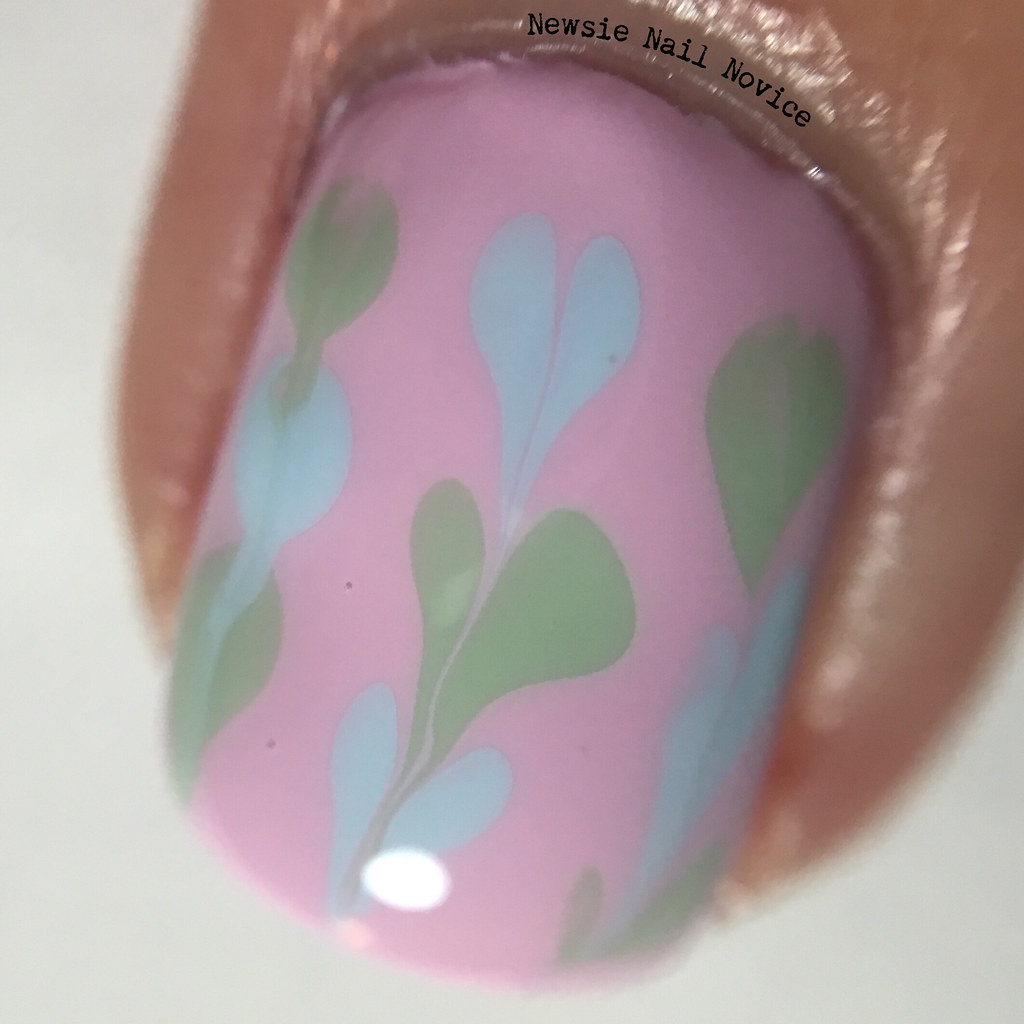
See that center line there, it actually created the hearts I was going for. The other lines on all the other nails were kinda fails. But hey at least the center one looks good.

Untitled

For this look I started with one coat of Essie Go Ginza. Once that was dry and I was ready to quickly do this needle drag thing, I added a thicker second coat of Go Ginza, and alternating dots of Zoya Neely and Blue. Then while the whole look was still wet, I took a sewing needle and dragged it through the dots to try an create the hearts.

Untitled

As you can see I was only successful once.

Anyway, I do kind of like how these turned out! An interesting look and I'm sure with some practice I could get better at this technique.

As always don't forget to check out the other fabulous pastel looks from the other Nail Tarts in the inlinkz below!


    An InLinkz Link-up
   

Wednesday, March 25, 2015

Coral Polish Comparison Showdown

I don't know about you but warmer weather always gets me longing for a good coral manicure. And being that coral is one of my absolute favorite nail polish colors, you better believe I have a bounty of it!
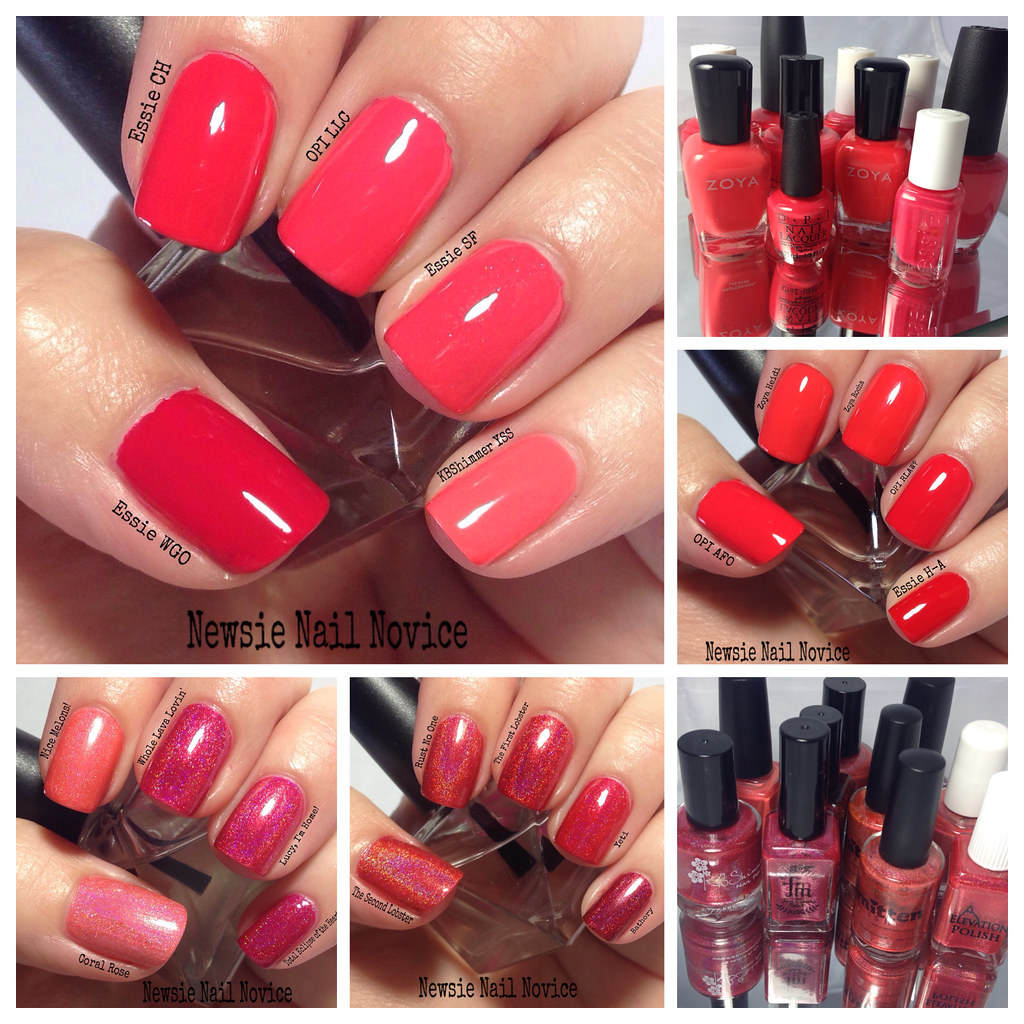
Untitled

And boy do I have a ton of coral polishes! There are all different types of corals. Pink leaning, red leaning, orange leaning. For the purposes of this post, I decided to compare all my cremes and holos that were in the coral family.

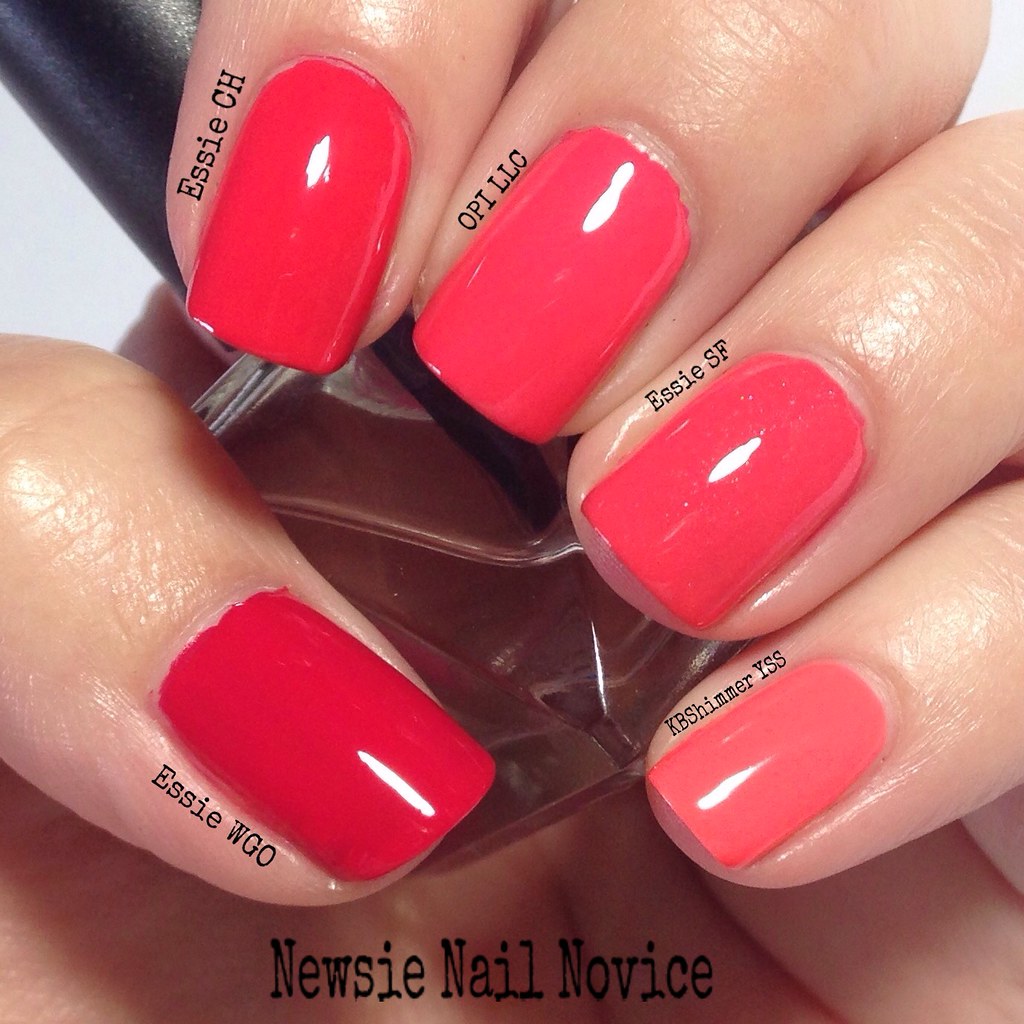
Let's start with the creme's first. I'll start with the pinker leaning polishes to start off with!
Untitled

Untitled


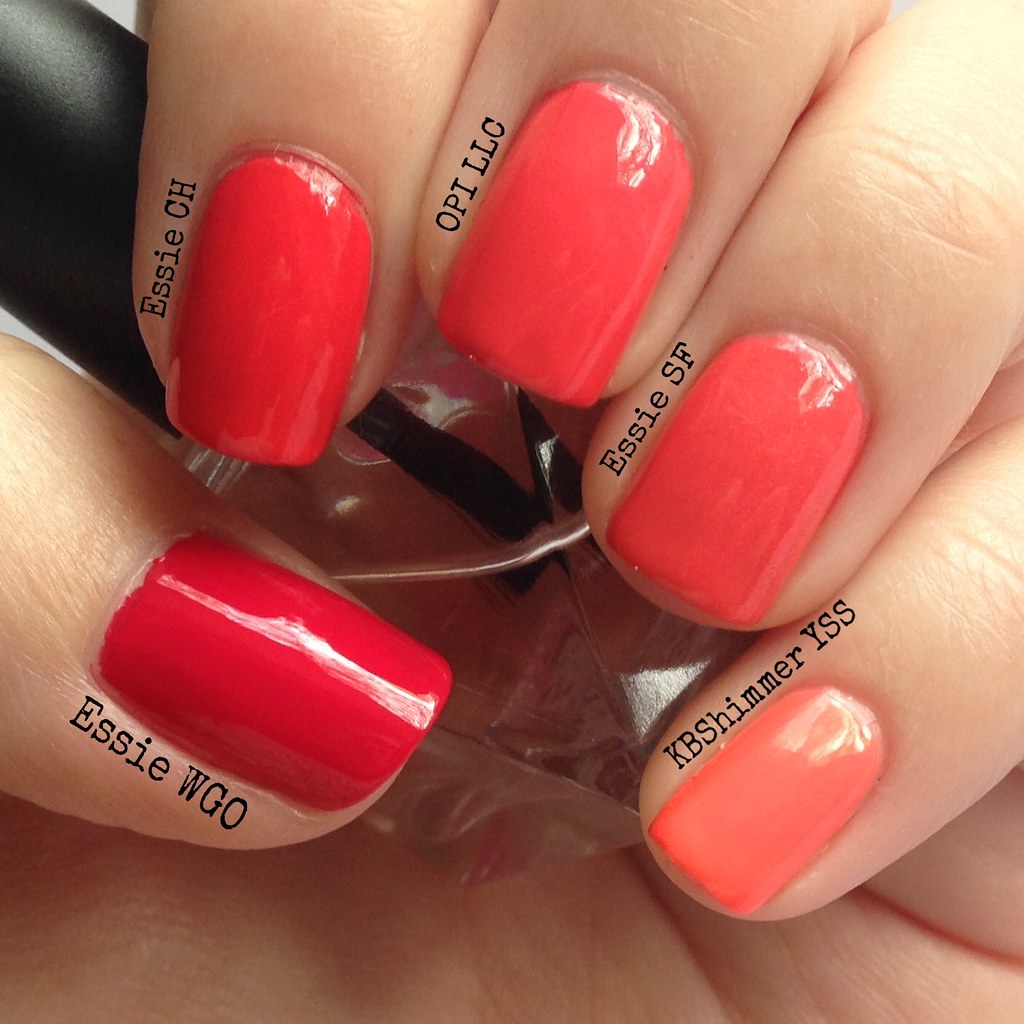
From thumb to pinkie we have:

Essie Wife Goes On: This is a gorgeous pink leaning coral, but truly more of a watermelon color. A great summer color! This is two coats.

Essie Come Here: This was my favorite of these five polishes. My favorite type of coral is a more red orange leaning coral that is still bright. This is two coats.

OPI Live.Love.Carnival: This is a lighter, pinker coral than Come Here. This is a great bright color, but a bit to pink for my liking. This is two coats.

Essie Sunday Funday: This polish is almost practically a dupe for Live.Love.Carnival if it didn't have these fine silver flakies, which doesn't really make it a true creme I know. This was three coats the formula was pretty watery.

KBShimmer You're So Coral: Honestly, this polish shouldn't even be in the comparison. This polish is a lovely orange/peach leaning coral, but it's more neon than anything, and unfortunately I just couldn't capture it's beauty in this post!  This is two coats.

Now on to the darker cremes.
Untitled

Untitled

Untitled

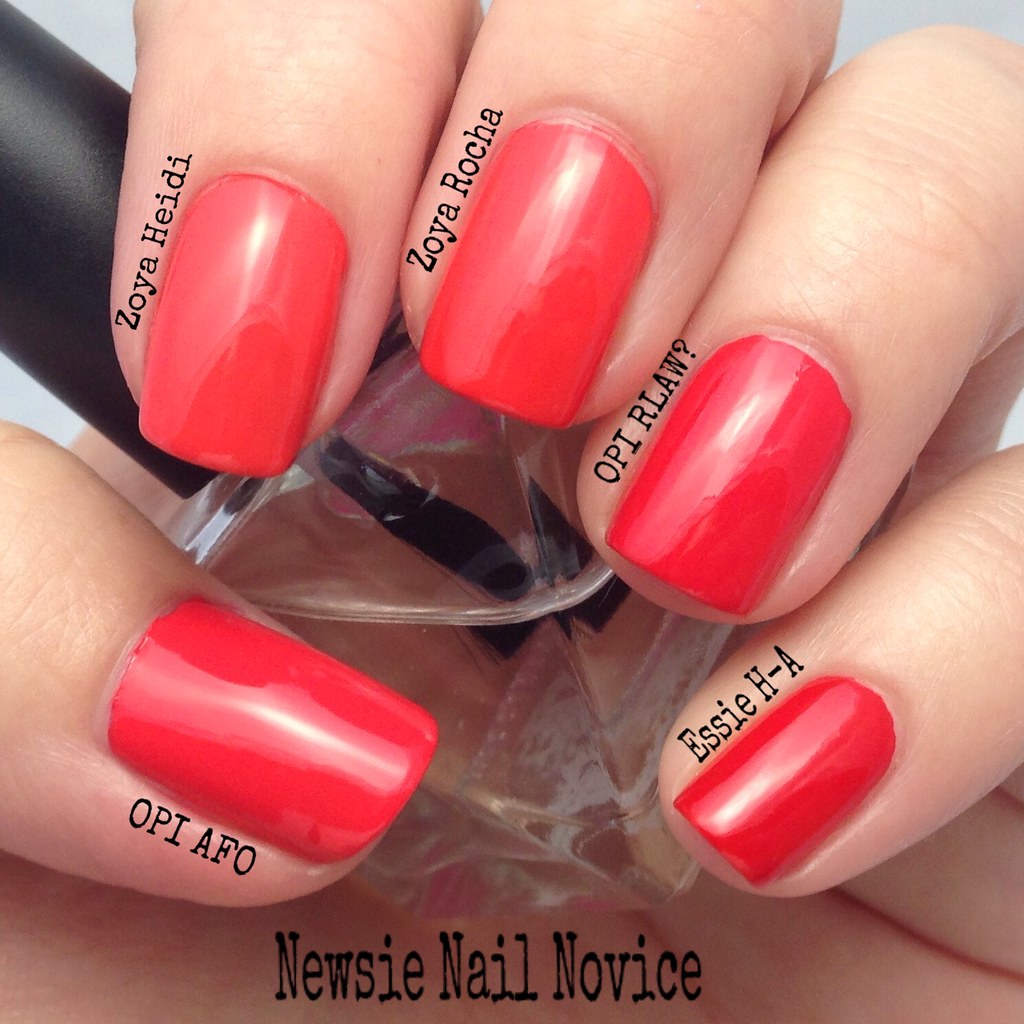
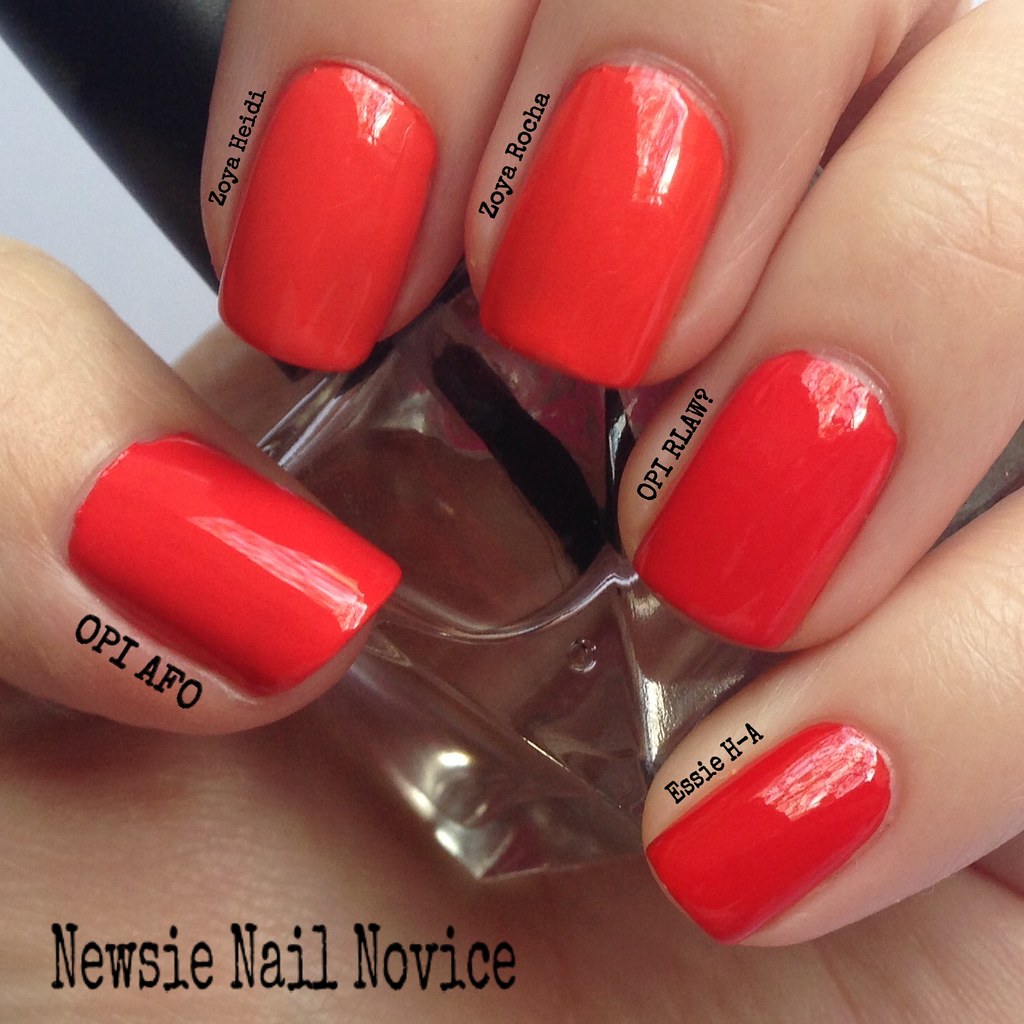
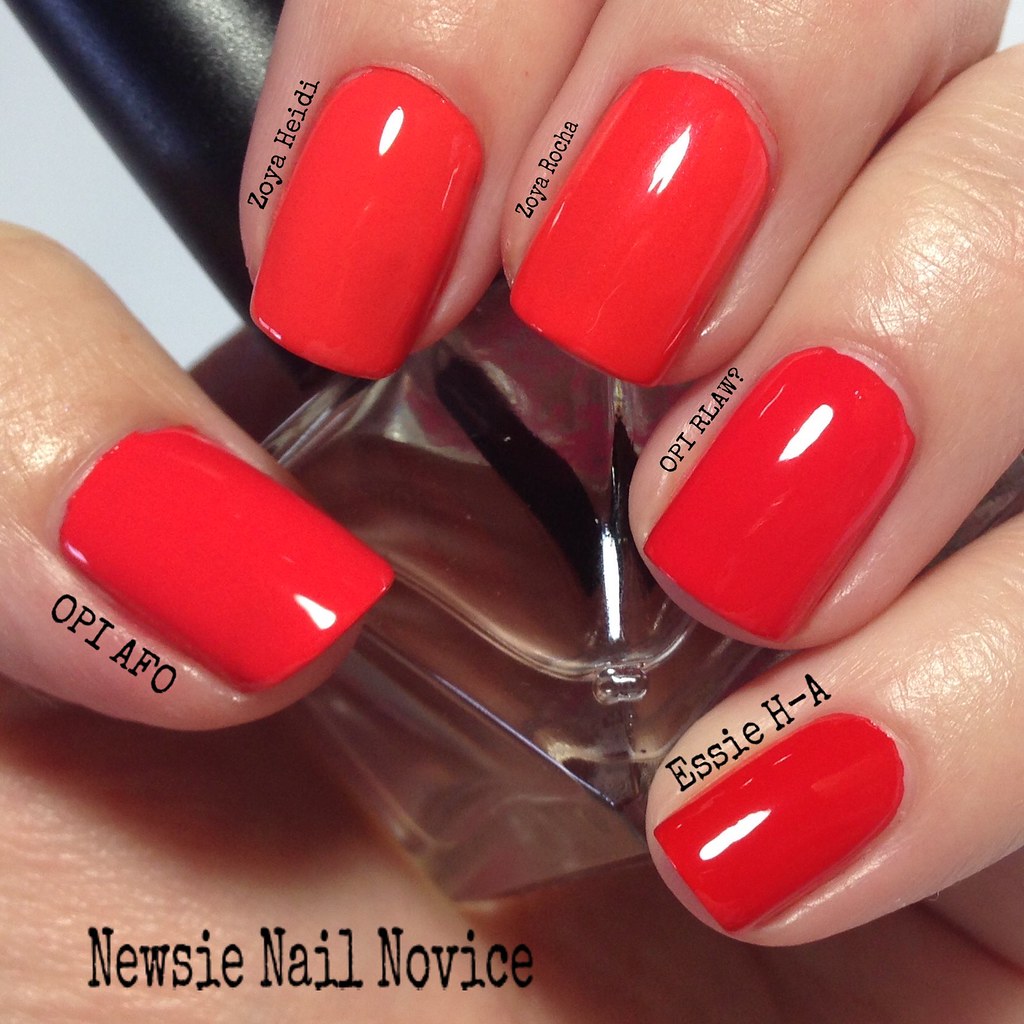
From thumb to pinkie:

OPI Aloha from OPI: This was my newest addition to my coral collection, and the real reason this post came to life. I had to see how my new polish compared to my collection. While I love the color of this one, a bright perfect darker coral, the formula was not great, it took three coats for this opacity.

Zoya Heidi: This polish is an oranger leaning coral, but still a big favorite of mine. This is two coats.

Zoya Rocha: Almost a dupe with Heidi, except it has a very hidden shimmer and is a smidge darker, that you can only detect in certain lighting. This is two coats.

OPI Red Lights Ahead, Where?: My all time favorite coral, and it still holds true. More of a red orange coral, bright and pigmented. I just love this polish and it has yet to be dethroned as my favorite coral creme. This is two coats.

Essie Hip-Anema: This polish is less of a coral and more of a tomato red-orange. Still bright and well pigmented, and very good for stamping! This is two coats.

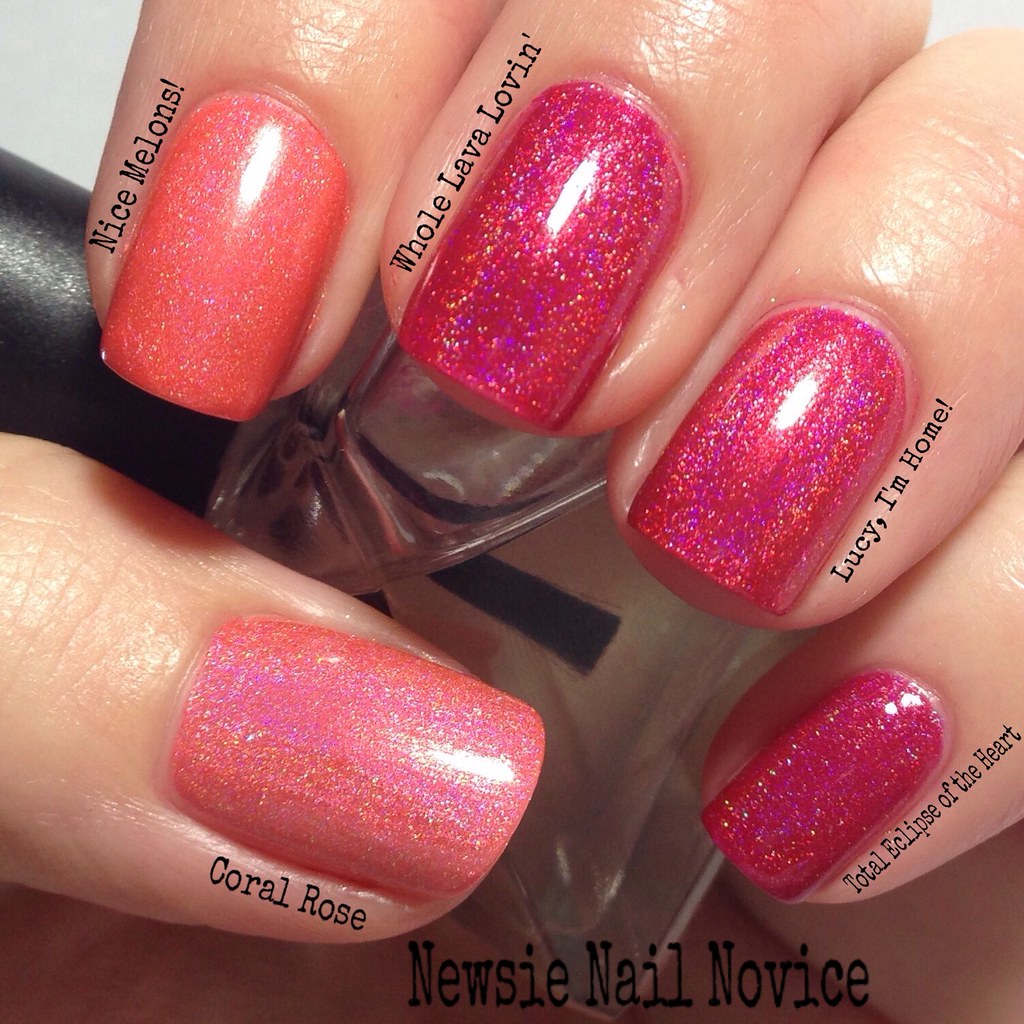
Now on to the indie holos! Some of these are a stretch for coral, but I picked all my polishes in the pink/orange/reddish coral family. We'll start with the lighter/pinker colors.
Untitled

From thumb to pinkie:

Different Dimension Coral Rose: This is truly in the lighter pink coral category and was my first coral holo polish. I do like it, but I favor a more bright and vibrant, less pink holo! This polish took three coats for this opacity.

Colors by Llarowe Nice Melons!: This is less of a coral and more of an orange peach holo. This polish was very bright, but had the weakest holo glow of the lot of holos I feature in this post. This was opaque in two coats. 

KBShimmer Whole Lava Lovin': This polish is a bright pink holo that leans more cherry to me. Though it looks very similar to the next two polishes, it is a tad lighter, just didn't really photograph that way. It is happy and bright and fun, this is two coats. 

Colors by Llarowe Lucy, I'm Home!:This is a bright pink coral holo that is just lovely. When I originally purchased this, I thought my search for the perfect coral holo was over, that was until I discovered the world of orange-red holos (my more preferred coral family color). This is two coats.

Fair Maiden Polish Total Eclipse of the Heart: This polish is a tad darker than the previous two, but is the brightest polish of the group, but leans a darker more raspberry pink holo polish with stronger violet undertones. This is two coats.

Now on to the orange/red holos!

Untitled

Smitten Polish The Second Lobster: This polish was an oops mini batch from Smitten, and I just had to get it since I love The First Lobster so much. It basically is a lighter less bright version of The First Lobster (middle finger). This also had a thinner formula and required three coats for opacity.

KBShimmer Rust No One: This polish leans just a tad more orange and darker than The Second Lobster, but is a really gorgeous orange leaning coral in my eyes. I just love this polish. This is two coats.

Smitten Polish The First Lobster: I think this polish still holds the title of my favorite coral polish, though some wouldn't classify it as such. But this is one of my absolute all time favorites, it is bright and the perfect amount of red-orange holo. This is two coats.

Elevation Polish Yeti Hides in the Mini Apple: This polish popped up this year and quickly stole my heart. I thought it was a real contender to maybe dethrone The First Lobster in my heart at my top coral holo, but this is a more cherry holo. Still gorgeous and amazing in its own right. The formula was perfection, almost a one coater. This polish also had a golden shimmer and flakies inside, setting it apart from the other classic holo finishes featured here.

Bear Pawlish Bathory: Bear Pawlish is a newer to me brand that I haven't had a ton of time to play with. I threw it into this post, because I orignally purchased this polish because I thought it might be in this family of color. It's not, instead is a gorgeous smoky raspberry, a perfect fall holo in my opinion. I have nothing in my collection like it. This is two coats.

So which polishes win here? Well everyone's taste here differs. For me, I would have to say my two favorite cremes are Essie Come Here and OPI Red Lights Ahead Where? And for the holo category I would have to say Smitten Polish The First Lobster and Elevation Polish Yeti Hides in the Mini Apple.

But there is a shade of coral here for everyone to love. How do you like your corals, more light than dark? More orange leaning or pink leaning?

Have any coral recommendations for me to check out?! None of these are actual dupes of each other, they are just close, which is why I feel justified in owning them all! :-) Hope you enjoyed this post, it was a lot of work to put together!!!


Monday, January 26, 2015

Fishtail Braid Nails

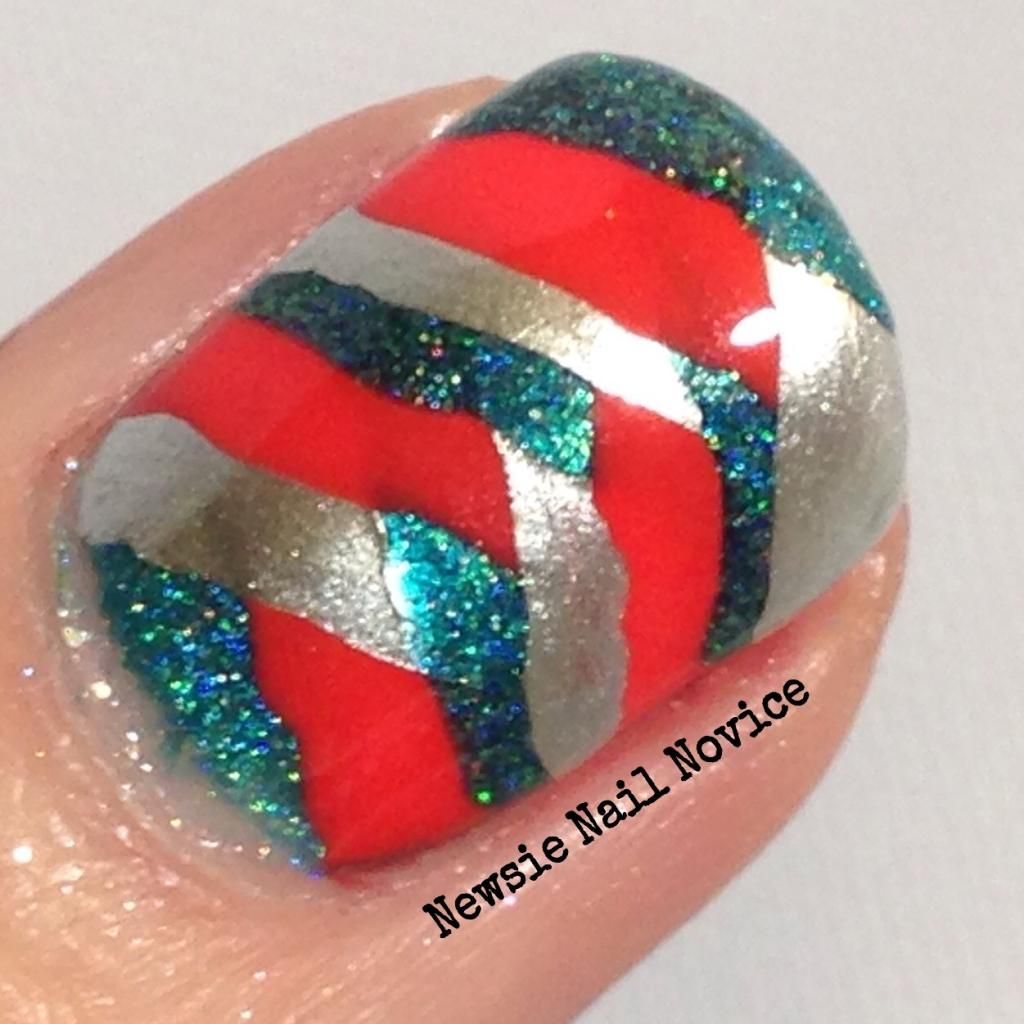
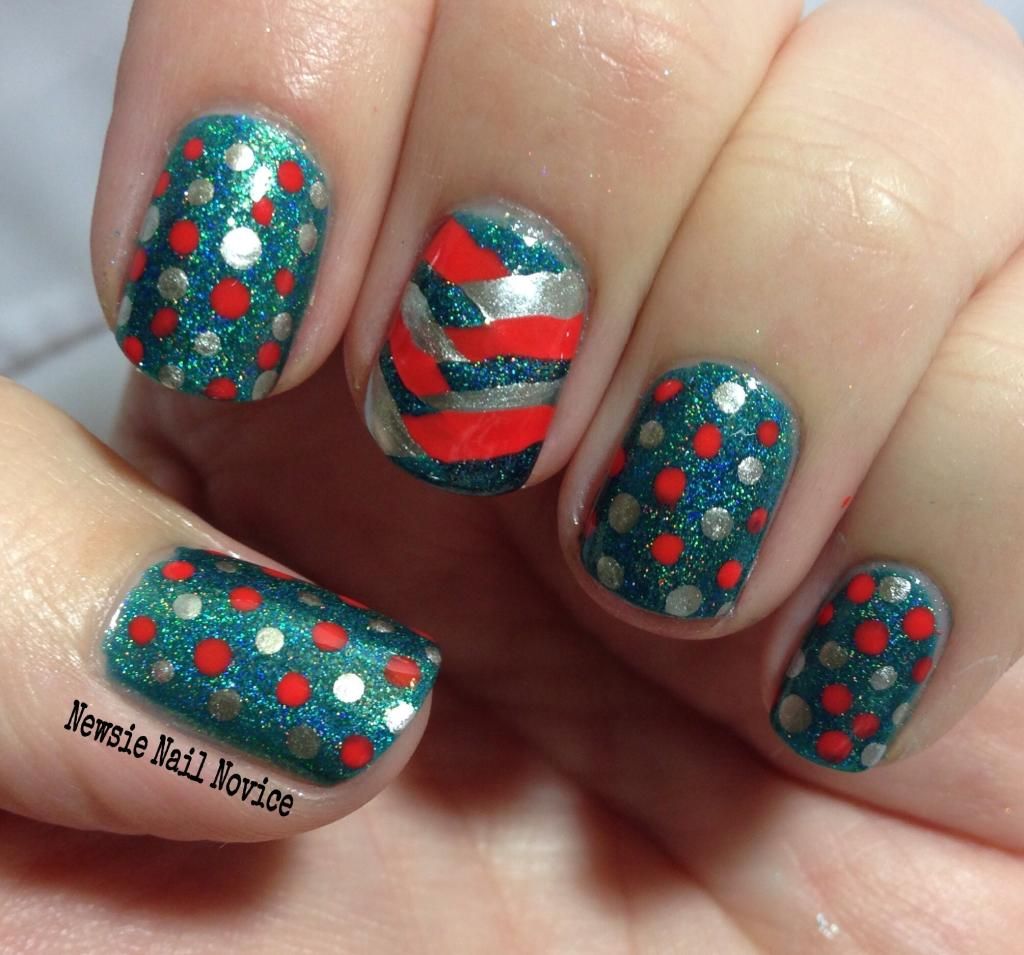
Today, as a part of Crumpet's 52 Week Pick and Mix Challenge, I attempted a new to me nail art technique: The Fishtail Braid nails.

I google'd a few tutorials and watched them first, just so I got the hang of it, but basically this is braiding strokes of three different colors.

 photo FAE9256B-7B62-43DD-A2E7-94E34B241DF4_zpsjkktzxby.jpg

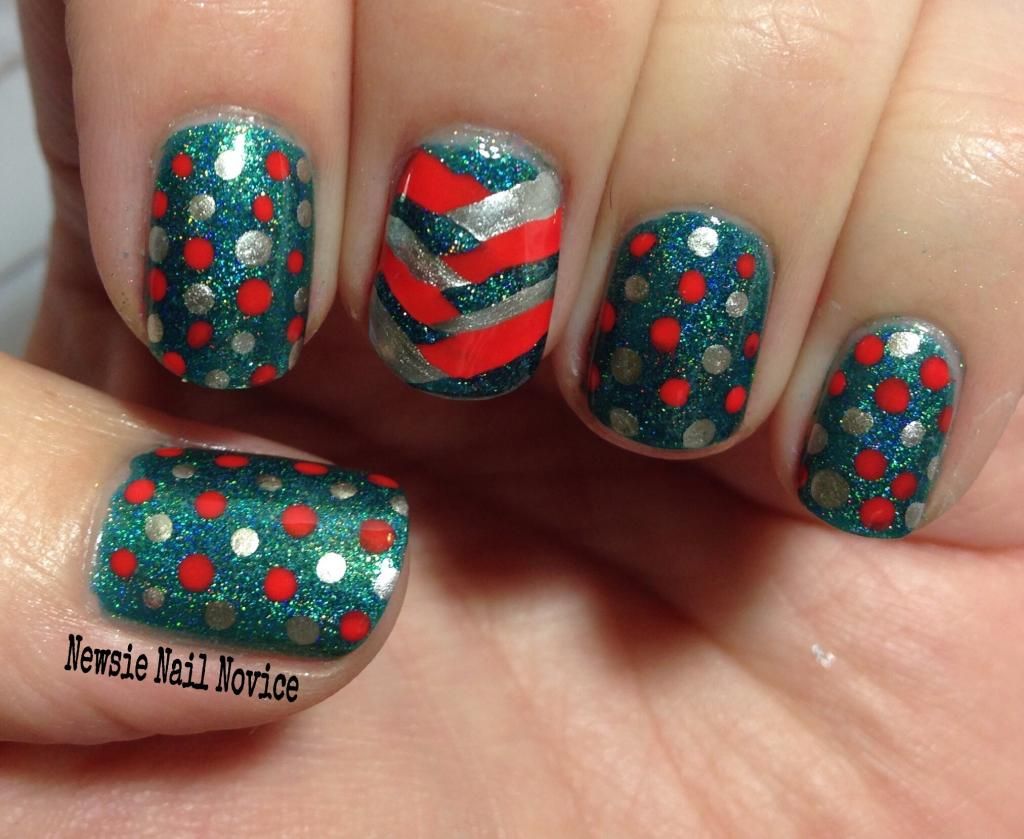
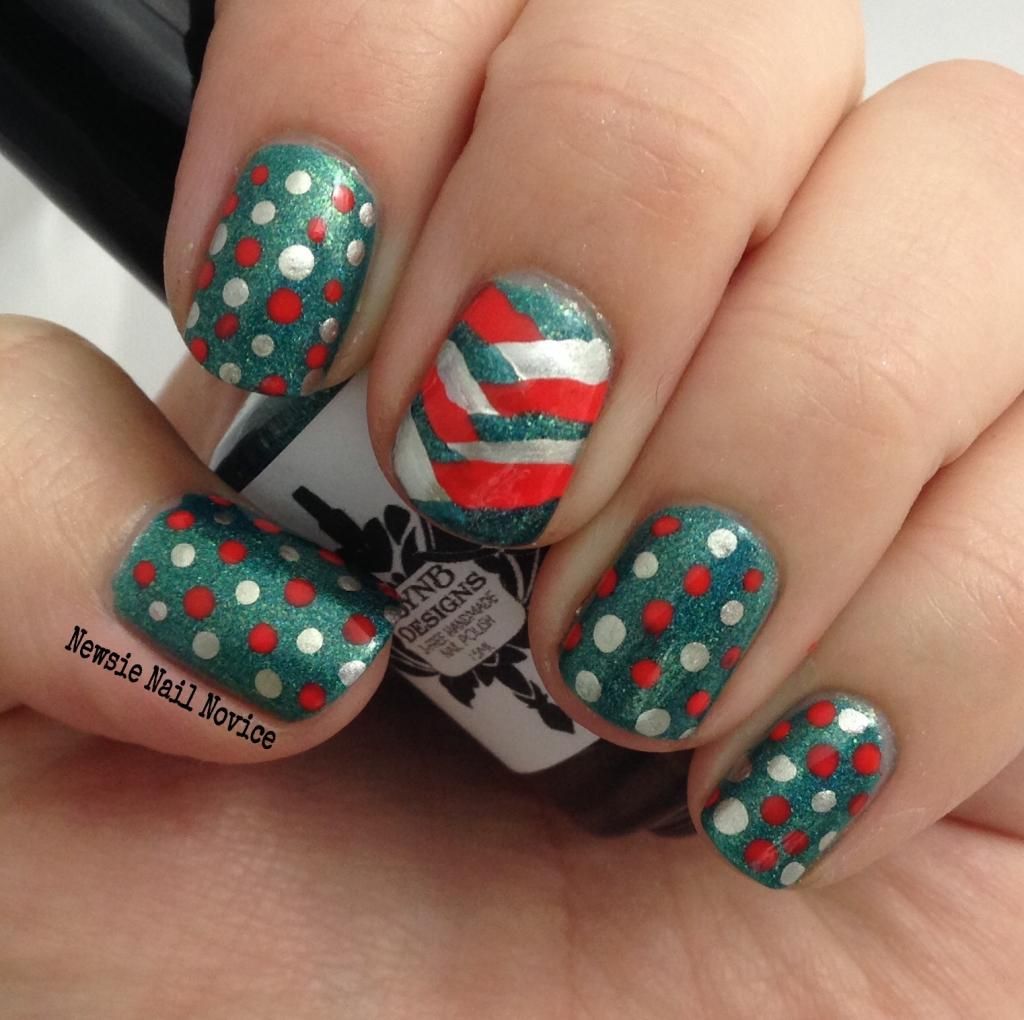
To begin I used two thin coats of LynBDesigns Seize the Day, Boys, a lovely teal holo polish with gold flashes. The application on this was perfect, very impressed with the quality of this polish. It is a bit jelly like on the first coat, but evens out by the second coat.

 photo 2E4B9C33-579C-4287-910A-F1D75FFE201A_zpsznvqb4xf.jpg

After that I went to work on the Fishtail Braid technique. It was a little difficult at first, but once you get the hang of it, it isn't so bad.

 photo 88D3CA1A-D0BC-4719-AA12-4AC446908429_zpslyeavcwp.jpg

To complete the look I added a dotticure to tie in the three colors on the other nails. I was originally going to do a skittle look, but I accidentally went nuts with the dots so I didn't get there unfortunately.

 photo D639A246-61DF-418A-9282-5C86C8FF6069_zpsnnrjx7ya.jpg

The coral/red polish is Zoya Rocha and the silver is Essie No Place Like Chrome.

 photo CA8776D2-05C5-4902-8BD5-CAAD4F8B97E9_zpsez7qvryu.jpg

Overall I liked this look, and trying a new technique, but I found it a bit time consuming trying to make sure the layers were dry between strokes. I think this technique probably works best with one coaters, which Seize the Day, Boys was not. The polish does build up on the Fishtail Braid nail, so you have to be extra careful not to dent it.

What do you think? Have you tried this nail art technique before? Do you have tips to share?

And don't forget to check out the other ladies taking part in this challenge today!


Tuesday, January 20, 2015

My Mani Must Haves

I've seen a lot of nail care posts out and about around the interwebs today and I've always wanted to share what I use, but I just never got around to taking nice photos of all the products I use. Fast forward to this weekend when my husband left town for a guy's weekend on the slopes, so I had a lot of free time on my hand. In addition to relaxing, I got this post put together! Yay. So now I can share with you all the great products I use/love.

 photo 4f89035e9c4e83e255734a354fb189a2_zpsa16c704e.jpg

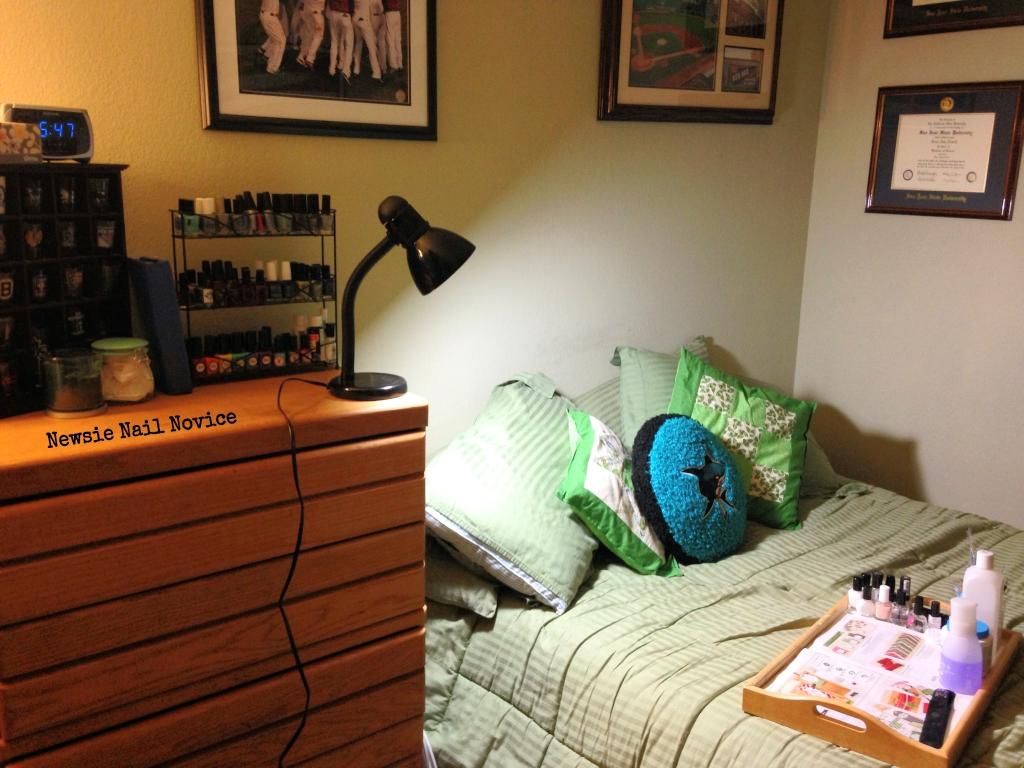
It all started because someone in a Facebook group I am in posted a photo of her work space, where she does her manis, and I thought adding that to this post might be fun.

 photo 4812C607-F692-425F-A31B-2BE7EA2BA96A_zpssvsbzmgs.jpg

This is a photo of the guest bedroom in our condo. I usually do my nails while sitting on the bed and watching TV. The shelf features a spice rack with my to-swatch/recent purchases pile. The light helps when I am doing my manis and I use it for photography as well. I keep my light box folded up in between the bed and the dresser so I can take photos when I feel like!

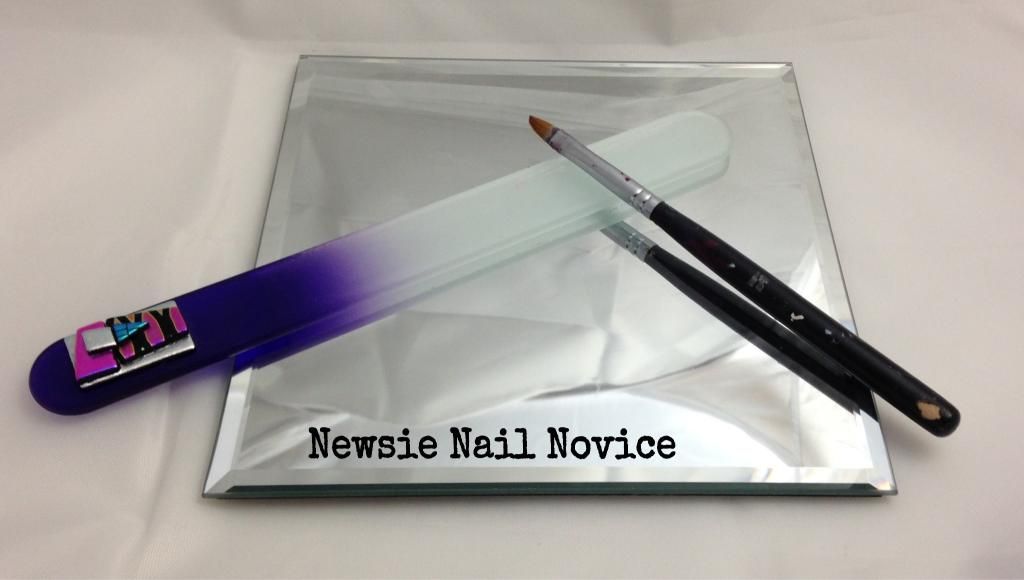
The tray holds all the essentials, remover, base and top coats, some stamping polish, a nail file and a magazine I use use to scrape excess polish or place used nail vinyls, or whatever. I don't always do my nails in this room, so it is nice that I can just move the tray easily into the other room and do my nails there as well. A moveable workspace works well for me! What does your workspace look like?

Ok, on to the products!!!
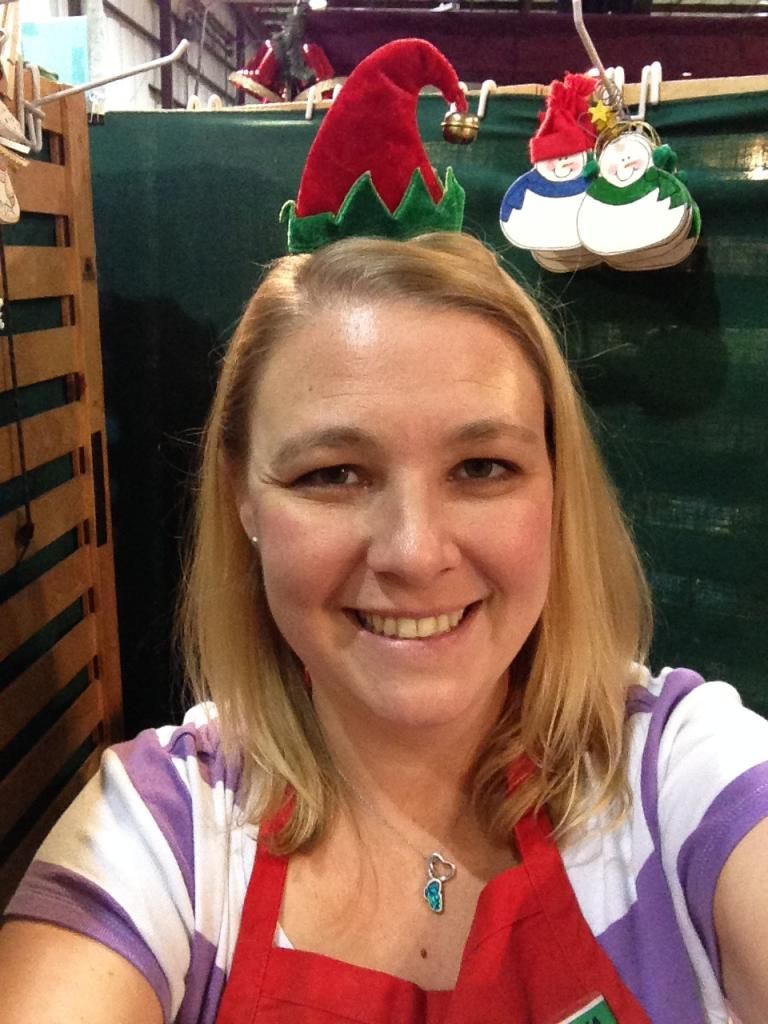
 photo AF11AC08-5744-4291-91D1-B00BEC2E1139_zps0wezuqbg.jpg

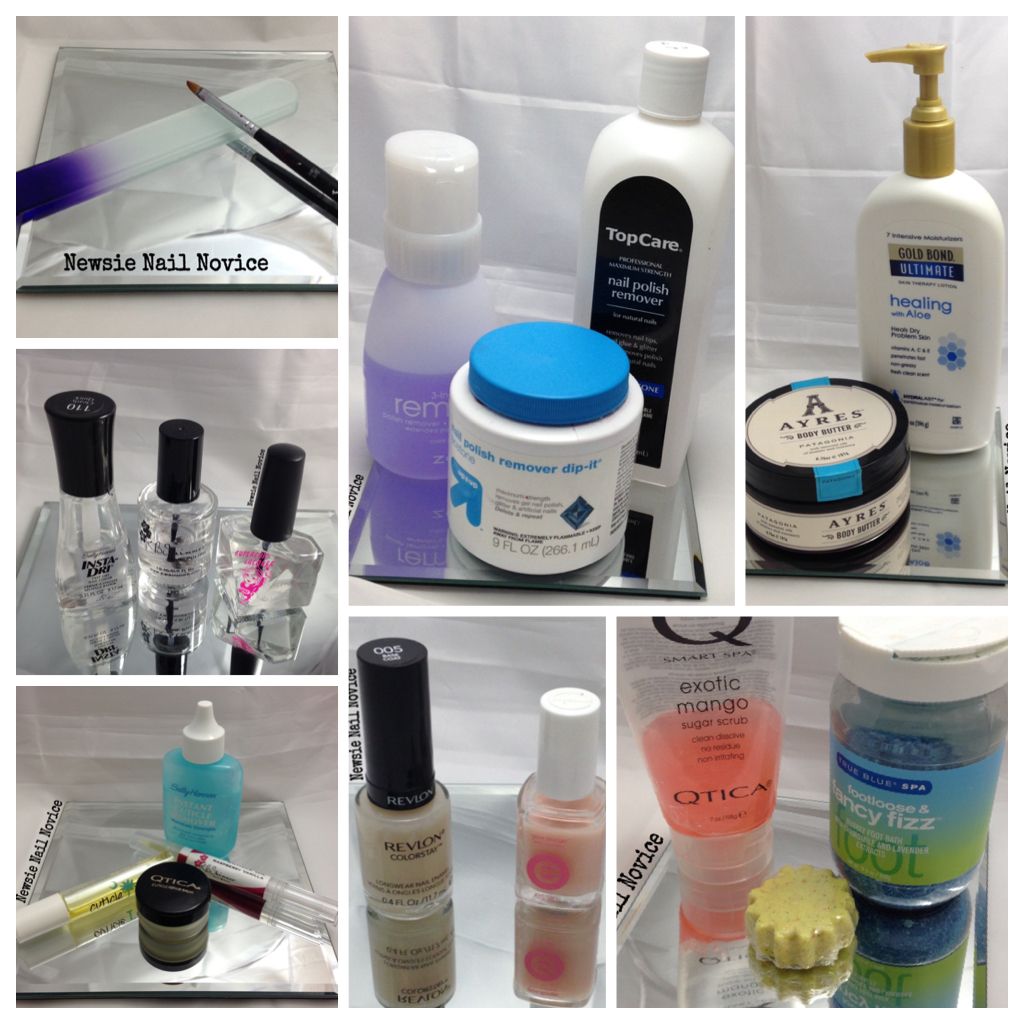
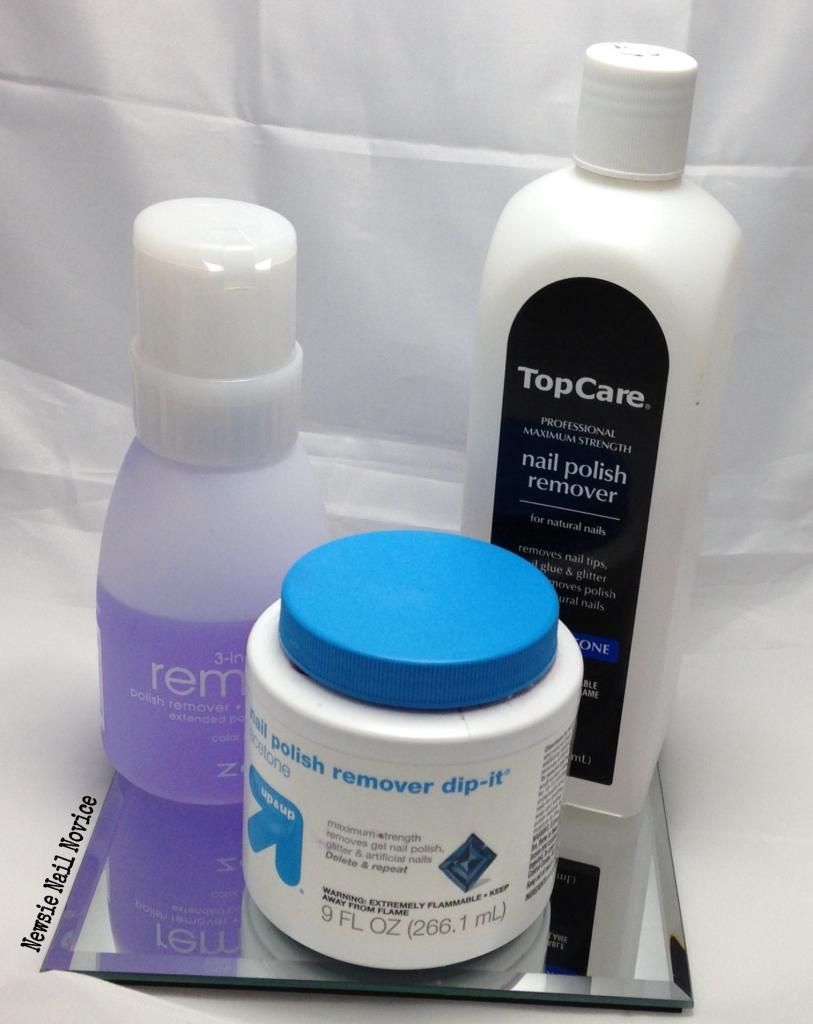
First up is removers. When removing most manis I use Zoya Remove because I find it is less harsh for my nails, almost moisturizing! If you've never tried it, you must. It is the best remover out there hands down!
I also acetone remover, which you can pick up at a drug store or local beauty supply. I use for clean up and tougher remover. To clean up, I just pour a bit of the remover inside the cap of the acetone bottle and dip my clean up brush in it as needed.

Also, for glitter polishes, The up&up Nail Polish Remover Dip-It is a must have. Glitter polishes are so gritty and difficult to remove. I absolutely hate it, and sometimes admittedly I avoid glitter polishes because of this. But the Dip-It, while is pure acetone and not so nice on the nails, rally is a saving grace when removing glitter polish.

 photo 314314A5-A562-4610-8DAE-54D8873812CA_zpsj8zkrxix.jpg

For nail care, I use a glass nail file I got as a gift from years ago, and I thought it would be good to feature my clean up brush. I've been using this for about two years now, I know it has seen better days. But it has held up pretty well! I got this clean up brush in a Red Carpet Nail Art kit, back from when I tried gel nails many moons ago!

 photo F03FAA8C-7D04-4A19-B8D0-5EB5D022A9A8_zpshfkasvoe.jpg

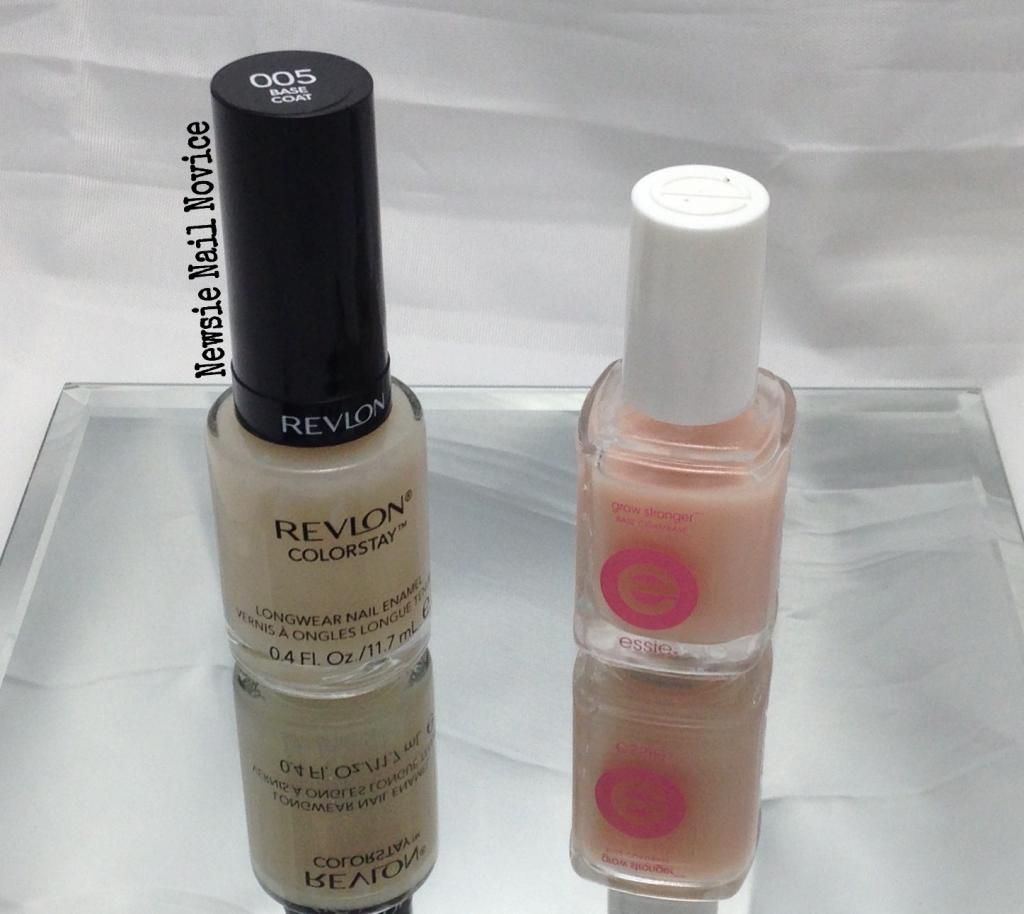
Now on to base coats. I've been on quite the journey the past few months testing various base coats after my beloved Revlon Colorstay Base Coat was discontinued. The Revlon base coat was seriously a Holy Grail product for me. Made my manis last forever. If your manis don't last like you want them to, you really have to try switching up your base coats. Believe it or not it really does make a difference. After trying many different base coats (boo to CND Stickey, it stains my nails!) I think I've finally settled on Essie Grow Stronger, though I find it might not protect as well from staining polishes (thought that was only once), but it does make my manis last longer and my nails stay stronger!

 photo D13E97DC-8DA5-4F07-AA4F-B4950065C610_zpsdmcyzmyv.jpg

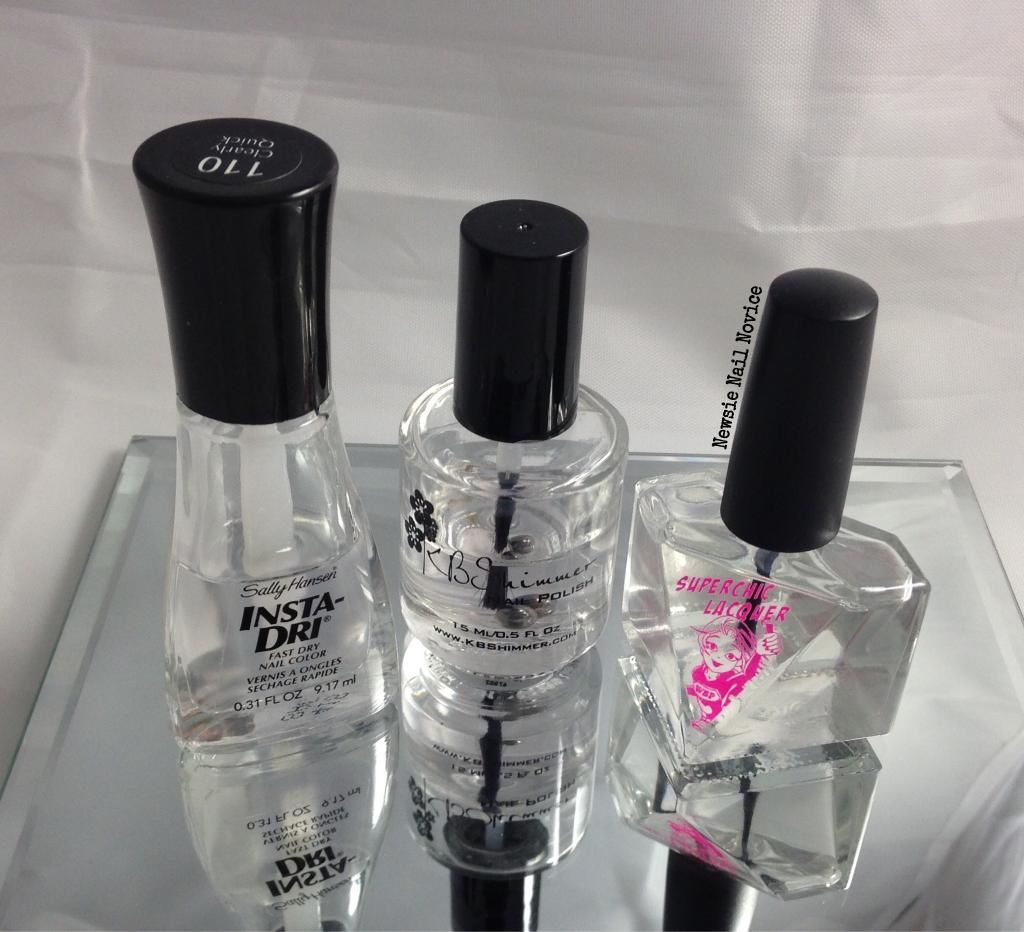
Next is top coats. These are also as important. I use KBShimmer Clearly on Top as a great quick dry top coat that is affordable too! It's only $5.00. Brand new this is a great top coat, but I do find I need to thin it about halfway through, otherwise it does shrink the polish a bit (don't worry it's nothing like Seche Vite). The coolest product I just discovered is Marvel Liquid Macro Top Coat. This is another quick dry top coat, but I have to say what I've noticed most about this one is how well it retains it's shine! This retails for $6.50. It is lovely. My bottle is still new, so no news on if it thickens after awhile, but I'll try to post an update if I remember. The Sally Hansen is there as my drug store go to, but honestly this one rotates. I use an extra top coat when I have hungry glitters and I don't want to use a good top coat, so I'll just use whatever drug store top coat I have on hand and then top it with Clearly on Top or Marvel Liquid Macro.

 photo 11A5D76A-59D2-47E4-9E5B-6C1705554DC7_zpseeamqdyu.jpg

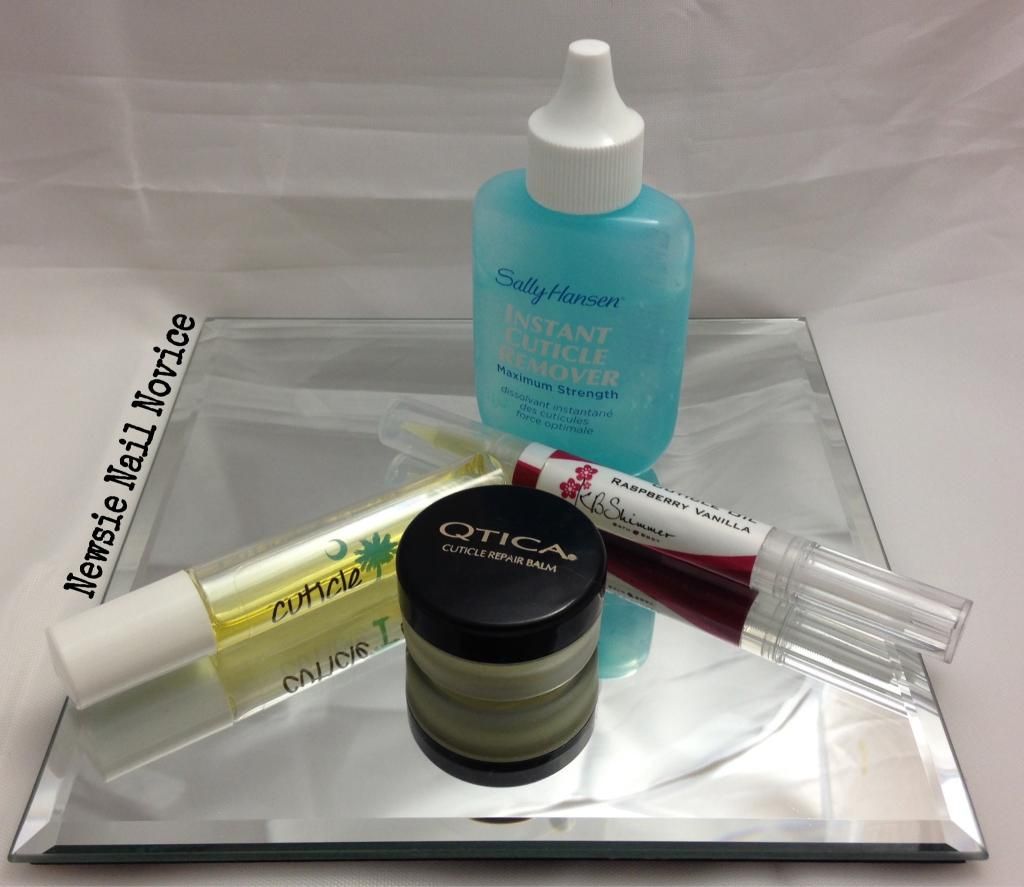
Now on to cuticle care. This is an area in which I have a ton of products, but don't use them near as much as I should. But I do want to remedy that. I really love KBShimmer's Cuticle Oil Stick, love the brush applicator, really saves on the mess. Cuticle Glaze is a heavy duty oil and is really great for moisturizing the cuticles, and has a lovely sweet cookie smell to it. I won this one in a contest lately and is created by the lovely Danele of Low Country Lacquer. The Qtica Cuticle Repair Balm is for the jobs when you need a heavy duty job of moisturizing dry cuticles or healing a hangnail. This is in a jar, but I like to apply it with an empty cuticle oil stick to cut down on the mess. And I use the Sally Hansen Instant Cuticle Remover to push the cuticles back, but probably only once a month.

 photo 1B1B4290-A591-4726-A4DE-69BC1F41D2EC_zpslr9dwav1.jpg

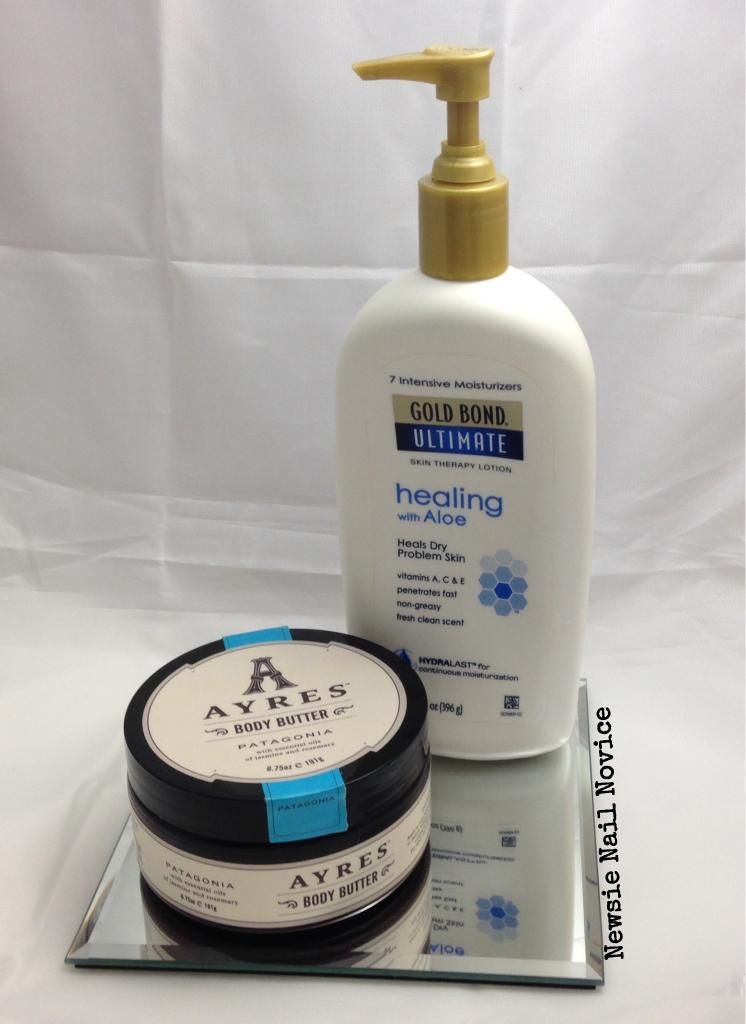
Probably one of the reasons I don't need as much cuticle care is because I moisturize like crazy. The Gold Bond Ultimate Healing Lotion with Aloe is THE BEST OUT THERE. I have tried so many lotions, but this is the best out there. It is thick, fast absorbing and so nice. The Ayres Body Butter is something I got in my ipsy bag, and liked it so much I got a full jar. It is a nice thick lotion, with a nice scent, and a little goes a long way. And it is also fast absorbing, which is a must have when it comes to lotion. Usually I apply the Gold Bond before bed, or just when at home and I my hands are feeling dry. I use the Ayres on my way out in the morning. Every time I apply lotion I rub it into my cuticles as well, which is probably what keeps the my cuticles pretty happy overall. 

 photo BBF8B0D6-4F27-4734-A7C2-99DA40EEC3D0_zps4vhfvhdh.jpg

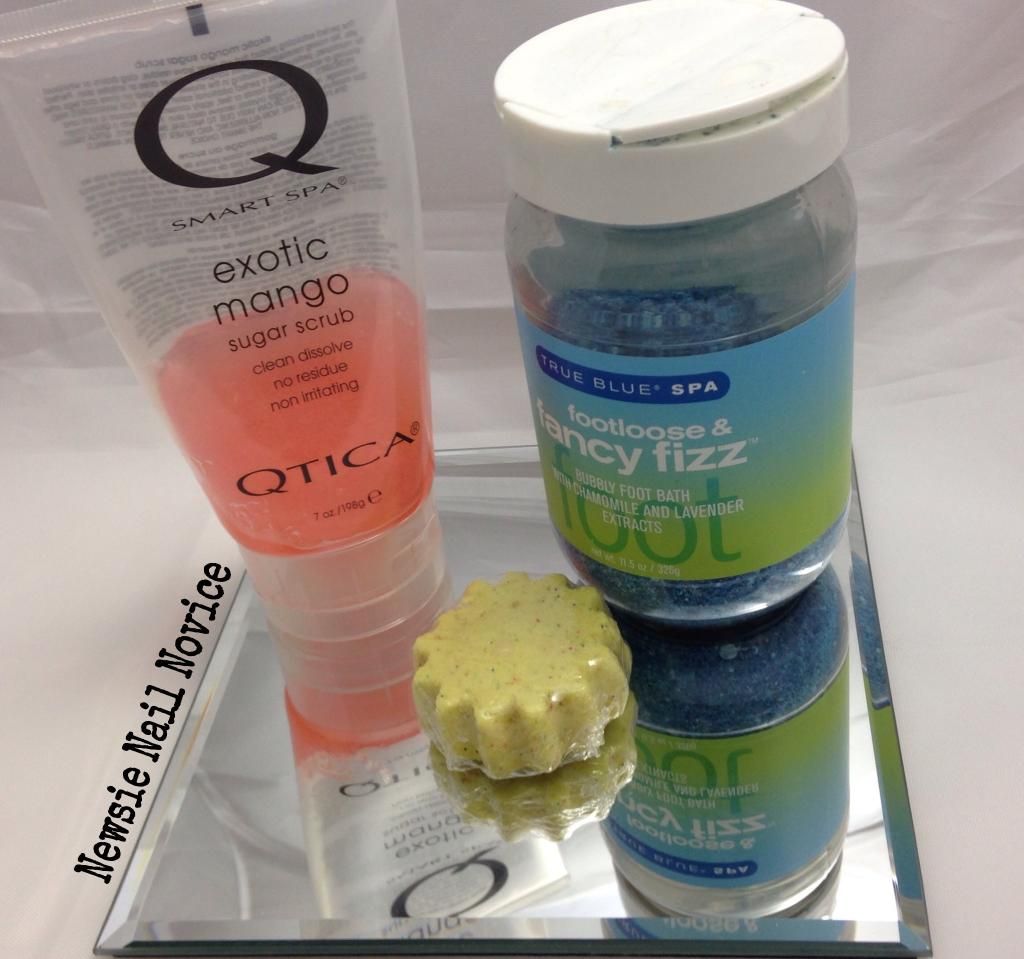
Now for the pampering products. I keep my Qtica Sugar Scrub next to me in the shower, and use it around once a week. I use the Footloose and Fancy Fizz for pedicures, but also as a soak when I am treating my hands to a full on soak and manicure. And the most amazing find of the year for me, is the Forever Polished Mani Bombs, these things are so fun to use as a soak. They bubble and moisturize, and I just absolutely love them. This is the ONLY ONE, I have left. I have to get more during her next restock. Follow her on Facebook to find out when the next restock is!

So that's it! What do you think? Do you use any of these products? Have something to recommenced to me? Later this week on Thursday, I'll have my Nail Art Must Haves, which I'm excited to share with you too! I just love posts like these and I hope you like reading them too!


Sunday, January 18, 2015

My Favorite Winnie the Pooh Character Nail Art

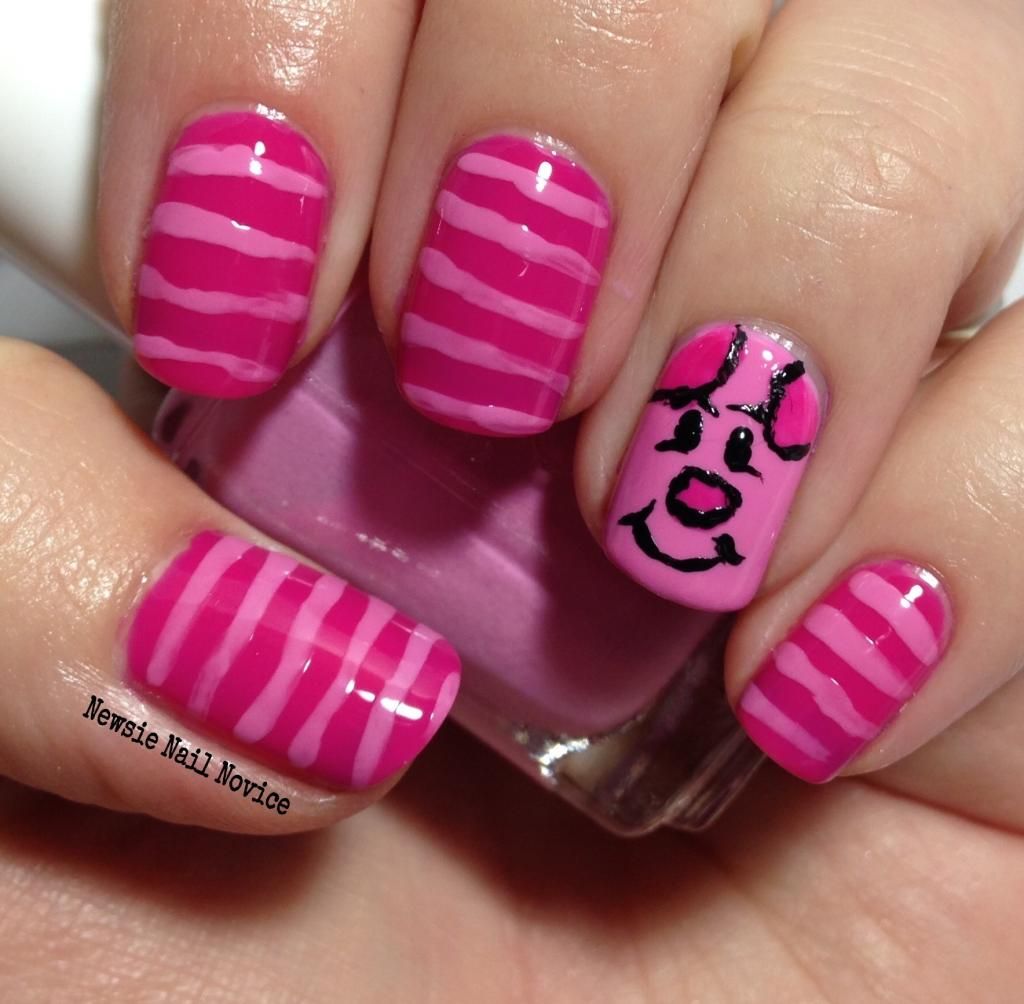
So who is my favorite character in Winnie the Pooh?!?! Piglet of course. I don't remember why Piglet is my favorite, but I do remember that I used Piglet in my very first screen name, long long ago in my childhood, I think the the days of Prodigy.

 photo 30CF4018-B017-448B-8EC7-5641C8419CB8_zpsunyhbnc1.png

So onto the fun Piglet nails.

 photo 88109534-EF49-4762-A02B-468BAEEA76A4_zpsmsx3xq0q.jpg

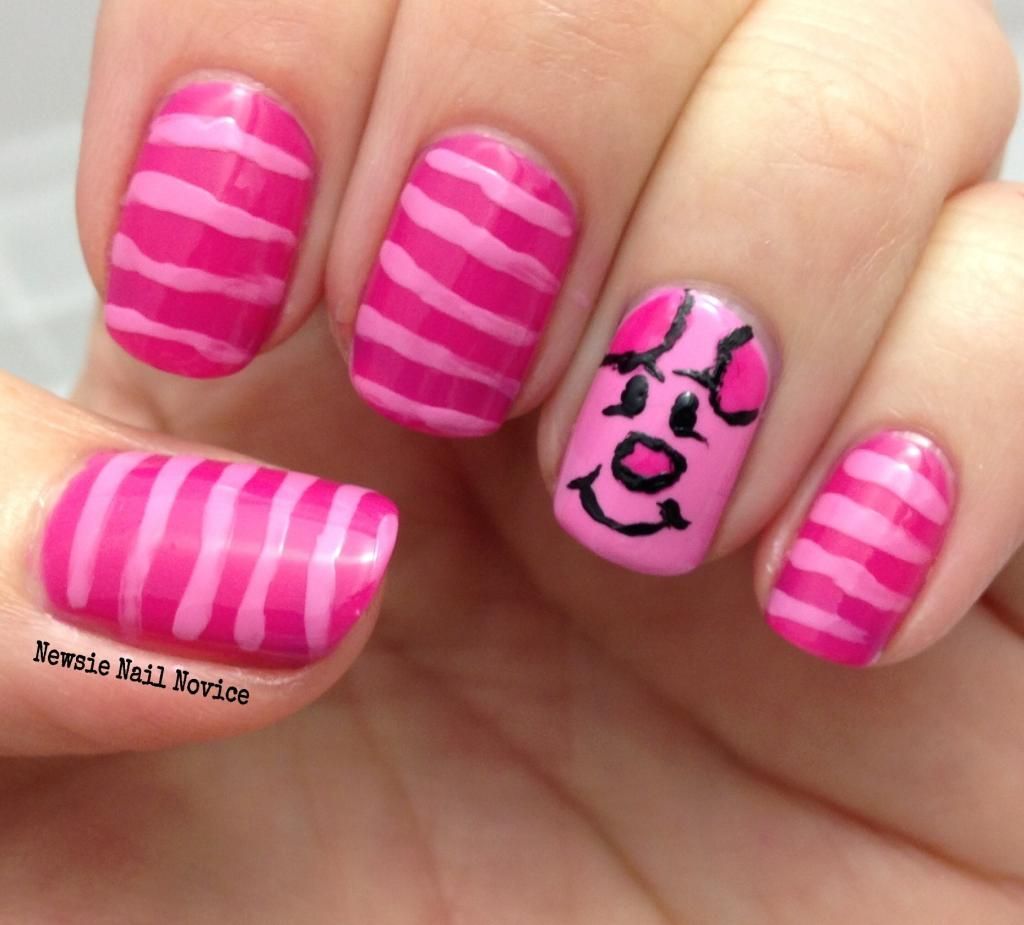
The polishes I used in this mani are Essie Cascade Cool and Essie Secret Stash. Secret Stash is a bit of a crelly, took three coats to get to this opacity, Cacade Cool only needed two for the Piglet face accent.

 photo 75AA4468-D598-460A-AE81-341AA82A4BBC_zpsdgq2ecxr.jpg

I used a stripping brush to make the stripes with Cascade Cool, and I was inspired by this manicure I found online for the face. I used a finer nail art brush and a black stamping polish to make the detail on  I wish I could say I was that creative, but well, I'm not.

Anyway, this was a pretty fun nail art prompt! What do you think of this look? Do you like?

And don't forget to check out the other ladies taking part in the challenge!


Wednesday, November 19, 2014

LynBDesigns Reader Appreciation Giveaway

You guys, I'm super sorry I've once again gone a week without a new post! I guess I'll begin this post with an explanation of why.

Each year around mid-November my life gets a little hectic. My mom, who owns her own business crafting personalized goods, comes to town and I work her Northern California circuit of Harvest Festival Craft Shows. I do this in addition to working my normal day job as a journalist. So for the month of November, I am pretty much working EVERY DAY.

My life at the moment, is a bit intense.

But at the same time I love this time of year because I get to spend so much time with my parents, who I don't see as much as I'd like to, and I get to see a lot of hand crafted goods in the meantime.

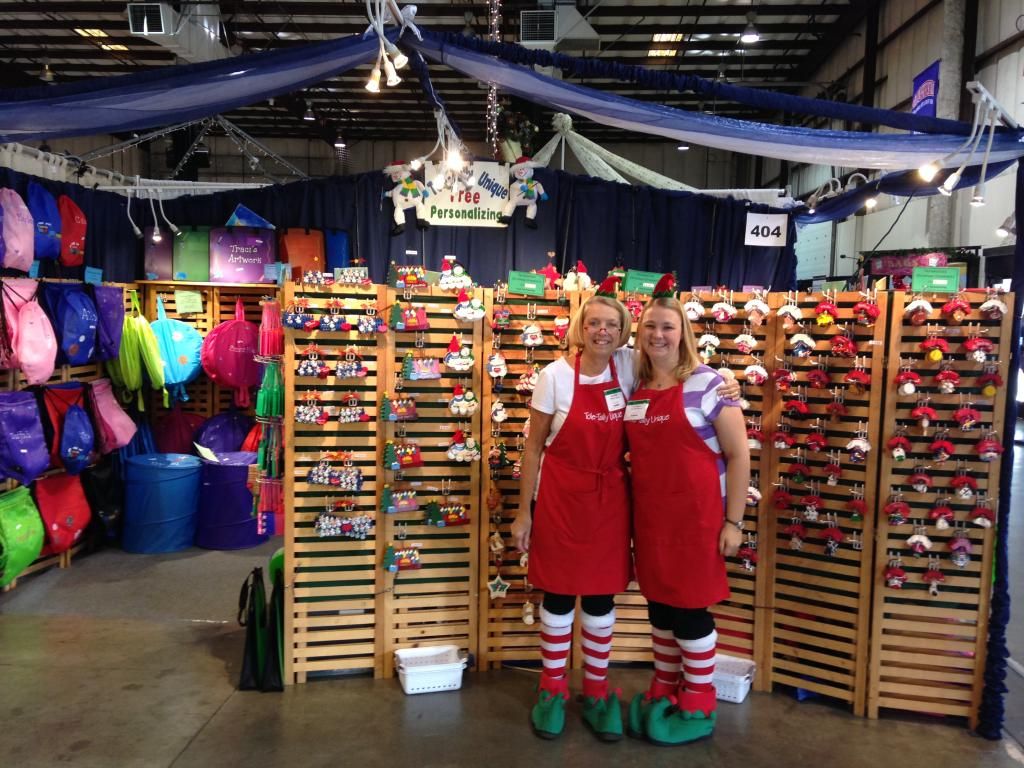
And a bonus, since my mom's business mainly involves Christmas ornaments, we dress up as elves to sell the stuff, and while it's a little embarrassing, I thought I'd share with you some shots from the last show.

 photo 93AD55D8-AC81-47CF-8DDA-D6ED70E92B5E_zpszjo30yim.jpg

That is me and my mom at the booth before the day started. Last weekend was her best show ever, we are talking Black Friday proportion success here. She's been at this biz for 21 years.

And to show you just how cute/humiliating the outfit is, her is a closeup of me with that hat (that was originally intended for dogs).

 photo 60992345-670C-4D49-959A-1C8758FADD3A_zpselyz7kc5.jpg

Anyway, if you are a bit more curious as to what she makes, here is a cute nail ornament that I thought my readers would get a kick out of. And this is some holiday nail art I did to display it last year!


And now on to my reader appreciation portion of this post. Since I might be a bit sporadic for the next few weeks (after my mom leaves post Thanksgiving weekend, I'll be busy volunteering at the Kiwanis Tree Lot, which I'm sure is a post for another day), I thought I would host a little mini giveaway to make up for it!

I recently tried LynBDesigns nail polish for the first time after seeing The Mercurial Magpie review her Robin Williams inspired collection. So I snatched up three polishes, and I've decided to giveaway one of the polishes.

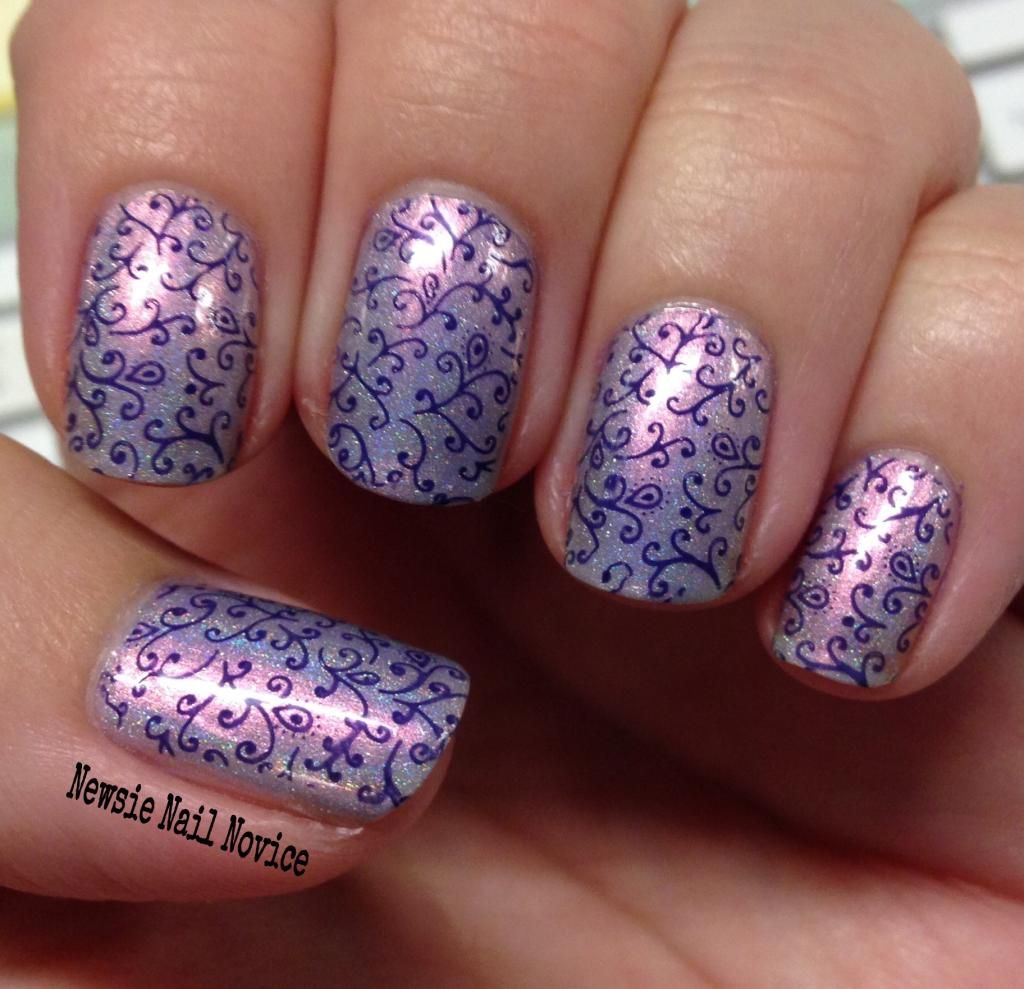
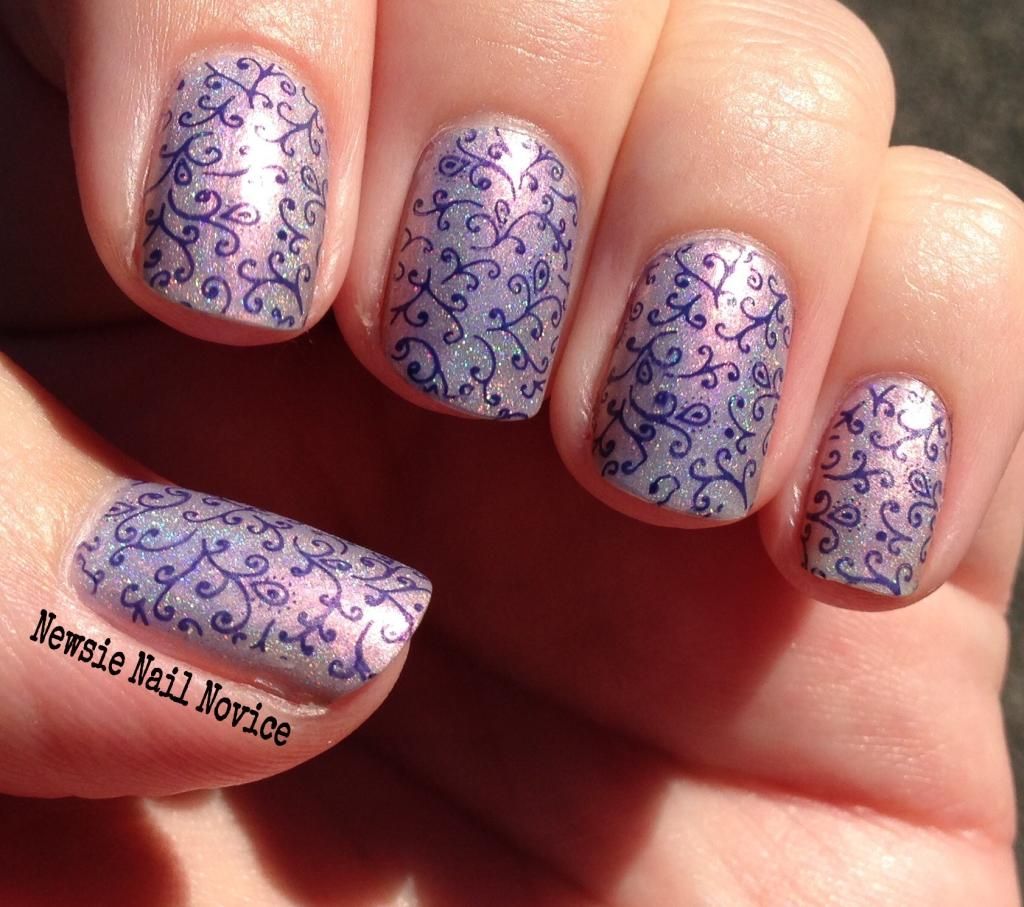
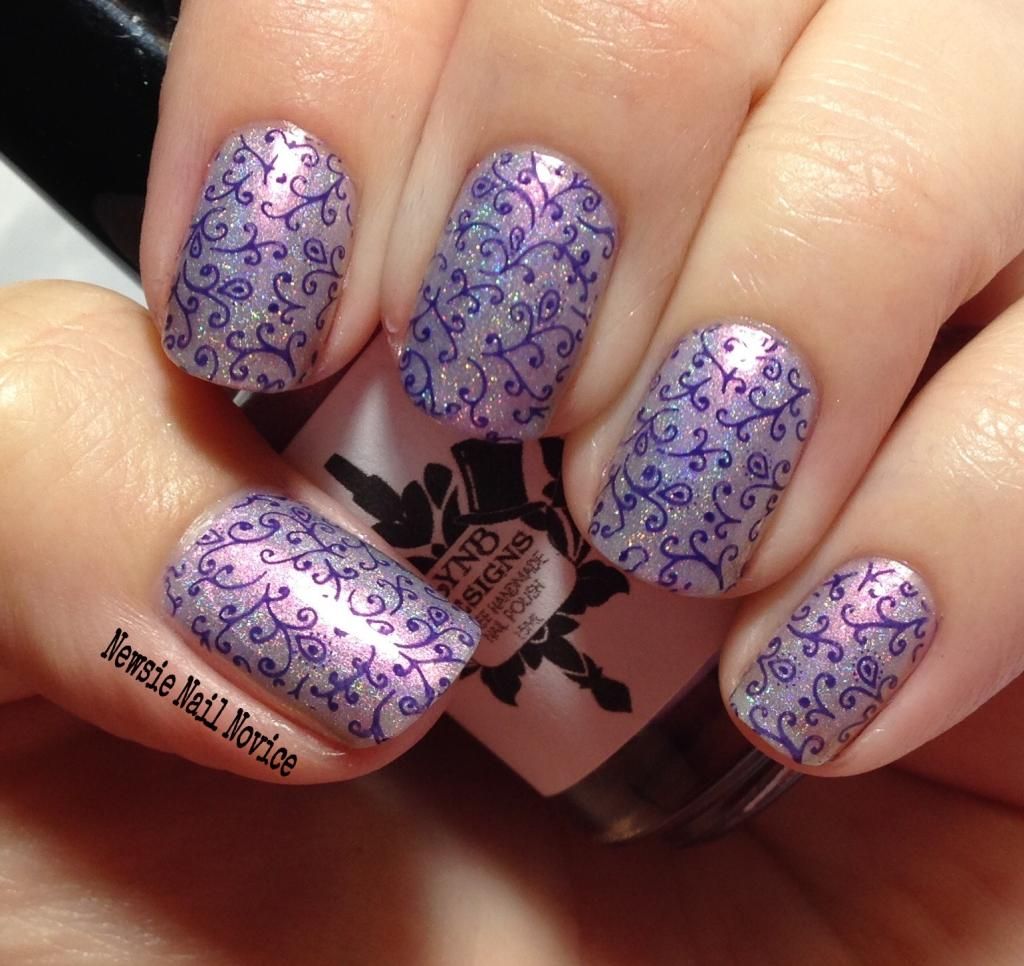
So to begin, I'll share a manicure I did with Make Your Life Spectacular, a gorgeous light purple with pink flashes holo.

 photo EC17D70F-BD80-4443-8F78-72F619C7AE16_zpsr8hsufml.jpg

I started with three thin coats of Make Your Life Spectacular. The formula was great, thin and easy to work with.

 photo 51C51F6E-789E-4683-AF3C-3FD351A9625D_zpsawgtgpai.jpg

I have nothing like this in my collection of polishes, and was pleasantly surprised I liked it so much. It is a bit girly for my taste, but so girly that it makes me really love it. I think this polish is girly and proud of it. I tried for a bit to get a unicorn stamp on top of the design I used here, but I just couldn't get it to work. But I still think this polish would be great with a unicorn motif.

 photo CEDFAE7A-E0C9-4E00-BD68-B885475274F9_zpsoub8l5qz.jpg

The stamp I used here was Lily Anna 09 stamping plate for the image and used Essie No More Film to stamp with. I really loved the Make Your Life Spectacular polish because of its bright pink flashes and holo glam that really came out to play in the sun, above.

Now on to the giveaway. Because I have been a polish purchasing machine lately, and I still have two untrieds from my LynBDesigns order, I thought I'd spread the love and giveaway one of the two. So I will be gifting Phenomenal Cosmic Powers. And Kirby, The Mercurial Magpie, was kind enough to share her swatch of it with me so you can see the beauty of what I'm giving away!


Isn't it gorgeous!?! This giveaway is for US residents only 18 and up. I'll run the giveaway through Dec. 1, when my mom's Northern California shows are over! Thank you readers for sticking with me while my posting is sporadic and not on its usual Mon-Wed-Fri schedule. I truly love you all to pieces!

a Rafflecopter giveaway

Wednesday, October 29, 2014

What I'm wearing on my nails TODAY

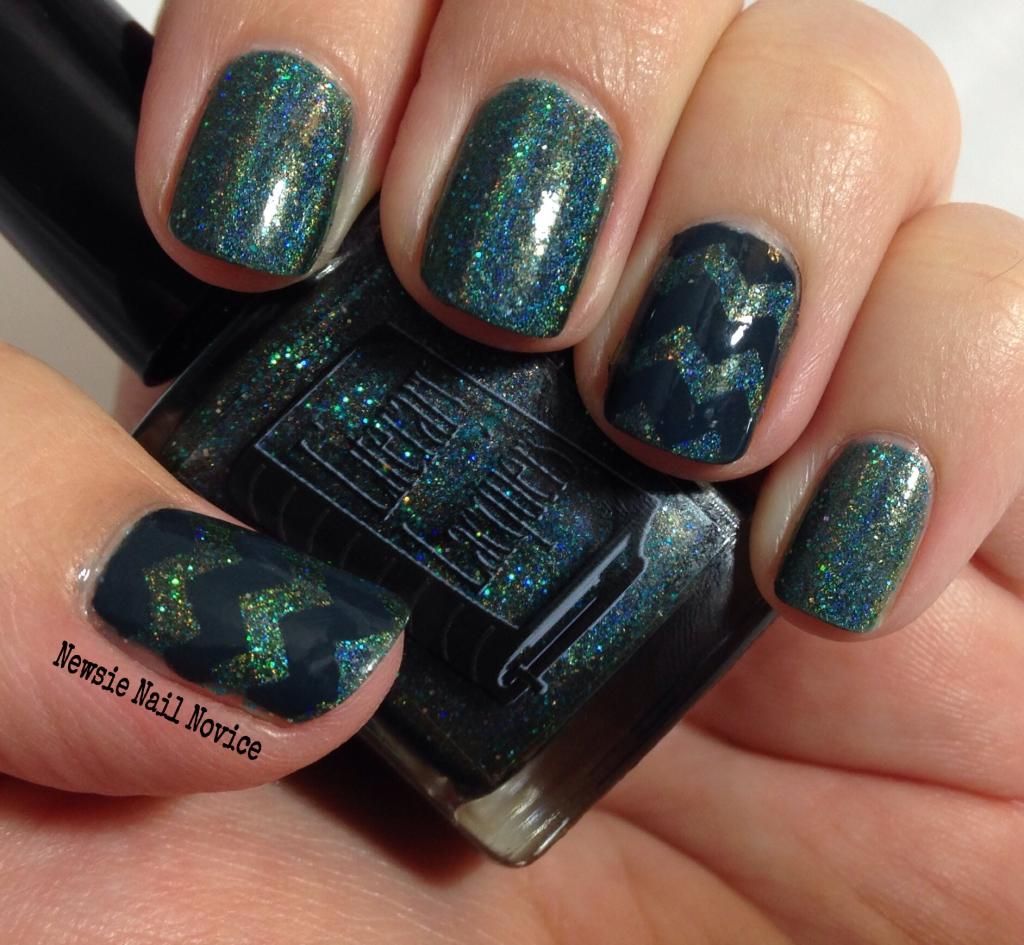
It's not often I share with you my manicures in live time, but I am so in love with this new color I got from Literary Lacquers, I couldn't resist showing you right away.

 photo 336099FF-C243-4BAB-BF85-376E9EC0AA9B_zpswm6irx6u.jpg

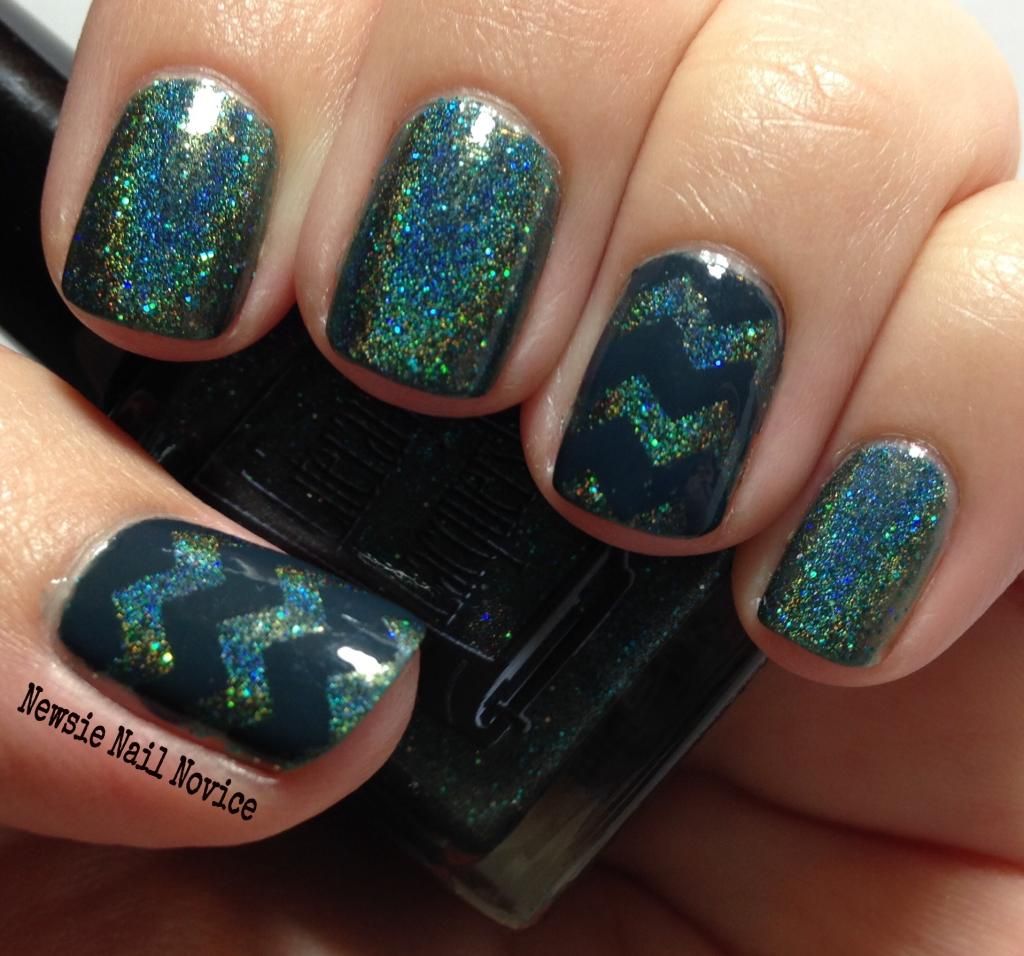
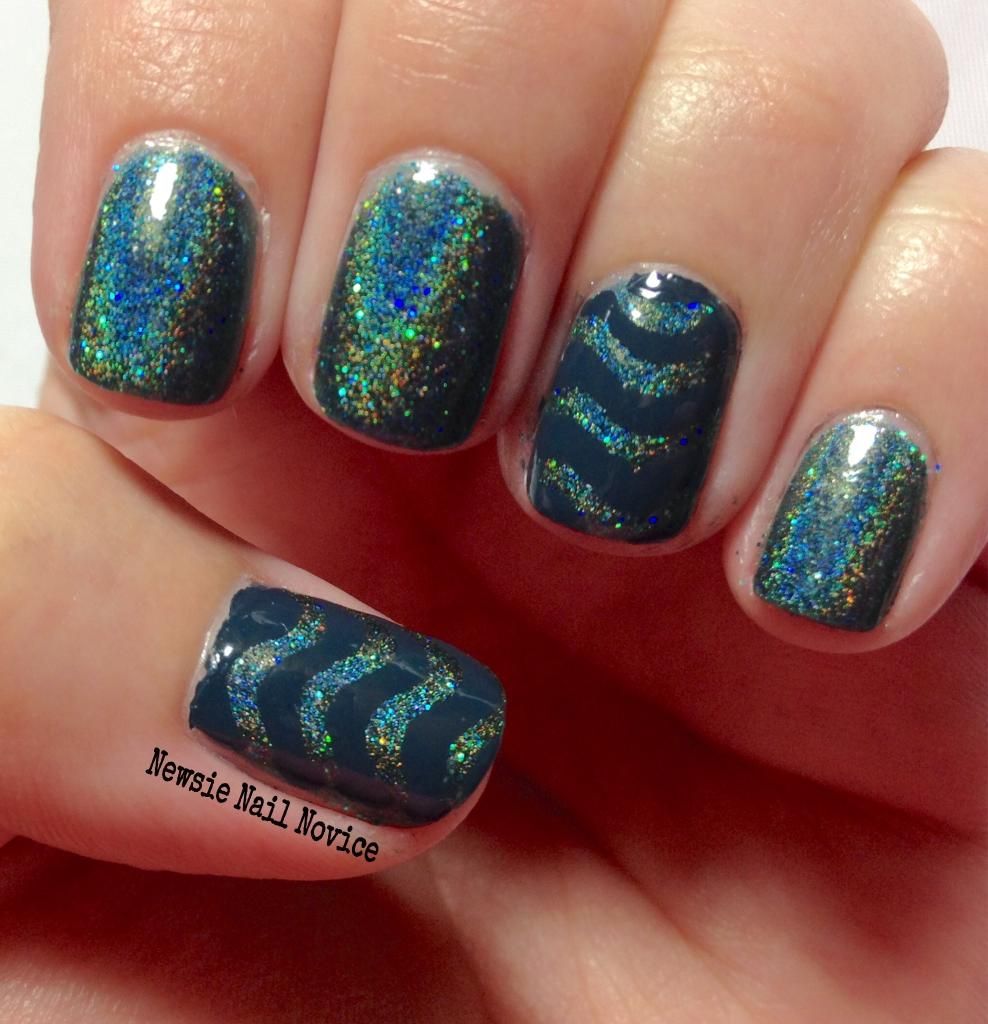
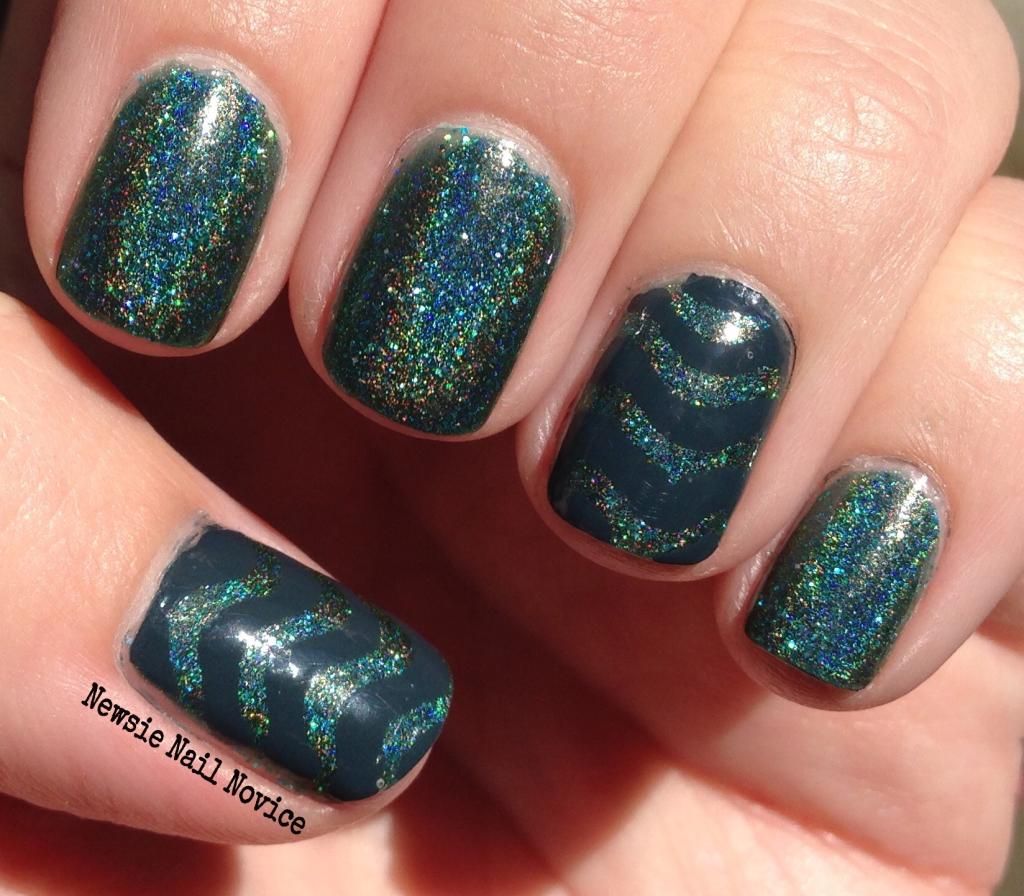
This is Literary Lacquers Je Reviens from Literary Lacquer's Rebecca collection, inspired by the novel by Daphe de Maurier. The polish is a darkened teal holographic polish, with a linear holo finish with larger holographic pieces scattered throughout!

 photo 036BDA98-45E8-4B70-AFD9-29828B4CB52E_zpsq76hw8qb.jpg

Here is what maker Amy wrote about this beautiful shade:

The buoy was just opposite, about thirty feet away. There was something written on it. I craned my neck sideways to read the lettering. “Je Reviens.” What a funny name. Not like a boat… “Je Reviens” – “I come back.” Yes, I suppose it was quite a good name for a boat. Only it had not been right for that particular boat which would never come back again.

Rebecca was assumed to have drowned in her little sailboat, Je Reviens, despite being known as an excellent sailor. Je Reviens means I come back or I return, is it ironic that the boat is named such? Has the boat disappeared beneath the water for good or does the name herald future events?

Rebecca by Daphne du Maurier is a suspenseful novel told in the form of a flashback. I struggled with these descriptions because I don’t want to give too much of the story away. This collection is dedicated to Rebecca, the book simply throbs with her presence, but yet we never meet her alive.


 photo 33EAD318-085D-4037-882E-49EFF54FE4D3_zpsgkabau97.jpg

I think it's pretty appropriate that Je Revins means "I come back." Last night, I took off the above manicure (you'll notice the manicure above has wavy lines and the manicure I'm currently wearing has chevrons). After redoing my nails, I literally missed Je Reviens so much I put the manicure back on, this time with chevrons instead.

I know that is pretty silly sounding. Literally taking a manicure off, redoing my nails to something I didn't love as much, and then recreating the manicure I took off. I guess that is love though!

 photo C3C51039-0E32-4028-8834-6948C23D7F2E_zpsgghg61eh.jpg

The polish I paired Je Reviens with is Essie's The Perfect Cover Up, from their fall collection, which is a lovely muted teal that just pairs with Je Reviens perfectly!

Application: The application of Je Reviens was flawless, goes on completely smooth, but is a little sheer. I did three coats for this opacity, but you could probably get away with two coats just fine.

Where to purchase: You can purchase Je Reviens from the Literary Lacquer Etsy shop. I purchased this polish for $12.

Anyway, Amy's words above had me so intrigued I've decided I must read this book! So I'm off to go start that now!

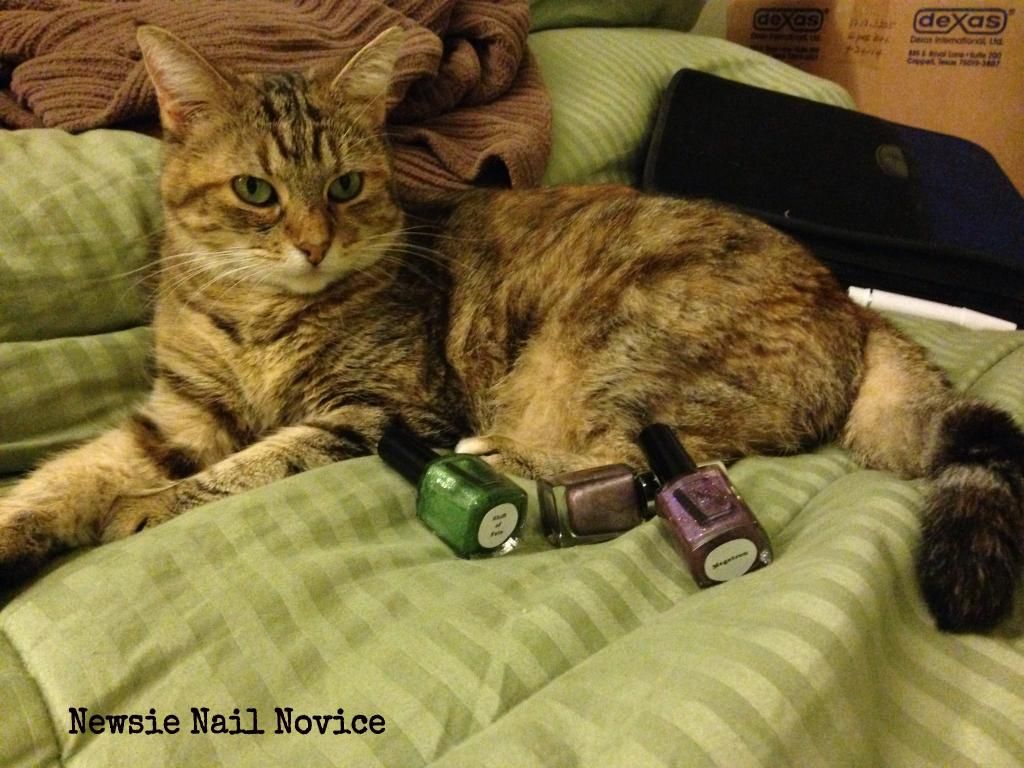
I'll leave you with a photo of my cat Patty – I've named this shot "Patty the Polish Protector!"

 photo 9ACF326D-F5C1-4E24-AF7A-948570CF3769_zpssmrhl2c6.jpg

Wednesday, October 1, 2014

Practicing my gradients

I have been trying to perfect the gradient method for awhile. I have attempted it a few times, each time I walk away amazed with how beautiful it looks, but so disappointed with all my errors in application.

If I could just do a smooth perfect gradient I would be happy.

 photo C416961E-29D0-4674-9C5E-8C0309C27FE2_zpsz0y1ztj7.jpg

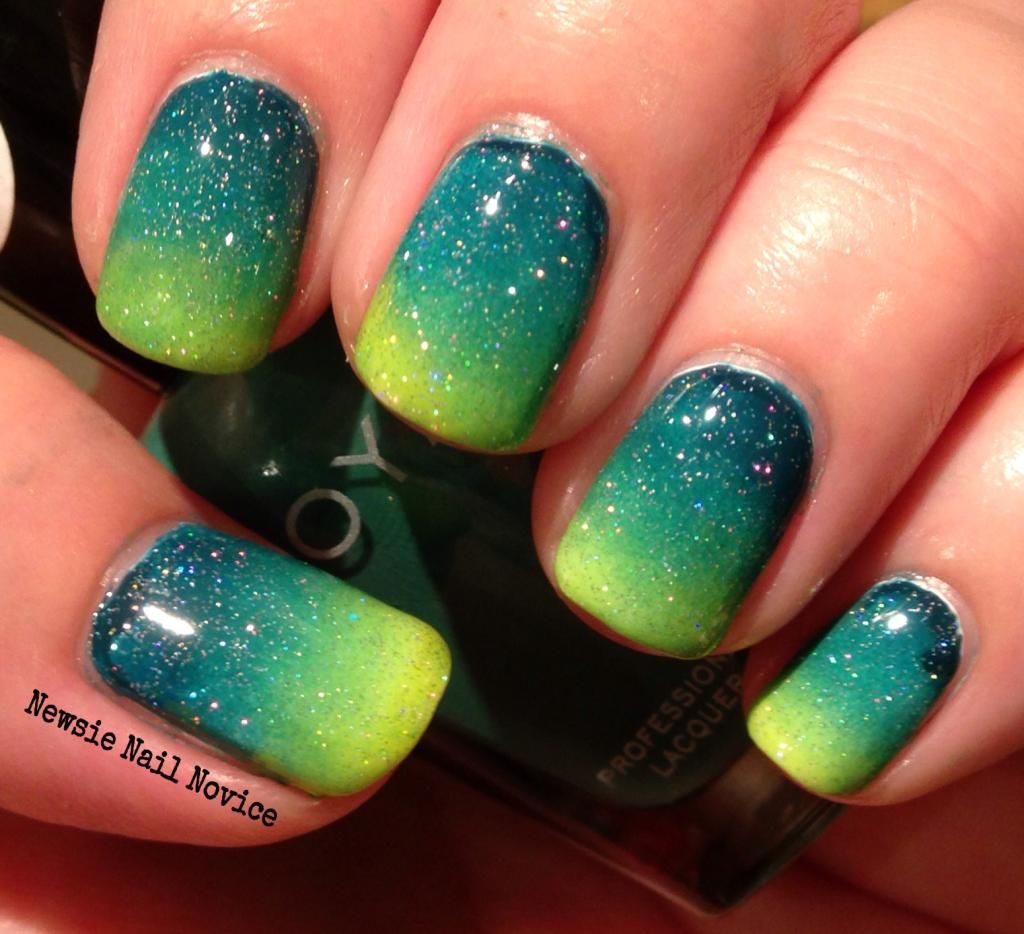
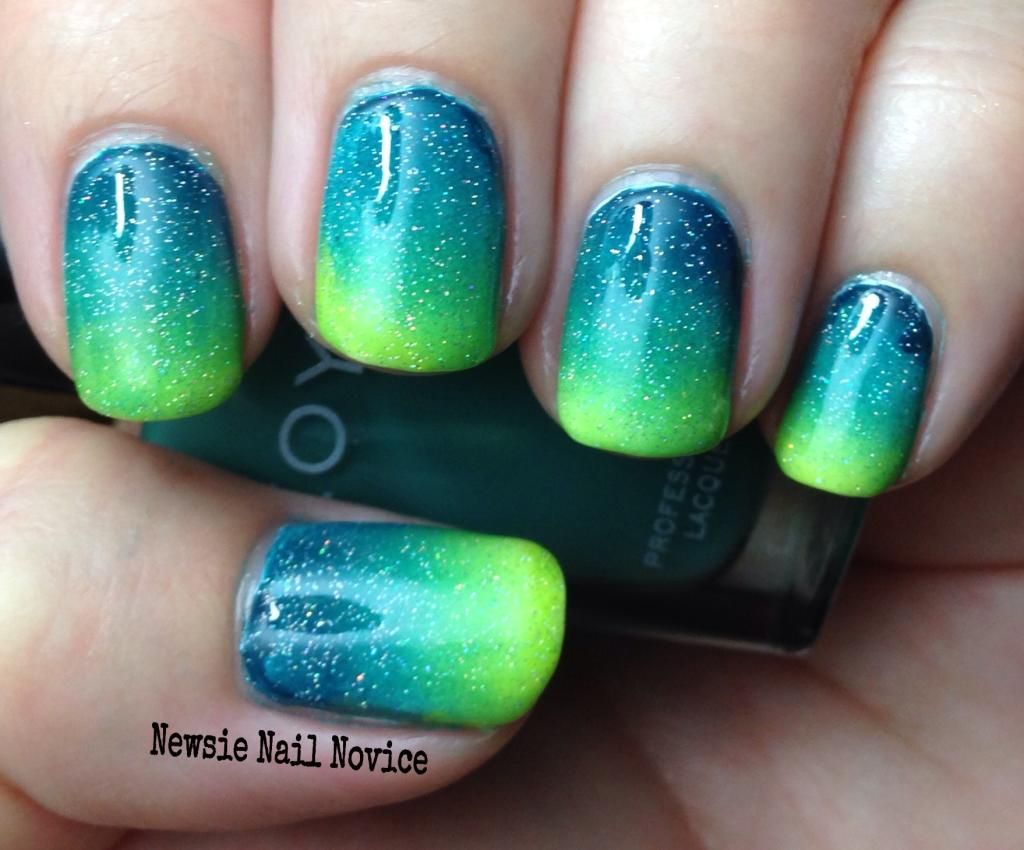
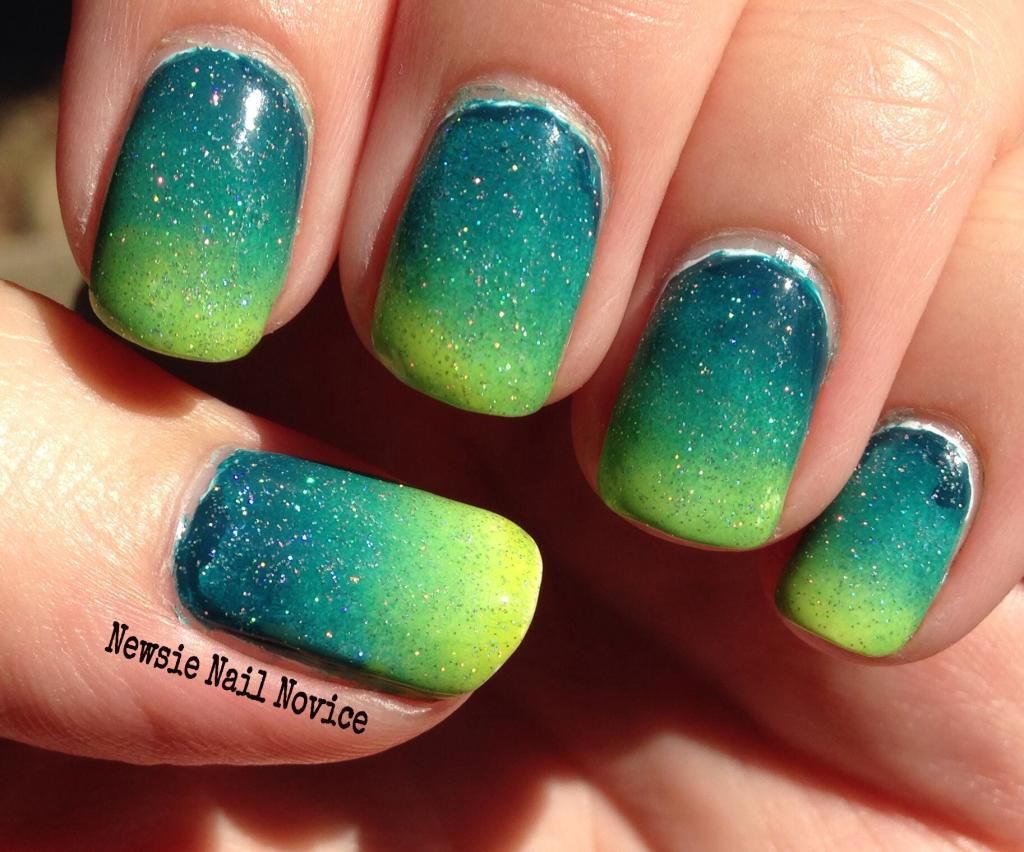
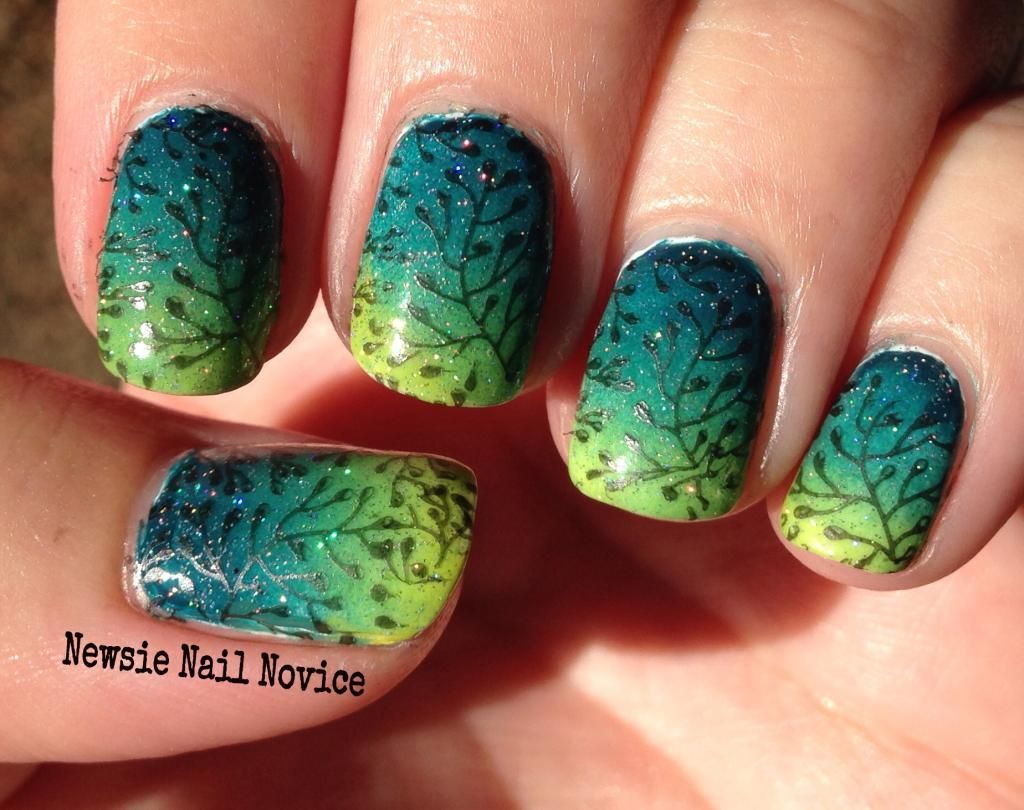
I love love love this color combination. For this gradient I used Essie Go Overboard, Zoya Alexa and Essie The More the Merrier to create a teal to lime green gradient. And just because I was not happy with the final result, I put some China Glaze Fairy Dust to cover up the imperfections.

 photo F7410394-AF32-41FF-8937-AE6F3C81BEDE_zpsgtexkcew.jpg

I'll tell you my number one complaint about gradients, the white undercoat. White pigmented polish is from the devil. I have yet to find a white polish I am pleased with. Some gradients don't require a white undercoat, but I find in order for the colors to be bright and appear as they are in the bottle, the white undercoat is a must.

Unfortunately, white polish is never good in one coat. Usually takes at least two and then maybe a third depending on how chalky and streaky the formula is. And then when clean up is involved, you end up cleaning the edges and showing the white undercoat by accident.

 photo 501146D0-F260-49A9-B8A5-174582A1609D_zpsj7qdeltd.jpg

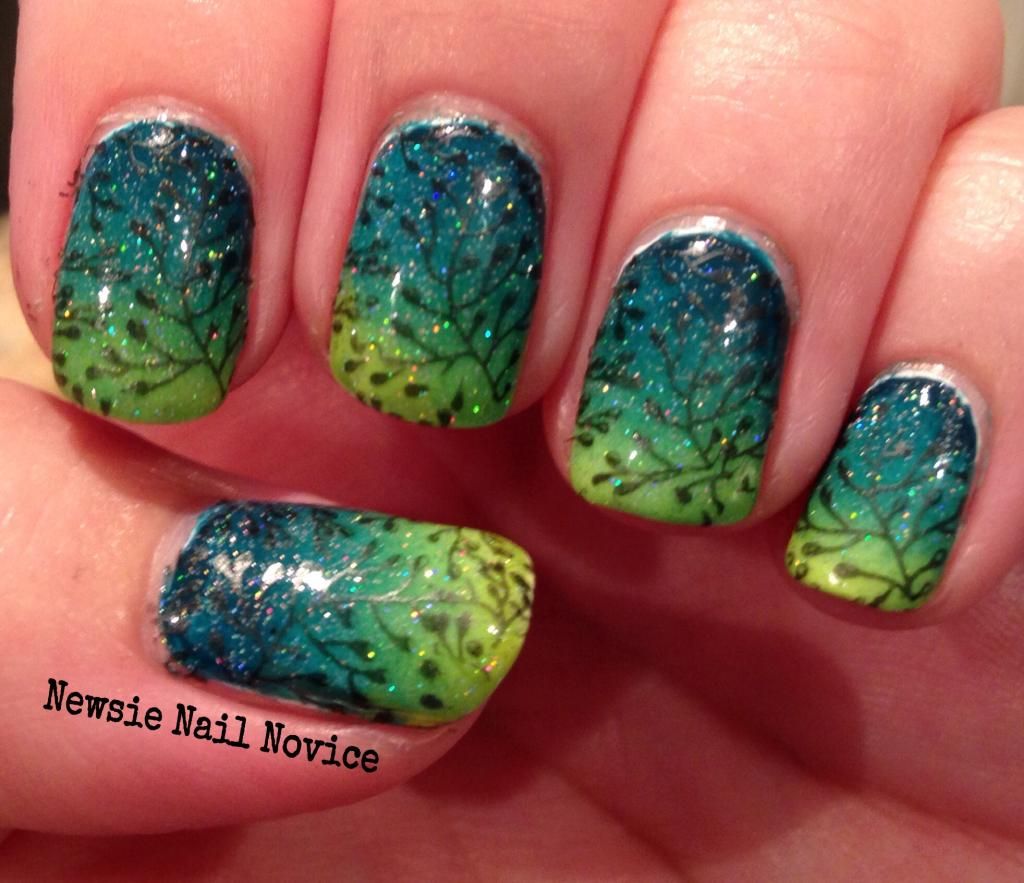
As you can tell I tried to cover that up with a smaller brush, note the darker teal edges, trying to cover up the accidental white undercoat. In an attempt to make the gradient look a little better, I added a stamp to it.

 photo DE9EBACA-9613-4CD7-98B7-E628FF199A61_zpsirhwxhqx.jpg

I used my Lily Anna Plate 10 to stamp a coral looking design. It looked ok, but I think I prefer the gradient on its own. I just wish I could apply the gradient perfectly.

 photo 2BFC0800-1D3D-4AAD-A58F-E70491C1D6BA_zpsvmas1cfx.jpg

So now I plead with you dear readers, what tutorials help you with the perfect gradient? I've watched a million online tutorials and they all show the same thing, and it is never helpful. So do you have tricks for the perfect gradient? Please share them with me!!!