Showing posts with label gradient. Show all posts

Wednesday, February 3, 2016

ILNP Gradient with Holo Stamping

Happy Wednesday everyone. This week is quickly flying by and I am so excited because I am going out of town wine tasting this weekend and after taking the last month off drinking, I'm ready to have some fun again. And thank you California winters because it looks like I'm going to have weather in the 70s for my outings!

Anyway today I have some terrifically bright nails to share with you.
Untitled

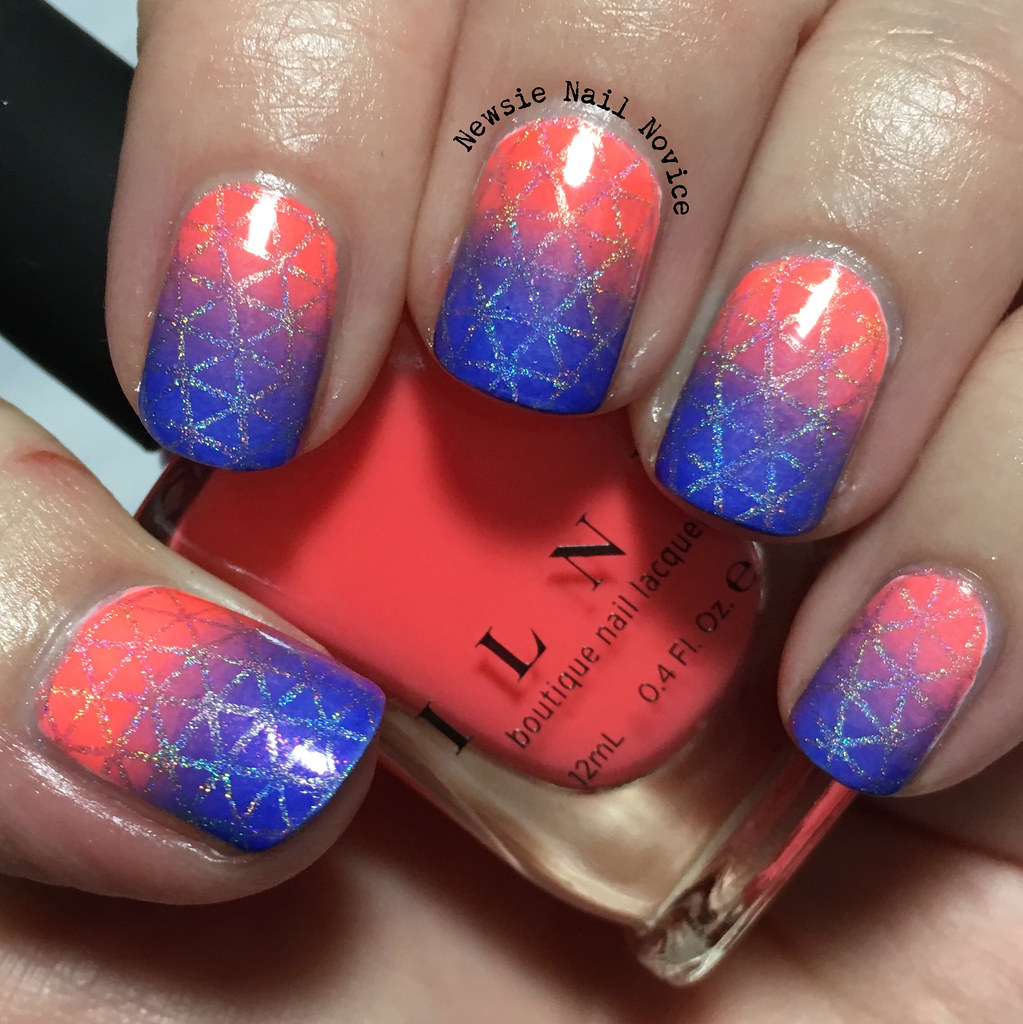
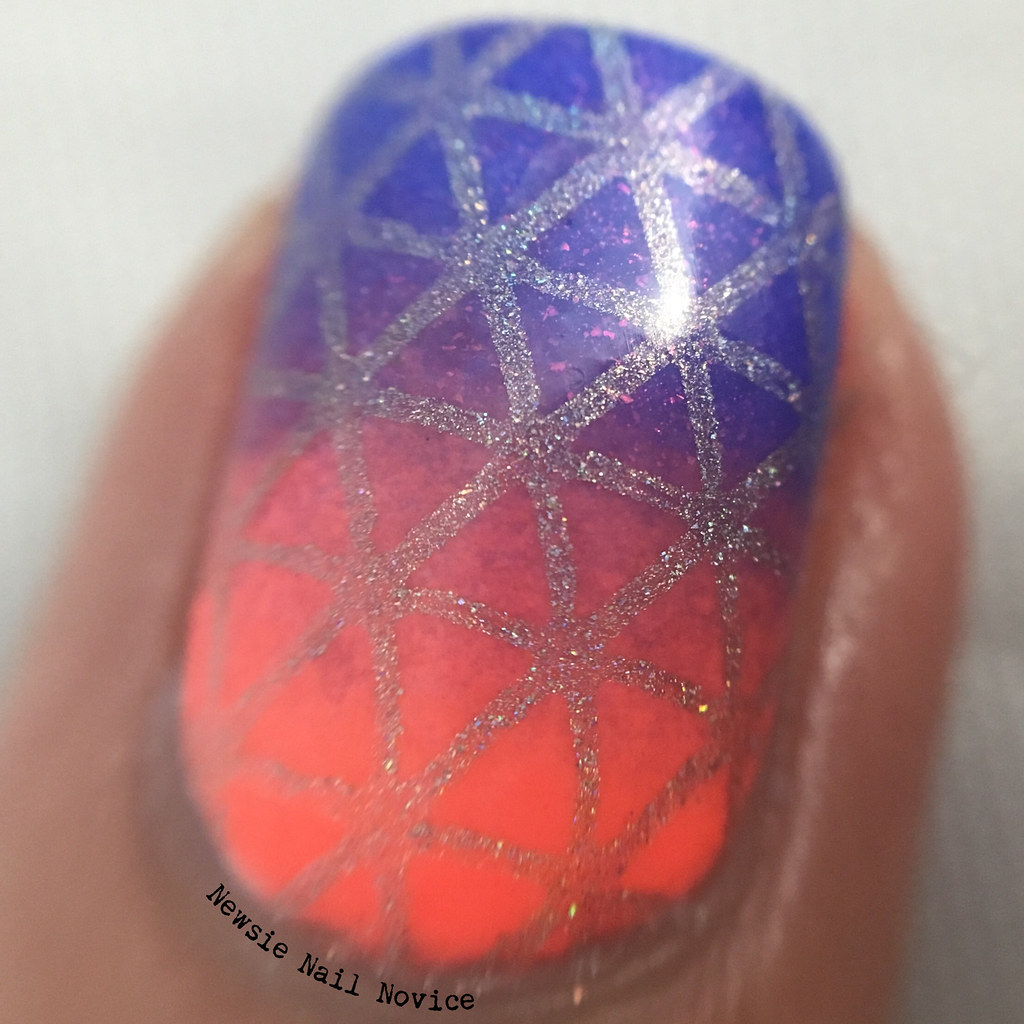
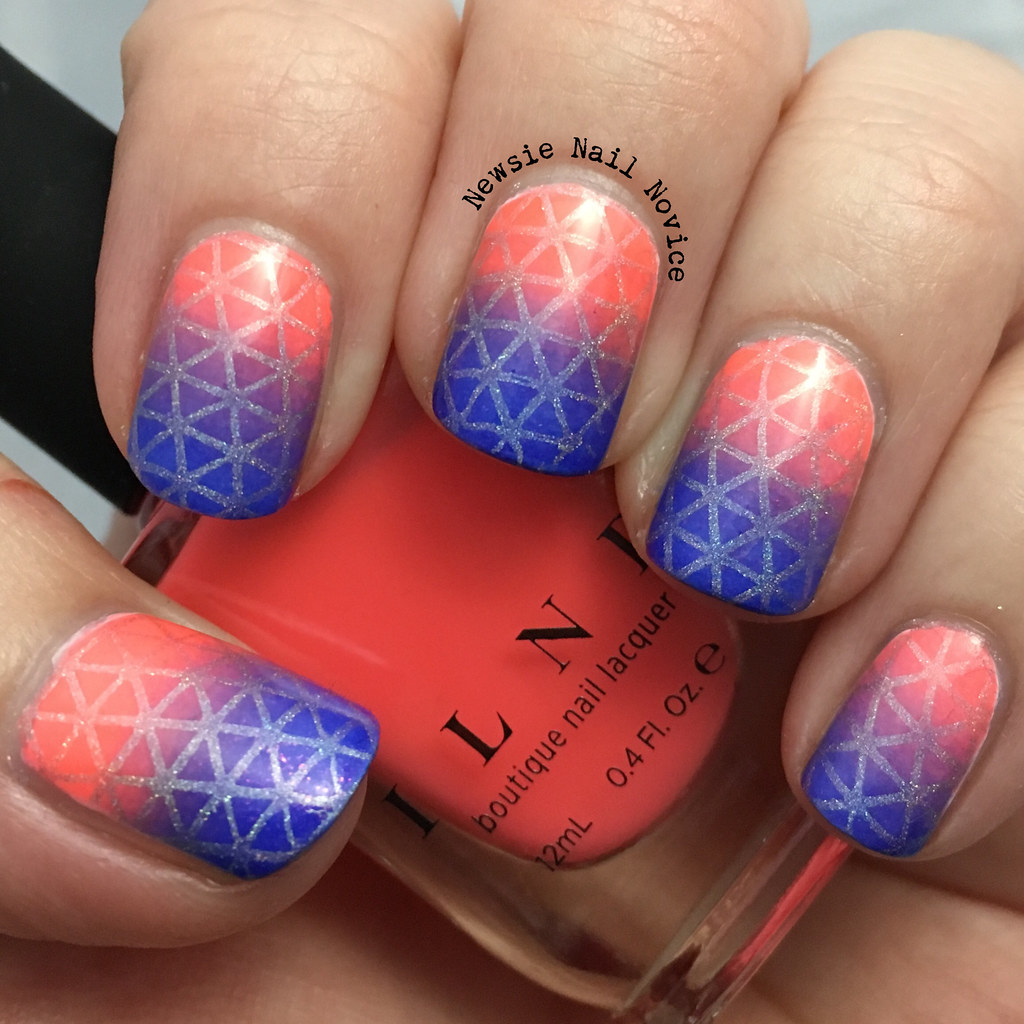
I recently made a hefty ILNP purchase, thanks to a coupon code and a gift certificate from Christmas. As soon as I saw So Coral and Super Juiced, I knew I wanted to pair them together in a gradient, and I think the results are stunning.
Untitled

I did put a layer of white polish down first, and I think the tip is for good gradients with a white base is good clean up of the white base. Try to clean away the white from the edges of the nail, so when you clean up your gradient, you don't get any white peeking through.
Untitled

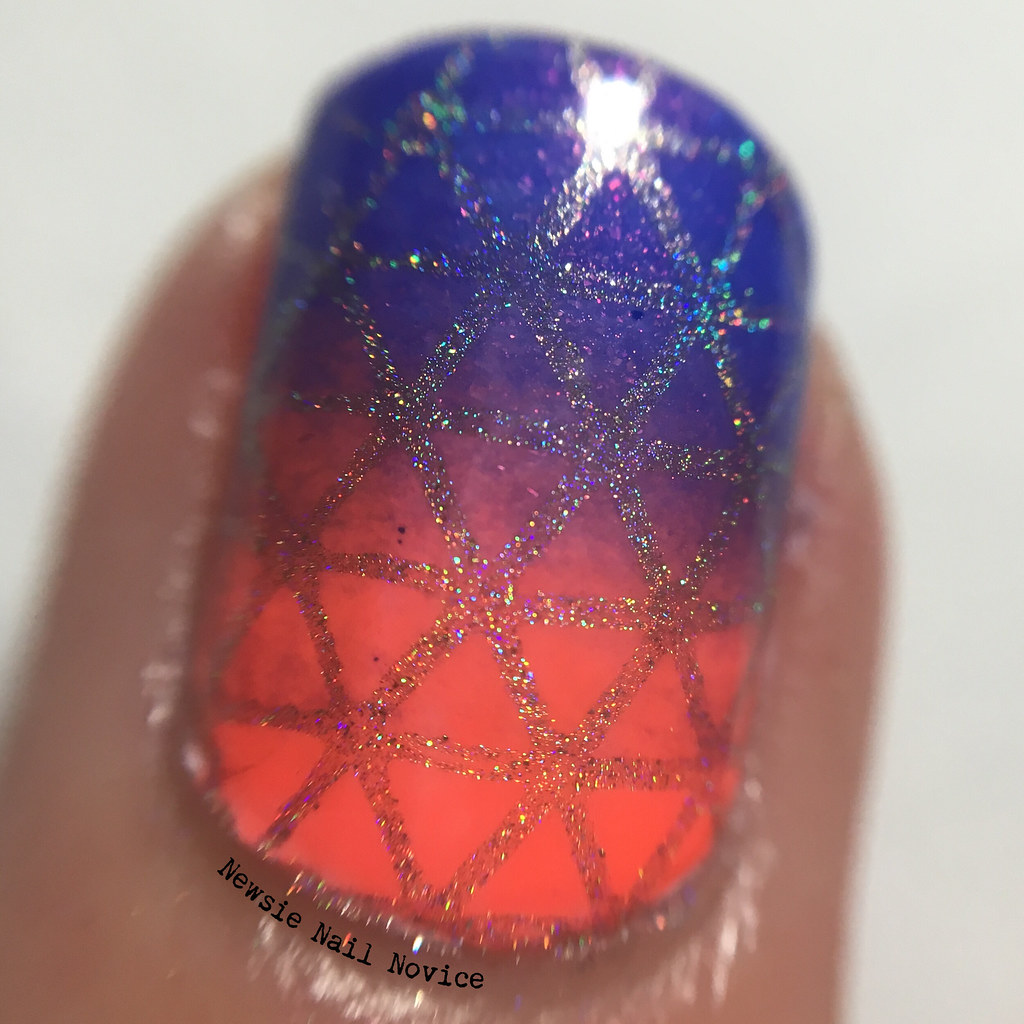
After finishing the gradient I knew I wanted to stamp over it, but I didn't want it to take away too much from the gradient. I originally thought I wanted to add a holo top coat to the gradient and then stamp with a solid color (like black), but then I decided that would be to distracting and take away from the beauty that is So Coral and Super Juiced. So I decided I would just stamp with holo color.
Untitled

I used one of the new UberChic Beauty Collection 7 plates (restocking Feb. 9), using the geometric image from plate 7-02 with my M Polish To Have and to Holo. The result was super delicate, but I really liked it!
Untitled

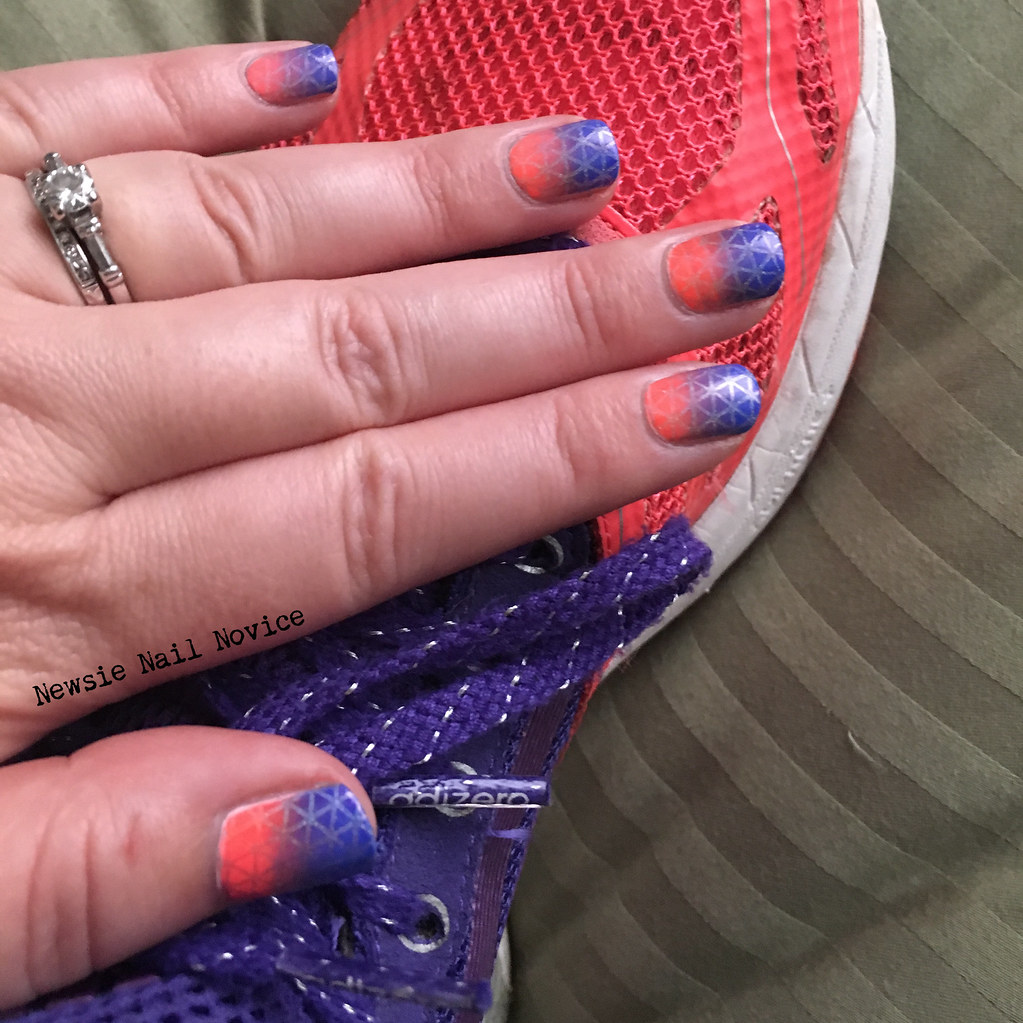
And a total happy coincidence, the manicure matches my walking shoes perfectly! It's been a goal of mine to reach 10,000 steps every day, and I've been doing my best so far using my fitbit! Having a lto of fun too!

I hope you enjoyed these nails, I'll have to post a full review of my recent ILNP purchase soon, so be on the lookout for that! :)

Friday, May 22, 2015

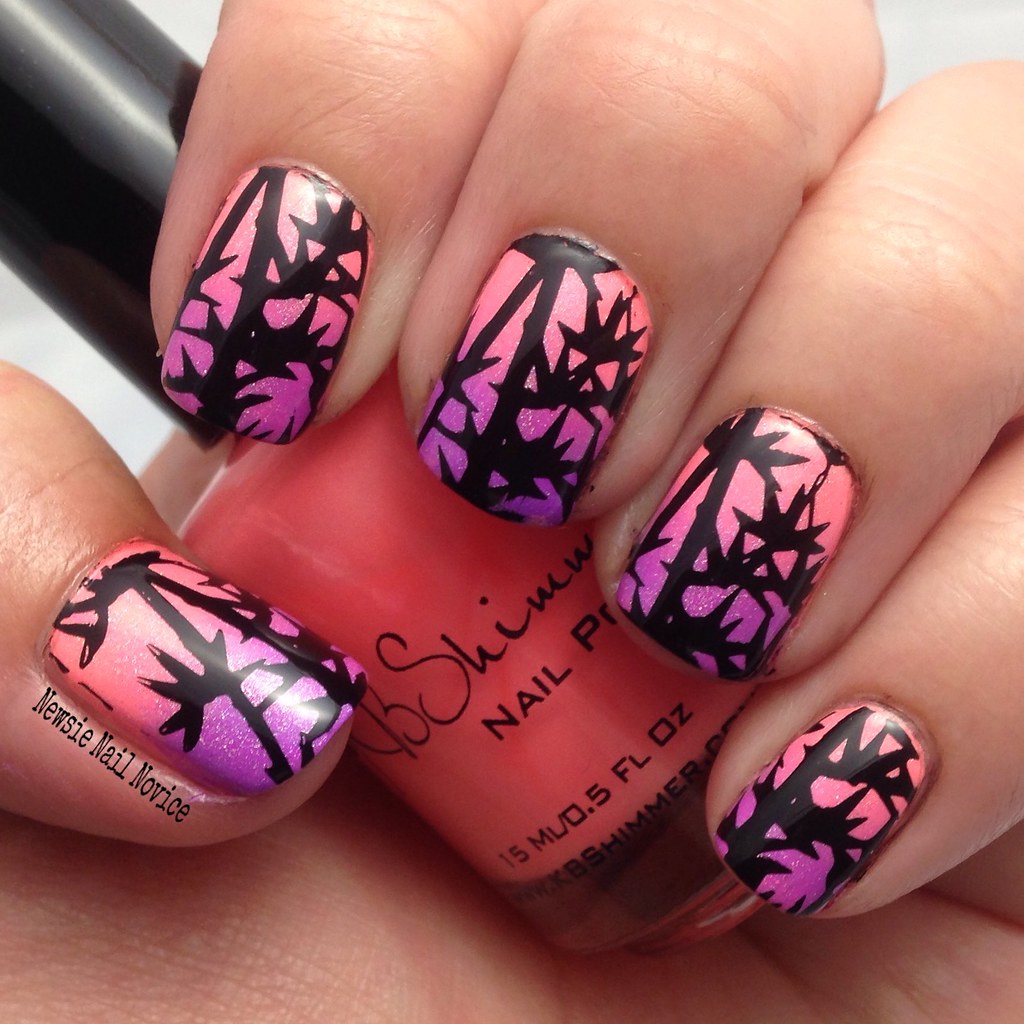
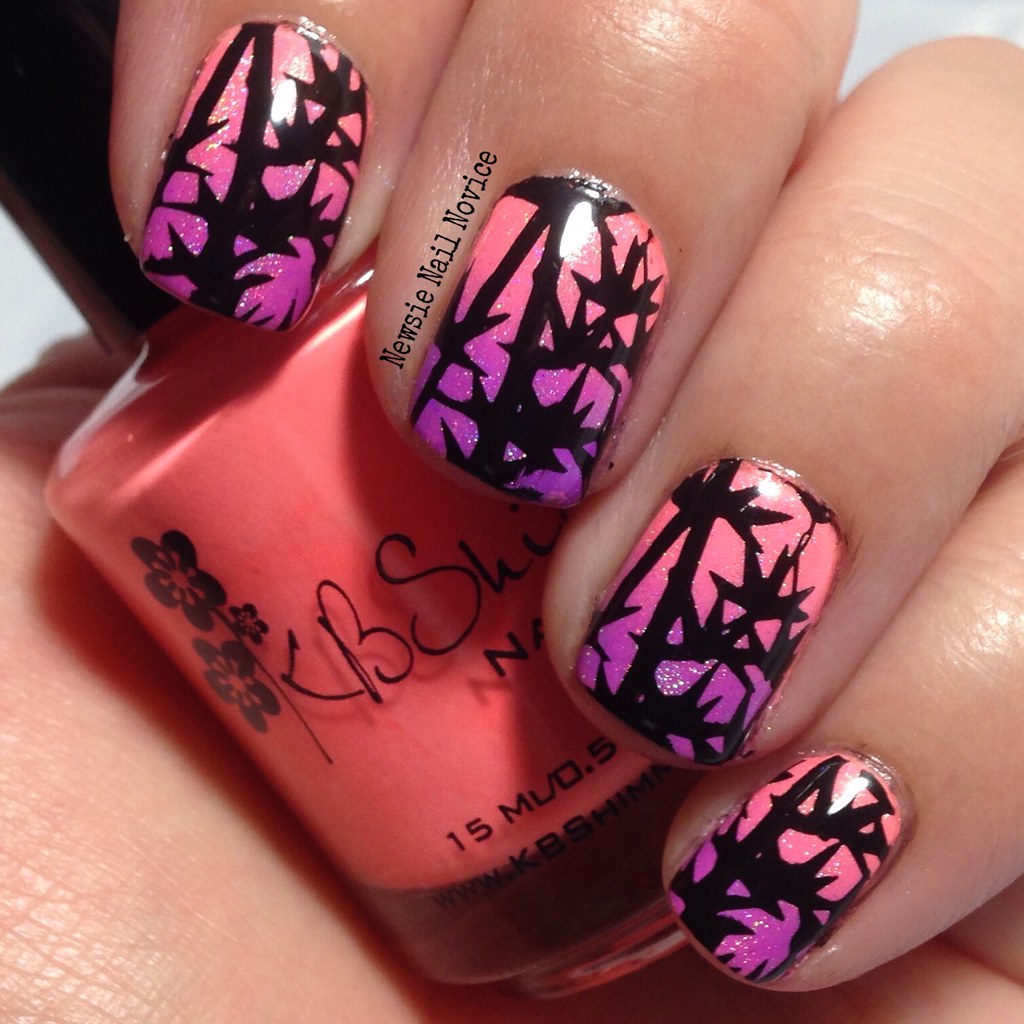
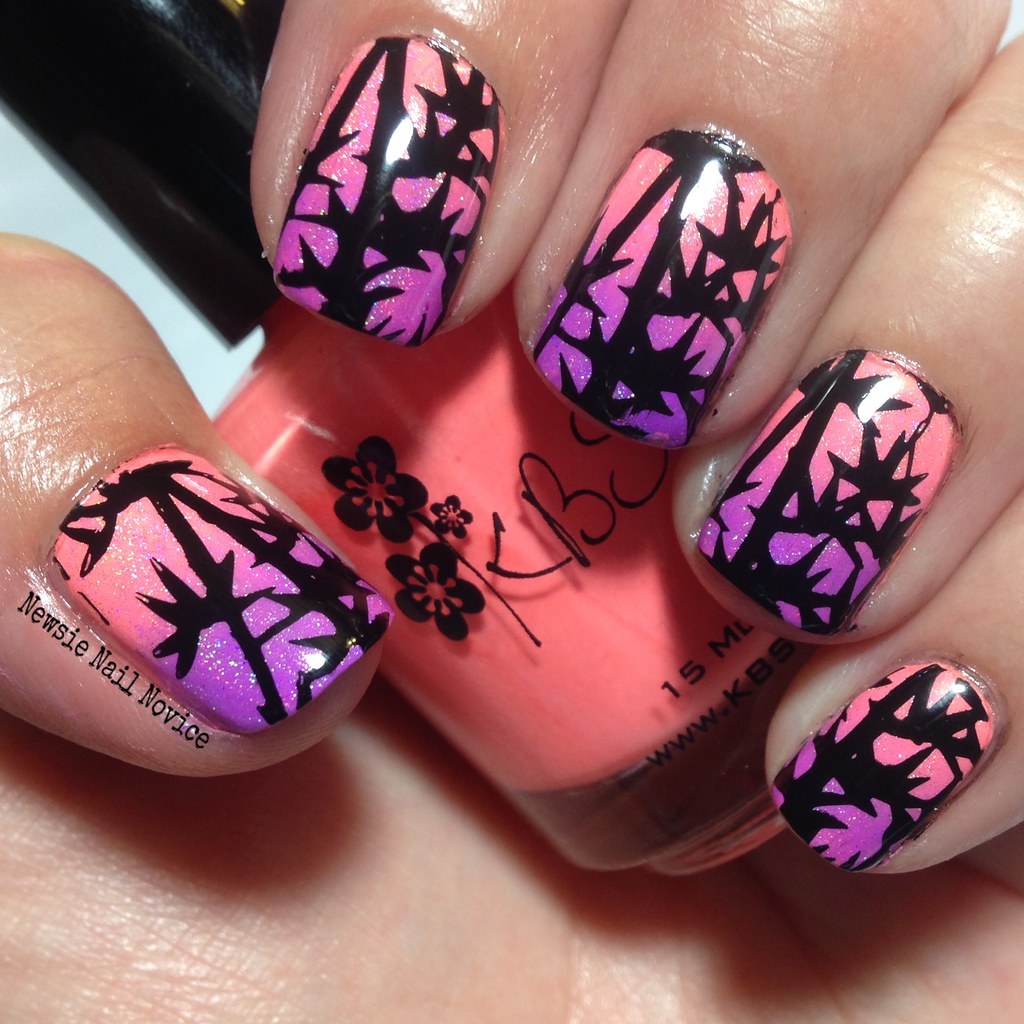
Hawaiian Sunset Gradient with BPS Stamping

Happy Friday everyone! I'm so ready for this three day weekend after suffering through a terrible migraine for a good portion of the week, I'm ready to kick back and relax finally.

I got my new KBShimmer polishes in the mail Wednesday, but was too ill to play with them until last night! First off, so excited with what I got, after receiving a birthday gift certificate and holding on to it I used it all on the summer bleached neons! I got Bahama Drama, Leggo My Mango, For Sail By Owner, In Yacht Water, Sarong Place, Sarong Time and What Are Your Wading For? I also got three of their new mani shots, which I intend to use very soon!

Anyway, let's get to the first creation using these shall we? I showed these too my husband when I finished and he promptly said, "It looks like a calendar of Hawaii, let's go to Hawaii!" He's too funny!

Untitled

I started with a base of Bahama Drama, the very first KBShimmer neon I knew I needed. It is a gorgeous creamy coral neon that is so bright! Formula wise, I found it to be on the thick side. It was a little streaky by the first coat, but the second coat covered it all up for the most part. Since I knew I was going to gradient the nails, I decided not to do a third coat, but normally I probably would have. The polish dried pretty quickly though, and was a satin almost rubber like finish without top coat!

Untitled

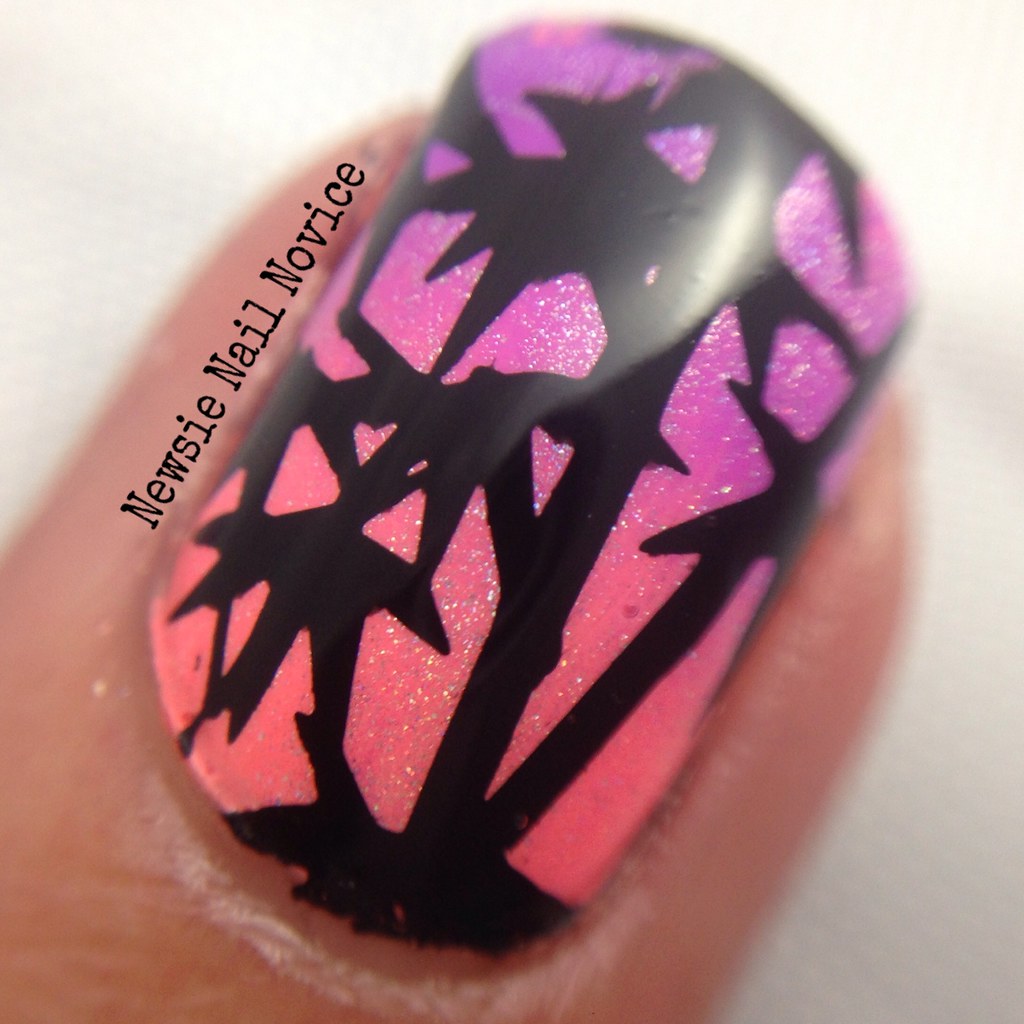
So after my two coats of Bahama Drama dried, I took out Sarong Place, Sarong Time which is a beautiful magenta-leaning purple neon polish and applied it and Bahama Drama to a make up sponge and applied the gradient. I topped off the gradient with my new favorite gradient topper: Spectraflair 35 Top Coat by Spectraflair4U and then set off to add some bold stamping to the look!

Untitled
*Press Sample*

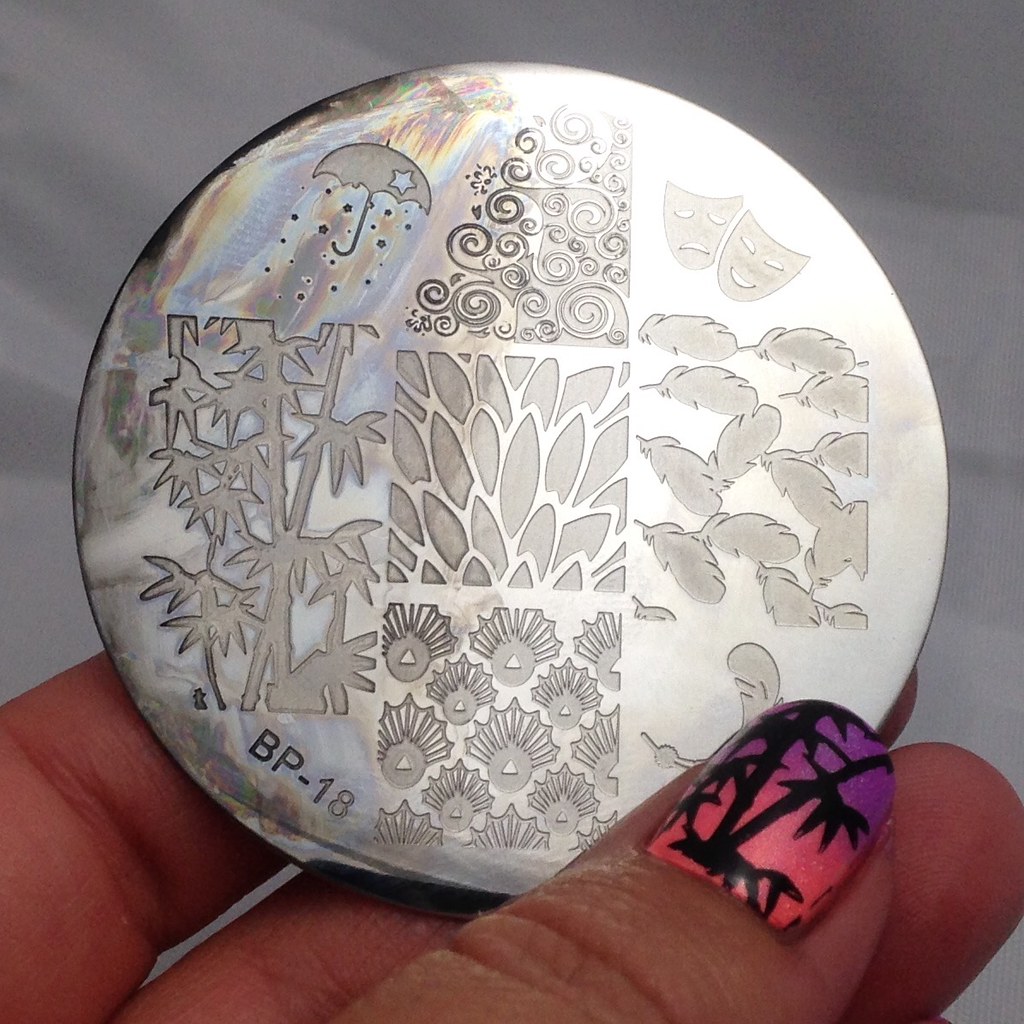
I had gotten behind on some of my Born Pretty Store reviews, admittedly, so I broke out one of my nail stamping plates provided for review and decided to go to town with it! I chose this plate specifically for that bamboo looking image I used on my nails with a sunset-esque look just like this in mind.

Untitled

This plate is the Born Pretty Store Plate BP-18 and I had zero issues with it! Now that I look at it again, those feathers look like they would be an awesome stamping design as well, looking forward to trying that in the future too! This plate retails for $2.99, but you can use my Born Pretty Store discount code of TRAH10 to save 10 percent off your purchase (on items not already discounted). I've been pretty pleased with the nail stamping plates I've tried from them, and they keep releasing new images all the time.

To stamp with I broke out Rica Blackout, my most favorite black stamping polish. It is opaque, not gooey and easy to work with! And as you can tell the results are stunning!

Untitled

So what do you think of this look? It definitely makes me want to go back on vacation that is for sure! I think it is super happy and a great way to break in the KBShimmer Neons I just purchased! Hope you all have a fantastic three day weekend ahead of you!

Tuesday, February 24, 2015

Gold to teal gradient with stamping

So I was cleaning out my phone yesterday and I couldn't believe how many looks I had created that I never actually got around to blogging to!

So here and there, I'll be updating you guys with a post from the vault. Please be kind to me when posting these, most were before my better lighting and photo set up, so the photos are much more amateurish than what I've been striving to post.

Untitled

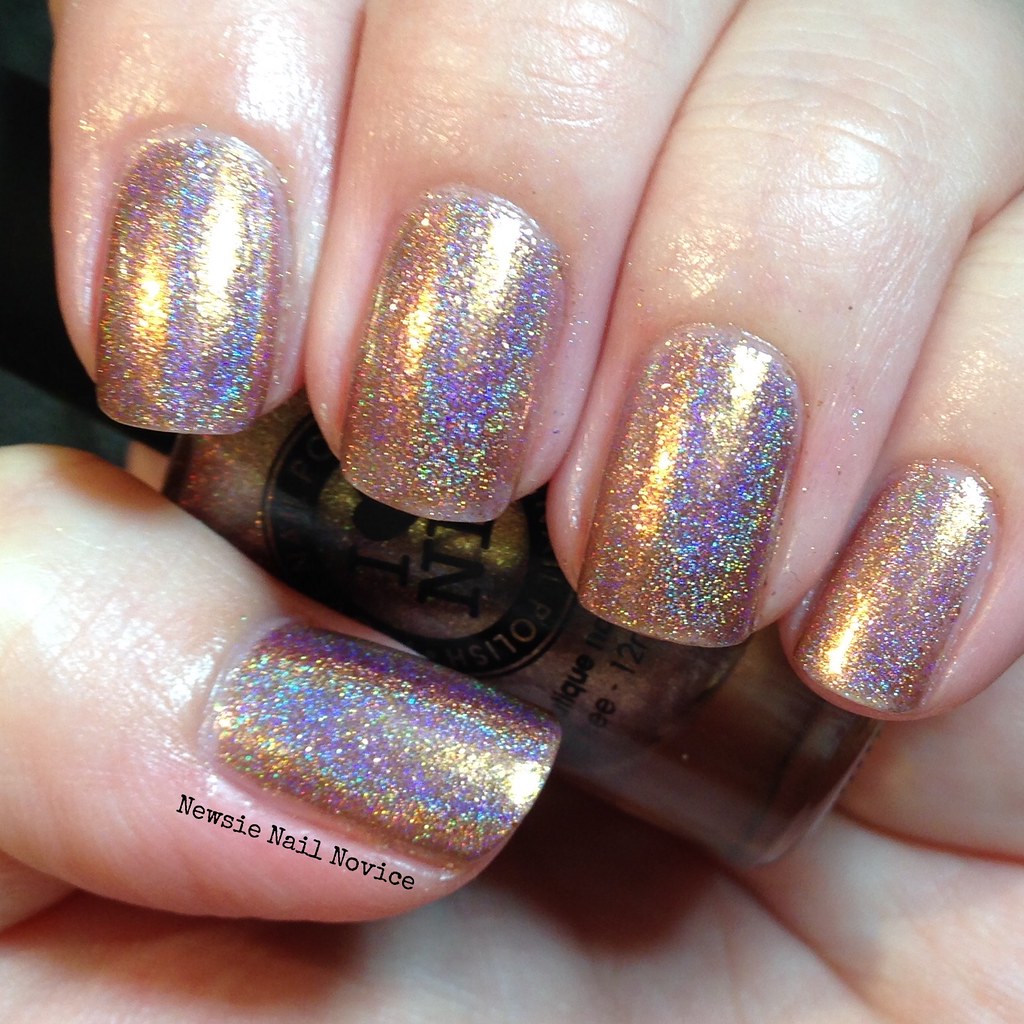
To start today's look, I started with three thin coats of ILNP Iconic. Iconic is a gorgeous gold holo polish with really subtle violet undertones. I just love this gold, it is just a spectacular holo! I remember application being on the sheerer side, so I think it needed at least three coats for this application (but I did this mani back in October, so it is completely possible I am remembering this incorrectly).

Untitled

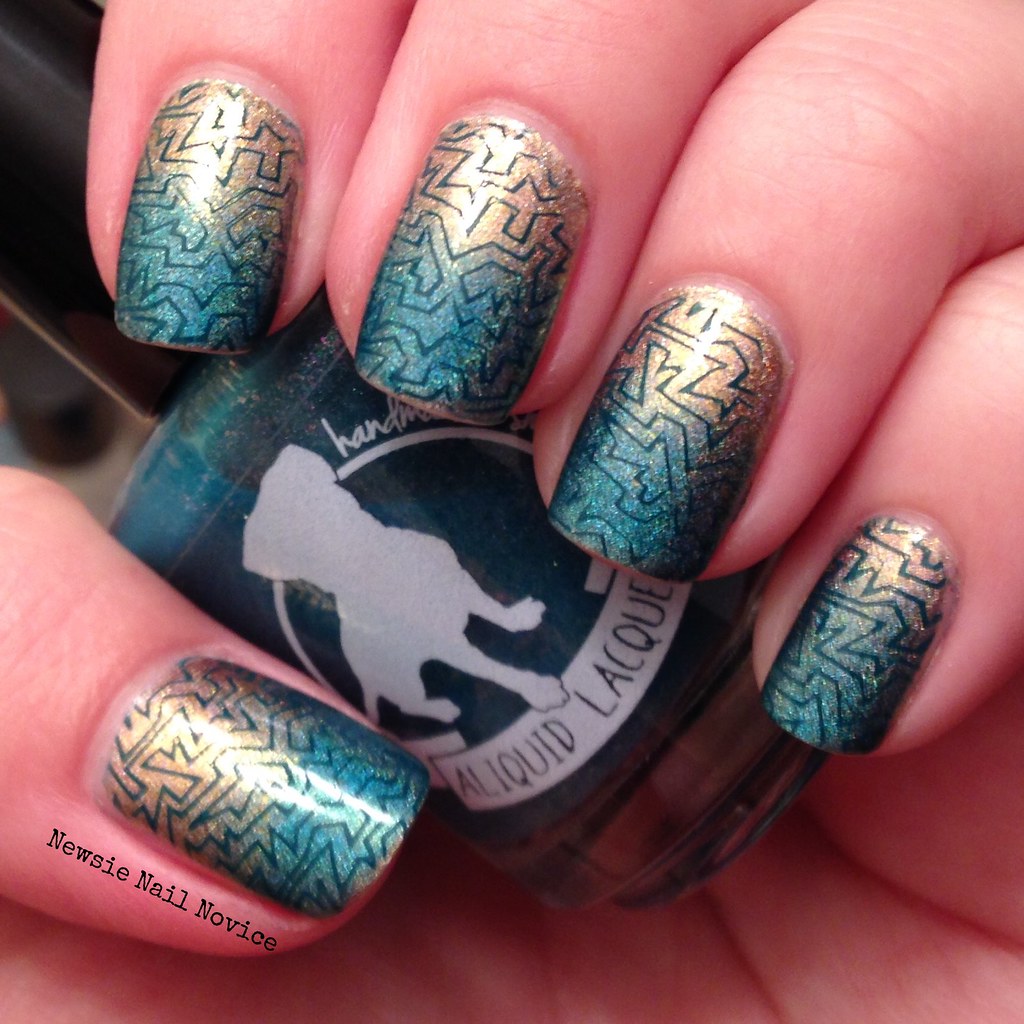
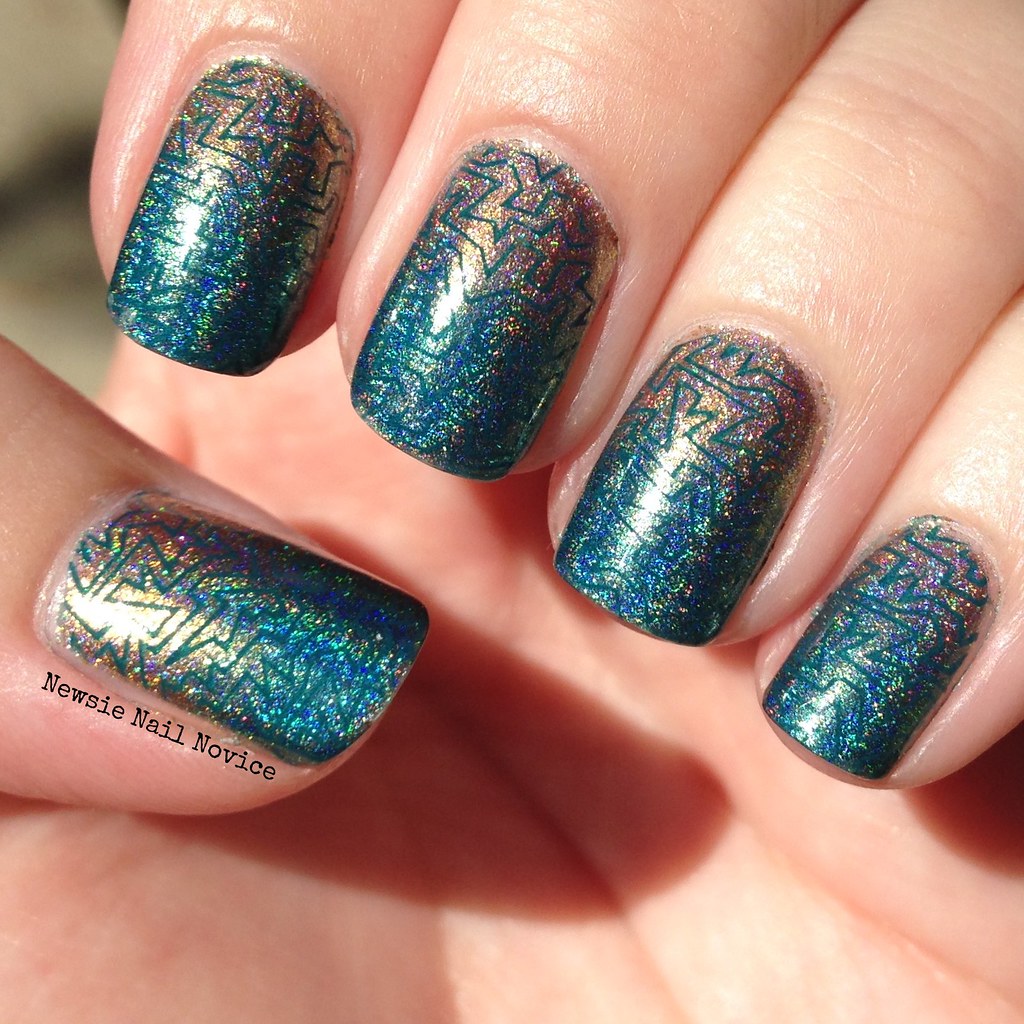
For the next step I used KBShimmer Up and Cunning to sponge on the teal gradient. I believe this was my first holo gradient and I can't believe I haven't revisited this technique since. Definitely need to break out the makeup sponges again soon! Oh and that polish bottle was some nail mail I had just revived from Aliquid Lacquer, another vault look I'll be showing you at some point!

Untitled

To finish off the look I used Essie The Perfect Cover Up to stamp this geometric abstract design using my Lily Anna 08 plate!

That's it for today, I hope you liked this look from the vault! Tomorrow I've got a review of polishes from Model City Polish, a new to me indie! One of my goals was to try a bunch of new indie polishes, and this is a review of just one of those experiences. And you'll definitely want to check back in at the end of this week for my very first Blogiversary, including an epic giveaway!

Wednesday, February 11, 2015

Nail Art Technique You Love: Gradient and Nail Vinyls

Hey everyone, today is the beginning of a five day challenge from the ladies at Challenge Your Nail Art and the theme is Love is in the Air!


But hold up, that means this thankfully isn't five full days of Valentine's nails, a lot of it is just things we love. And today, we start with a Nail Art Technique You Love. This was an awfully tough one. I love stamping, I love nail vinyls, I love a lot of things. But I decided to combine two things I love for today's challenge.

 photo 98FB6ED5-0B98-4363-9074-7D272B691FC1_zpsk6mic331.jpg

For this challenge I combined nail vinyls with gradients. I just absolutely go ga-ga for gradients. I'm not super great at them but I just love how they look every time.

 photo 0968C006-70B8-46FE-A14F-02A5D4175E09_zps1or5ecdn.jpg

Now I had to throw a heart in there because it is Valentine's week, but truly this does represent two nail art techniques I love! For the gradient I used KBShimmer Shore Thing and Zoya Edie and then topped it with a coat of China Glaze Fairy Dust, because I can't do a mani without some sort of rainbow reflection!

I used chevron nail vinyls in a pattern I hadn't tried before, angled, and I really like how it turned out. Different from your typical chevron look!

 photo 9EF43765-306B-45E6-AFA5-0026089A58F5_zpsygx9vatq.jpg

I created the heart using my freehand (definitely not a skill I've mastered or favor on my nails at least!) and added dots of Zoya Rocha, because I liked how the coral contrasted against the bright blue/green chevron!

I hope you like this look! What is a nail art technique you love?! Don't forget to check out the other fabulous ladies of this challenge, listed in the inlinkz below!


Wednesday, January 28, 2015

Born Pretty Store Plate Review

Hey guys, today I am going to provide a little review on a stamping plate I received from the Born Pretty Store.


To start this mani, I did a base coat of Essie Chills and Thrills (the blue). Once that dried I sponged on a gradient of Chills and Thrills and Essie Hip-Anema, which is actually a coral-leaning-red, but over the blue base it comes out more maroon!


Next I got out my BP stamping plate BP-22. This one is super cute with some single butterfly images (which for some reason, aren't on the BP-22 plates they currently sell online) and other fun circular designs. For the look I was going for, I used the slice of design on the bottom right of the photo above.


I used the Born Pretty Store Stamping Polish in white, this I purchased on my own and just love. I have only gotten their black and white stamping polishes so far, but I really like them so I might purchase some more again soon. They dry really quickly, so you have to work somewhat fast, but the payoff is super opaque and crisp stamping. I've had good experiences with their stamping plates so far too!


Who doesn't love a good gradient/stamping combo? I think these turned out really great and I really like the design! Almost like little butterfly wings! I just purchased Ellagee's Lickety-Split to help with the clean up of gradients, so expect to see more gradients in the future!

Have you tried ordering from the Born Pretty Store? If you do plan on ordering in the future, please use the discount code TRAH10 when you check out for a 10 percent savings. The Born Pretty Store is located in Singapore, but they have world wide free shipping and super affordable prices. The shipping take a few weeks, but the wait is worth it.

Wednesday, January 21, 2015

Three Greens Nail Art Challenge

Hi everyone, I'm back with another Crumpet's 52 Week Pick and Mix Challenge. This week I chose the prompt three shades of green and/or yellow (the other prompt was fire and I couldn't quite figure out how to tie the two together, but Serene at Copycat Claws did an amazing job!).

So I didn't just pick out three greens, I picked four, because I just love green. It is my favorite color!

 photo C2782632-6CCE-45DA-9F65-9AEF7A3F837B_zpshcgehjrv.jpg

I started out with two thin layers of Color Club Kismet, because, I guess I can't do a manicure with out some holo!!! Kismet is a great super linear holo that is almost lime green leaning yellow green, just lovely.

 photo 502C481C-6BAE-4C5C-B2EF-980D6FE348ED_zpsdqptdori.jpg

Then I took three Zoya greens, from top to bottom, Noot, Hunter and Shawn and stamped them using this scale-y design.

 photo DCF23D20-4E28-4382-A193-7C84ACC0DA6F_zpsmyy8hcdd.jpg

It's harder to see the three greens in the light because, um, hello holo, but I think the effect is nice in the shade and in the sun!

 photo EA177C39-097F-4915-9BCD-162BFF01D113_zpspsyc3k9d.jpg

The stamping plate I used is Lily Anna 09. I just love my Lily Anna plates, I seriously probably use them for more jobs than anything other plates I own (I own Lily Anna Plates 6-10). I think I want to collect them all because all the looks are so versatile. I might ask for some for my birthday (coming up in early March).

Overall I called these my dragon nails, because I just love the look of the scales and the green was just so dragon-esque!

My original concept for this mani was using Noot as the base and various green holo polishes in a dotticure gradient.

 photo 4996FA8D-E295-4DF4-A87C-ACAA4E456D56_zpsaxquczgj.jpg

The reason I didn't stick with this one is because I feel the three shades of green holo get lost in each other. I decided to show it off though because look at how amazing Noot looks as a base. I can't believe this was an untried for me. I will definitely be breaking this out again for a nail art project in the future. Just look at how creamy and dark it is. Such a strong color, without being super black, which you can get with a lot of dark creme polishes. Just stunning!

Anyway, that is it for today. Don't forget to check out the other ladies taking part in this challenge!!!


Tuesday, December 9, 2014

Icicle nails

Today's challenge was icy blue and white colors, and I guess I took this one pretty literally!

 photo A61405B5-D467-42F8-BD47-DC5091848DA7_zpsfihfqq4t.jpg

I started with two thin layers of Zoya Blu as the base for my gradient. Then I added Blu, Zoya Edie and OPI I saw... U saw... We saw... Warsaw (the longest and most annoyingly named polish!) to a make up sponge and applied the gradient!

 photo 6166F713-CDE4-4F80-B577-054C6BB9AAA1_zpsfa9ceicl.jpg

I really do think I am getting better at my gradients! I'm finding the more I do them, the better I'm getting at it! For the icicles, I used a-England Encore Margot and a nail art brush to apply them. They aren't perfect but I do like how they turned out!

 photo 6976CC86-2BDB-4717-8024-20EFE2FC8B7F_zpsv9h6ptmv.jpg

This whole manicure was based on my very first nail inspiration I pinned about January of last year. I had just stared to use Pintrest for nail inspiration, and this was my very first pin. So I knew this year, with all of the experience I had gained, I just had to try it! And I think the results were great.

At first I was going to use this manicure, below, I had created before I even started this challenge, but I wanted to try the icicle technique. And so in this post I am sharing two for the price of one!

 photo FE4B5EEF-0FA6-4A6E-B54E-4D8975FEEB0A_zpsvyac5z5a.jpg

The glitter base here is KBShimmer Fallen Angle. With my order of Fallen Angle, I got some fun snowman glitter, which I placed in the center nail. I used Bundle Monster BM-407 for the tree stamps. I wasn't in love with this manicure too much though, because I feel like the stamping got lost a bit. Which I guess is why I did this as a two for one post, because I wanted to do something that truly fulfilled the prompt!

So which one of these manicures is your favorite?

And as a fun bonus, I'll leave you with a photo of my husband and I with Santa. We met him last night at a bar. No joke. I told him I want a never ending supply of nail polish for Christmas! ;-) It's a shame I didn't still have on my Santa nails when I met him!

 photo 20C9D053-3B71-407A-B1AE-E2556ADE5F8D_zpsdfapujua.jpg

And don't forget to check out all the other ladies who are in this challenge too!


Tuesday, November 11, 2014

The Ultimate Fall Leaves Gradient Nail Art

You guys, I love fall. And I love the fact that I get to work in a town with the most beautiful trees. I mean take a look at my background on my iPhone, I truly love these trees.

 photo 61C0C834-8724-4BB0-810C-51CA7F04042F_zps5qloaqng.png

These trees are the Chinese Pistache, and Los Altos is full of them. They are green most of the year, and then every year in November, the leaves turn from green to yellow to the most magnificent neon orange-red. So in honor of these trees, I created a matching manicure.

 photo B2932019-E49A-4553-88A1-10761B53F717_zpsbzav3bqj.jpg

I mean I love this manicure so much, not only am I currently wearing it, I was originally going to wait to show you all this until Wednesday (to stick to my normal posting schedule). But I literally could not wait to share with you the amazingness that is this manicure. I think this might be my most favorite nail art ever!!!

 photo 9BC36F21-0D8D-45E9-B6E7-6A9A07FB5BDB_zps4fa4zkro.jpg

To start this manicure I did two coats of Sally Hansen OMGhost (which has a great formula, except for some minor bubbling, and is especially great for stamping). After that I sponged on a gradient of Zoya Shawn, Kiko Melon 356 and OPI Red Lights Ahead Where (which is I think my most favorite coral creme of all time, see my blog header).

 photo 10E0AAB6-E231-4E4F-BA26-08DDF4076FC9_zpszuxtgcxc.jpg

And then, because I still am super critical of my gradient, I added a layer of China Glaze Fairy Dust, because Fairy Dust covers a multitude of mistakes. To finish it all off, I stamped my favorite fall stamp ever, Bundle Monster BM H-11. I still feel like my gradient skills need some work, but practice makes perfect and I just truly love this manicure to death!

 photo EAC7A7BD-993C-458F-B7CC-7F9DA4049F63_zpsfuwaaud4.jpg

I never want to take this off, I am so in love with it! What do you guys think? I know a lot of us are all working on holiday nails in preparation for the fun holiday season, but I just can't get over fall. I haven't quite accepted winter is coming, because really in California, does winter ever really arrive?


Wednesday, October 1, 2014

Practicing my gradients

I have been trying to perfect the gradient method for awhile. I have attempted it a few times, each time I walk away amazed with how beautiful it looks, but so disappointed with all my errors in application.

If I could just do a smooth perfect gradient I would be happy.

 photo C416961E-29D0-4674-9C5E-8C0309C27FE2_zpsz0y1ztj7.jpg

I love love love this color combination. For this gradient I used Essie Go Overboard, Zoya Alexa and Essie The More the Merrier to create a teal to lime green gradient. And just because I was not happy with the final result, I put some China Glaze Fairy Dust to cover up the imperfections.

 photo F7410394-AF32-41FF-8937-AE6F3C81BEDE_zpsgtexkcew.jpg

I'll tell you my number one complaint about gradients, the white undercoat. White pigmented polish is from the devil. I have yet to find a white polish I am pleased with. Some gradients don't require a white undercoat, but I find in order for the colors to be bright and appear as they are in the bottle, the white undercoat is a must.

Unfortunately, white polish is never good in one coat. Usually takes at least two and then maybe a third depending on how chalky and streaky the formula is. And then when clean up is involved, you end up cleaning the edges and showing the white undercoat by accident.

 photo 501146D0-F260-49A9-B8A5-174582A1609D_zpsj7qdeltd.jpg

As you can tell I tried to cover that up with a smaller brush, note the darker teal edges, trying to cover up the accidental white undercoat. In an attempt to make the gradient look a little better, I added a stamp to it.

 photo DE9EBACA-9613-4CD7-98B7-E628FF199A61_zpsirhwxhqx.jpg

I used my Lily Anna Plate 10 to stamp a coral looking design. It looked ok, but I think I prefer the gradient on its own. I just wish I could apply the gradient perfectly.

 photo 2BFC0800-1D3D-4AAD-A58F-E70491C1D6BA_zpsvmas1cfx.jpg

So now I plead with you dear readers, what tutorials help you with the perfect gradient? I've watched a million online tutorials and they all show the same thing, and it is never helpful. So do you have tricks for the perfect gradient? Please share them with me!!!

Friday, May 30, 2014

Sunset gradient nails

Let me start this post off by saying, I really really loved this manicure. These are the type of nails I dream about. Unfortunately, these nails lasted about as long as a sunset. :(

 photo 6CA9C043-6AC3-43B0-8DB8-FD8F9519E459_zpse0scnwlb.jpg

Now, I'm not the best at gradients, this is really my second successful go at it. But man is it beautiful!

 photo 4B5F6116-1009-4B80-AC04-FB3A1AC2F4D6_zpsaw74nmrp.jpg

 photo 2EFD26BB-3882-4DC7-8EF5-94338BC06AAF_zpsstx1d4nm.jpg

 photo 366FD125-6122-4319-951B-692E2727B31F_zpszjek8hjr.jpg

Application: I began this manicure with three thin coats of China Glaze Son of a Peach. For the gradient I used Son of a Peach, Zoya Heidi and OPI Eurso Euro sponged up and down (with a makeup sponge) to create the sunset effect. To top it all off I did a layer of China Glaze Fairy Dust to create the twilight stars are coming out of the backdrop.

So I determined after this manicure, that my body chemistry does not agree with China Glaze polishes. They just do not want to last on me. The majority of China Glaze polishes I own are neons, so I guess this is a fact I remember every summer. I'll keep the ones I have around, they are pretty good for stamping, but I'm so sad that this manicure chipped in less than 24 hours of application. I'm sure it's the Son of a Peach base because I switched up nothing else in my application process.

I'm still a newbie at gradients, do you have any tips for making the application go smoothly? I still haven't tried the whole get your sponge wet first thing, I wonder if that would help? Using a non Zoya polish as the base definitely helped this time (because Zoya polishes take longer to dry on me), but I can't use China Glaze again. Anyway share your tips in the comments if you have any! Thanks and have a great weekend!!!

Monday, April 14, 2014

My first gradient nail art

One nail art technique I have never tried but always wanted to was the gradient. Today I have to share with you my first attempt, a teal gradient using a slew of Zoya polishes.

To begin I started with a coat of Zoya Neely, a beautiful mint green which is perfect for the spring. The other two shades I used was Zoya Wednesday and Zoya Alexa.

 photo 591BE7C0-4C93-4B0D-8A91-E677519FF3E0_zpsk8bix8ek.jpg

To complete the gradient, I used a makeup sponge and painted stripes of the colors, from lightest to darkest. I waited until Neely was dry and then sponged on the makeup sponge, moving vertically from the top of the nail to the bottom.

To be honest it was an absolute sticky mess! Part of me thinks it is maybe because I didn't let the basecoat of Neely dry long enough (Zoya's can take a bit longer than most polishes to dry) and the final result was a little more subtle than I had hoped. I guess that's because I used all the same shade of color.

 photo F50276A1-3930-41E3-8638-933358755E45_zpschtnqg18.jpg

To bring out the gradient, and make it more obvious, I used a Konad M60 – the dot gradients, with a darker teal polish (Essie Go Overboard) to make it more obvious. Before stamping though, I added a layer of China Glaze Fairy Dusts, so that the dots would float on the top of the manicure.

 photo 4E4763AD-B36F-40DC-A77E-47B8568CECC3_zpsl1lf56zn.jpg

I really liked the final results of this manicure, though it was extremely involved and took a lot of time. Next time I think I'll try and make a more obvious gradient (not use different shades of the same color).

What do you all think? I was pretty proud of the final result, it was my biggest nail art achievement to date!